2
1
PANEL DESCRIPTION
i
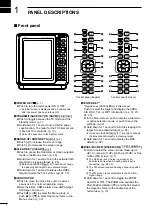
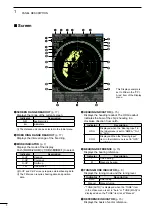
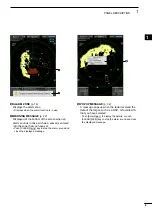
EBL2 (VRM2) KEY [EBL2 (VRM2)]/
[
]
(pp. 17–20)
z
Push to display the EBL2 and the VRM2.
EBL: Electronic Bearing Line
VRM: Variable Range Marker
•Push [
t
] or [
u
] to adjust the EBL selector, or push
[
p
] or [
q
] to adjust the VRM selector. Then push
[ENTER]/[
] to set the point.
•The EBL2 bearing and the VRM2 distance are
displayed in the lower right corner of the screen.
•When EBL1 and VRM1 are displayed, the center of
the VRM2 appears at the intersection point of the
EBL1 and the VRM1.
o
TRAILS KEY [TRAILS] / [
]
(p. 12)
z
Push to turn the trail function ON or OFF. This
is useful for watching other ship’s tracks, and
approximate relative speed.
L
The Trail settings can be changed in the Trail
menu.
z
Hold down for 1 second to erase the plotted
echoes when the trail function is ON.
!0
ALARM KEY [ALM1/2]/[
1/2]
(pp. 21
–
22)
z
Push to select the Alarm function, ALM1, ALM2,
ALM1 & ALM2, or OFF.
z
Hold down for 1 second to enter the alarm zone
setting mode.
•Push the cursor pad to move the cross cursor to the
zone starting point, then hold down [ALM1/2]/[
1/2] for 1 second. The frame of the entered zone
appears. Then push the cursor pad to fix the finish
point, and then push [ALM1/2]/[
1/2]. The alarm
zone will automatically be formed.
!1
BRILLIANCE KEY [BRILL]/[
]
(p. 8)
z
Push to display the Brill/Color setting box.
L
The brilliance of the display, the key backlight, and
display color can be adjusted in the setting box.
L
The brightness of the symbols, characters and
illuminations can be independently adjusted in the
Color menu.
z
Push to increase or decrease the brilliance of
the display.
z
Hold down for 1 second to select the maximum
brilliance.
!2
OFF CENTER / PARALLEL INDEX LINE KEY
[OFF CENT•PI]/ [
•
]
(p. 10)
z
Push to turn the OFF CENTER function ON or
OFF.
L
This function is usable in the 24 NM or less ranges.
z
Hold down for 1 second to display or clear the
parallel index lines.(p.17)
!3
EBL1 (VRM1) KEY [EBL1 (VRM1)]/
[
]
(pp. 17–20)
z
Push to display the EBL1 and the VRM1.
EBL: Electronic Bearing Line
VRM: Variable Range Marker
• Push [
t
] or [
u
] to adjust the EBL selector, or push
[
p
] or [
q
] to adjust the VRM selector. Then push
[ENTER]/[
] to set the point.
•The EBL1 bearing and the VRM1 distance are
displayed in the lower left corner of the screen.
•When the EBL1 and the VRM1 are displayed, the
beginning of the EBL2 appears at the intersection
point of the EBL1 and the VRM1.
!4
ACQUIRE TARGET / TLL KEY [ACQ/TLL]/ [
•TLL]
z
Push to acquire an ARPA target on the cursor.
L
Hold down [CLEAR]/[
] for 1 second to release
the ARPA target.
z
Hold down for 1 second to output the position
information where the cursor is placed, to the
NMEA output terminals. (p. 23)
L
TLL output requires bearing data and position data.
L
The target symbol can be displayed, depending on
the setting in the “TLL Mode” item of the System
menu. (p. 33)
!5
MENU KEY [MENU/HL-OFF]/[
•
]
z
Push to enter or exit the Menu screen. (p. 39)
z
Push [
t
] or [
u
] to select the Menu groups, or
push [
p
] or [
q
] to select the items.
z
While holding down [MENU
•
HL_OFF]/[
•
], the heading line is temporarily turned
OFF.(p.9)
L
The rings or other objects can also be turned OFF
when the “HL OFF Mode” item in the System menu
is set to “All.” (p. 44)
!6
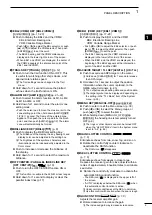
RAIN CLUTTER CONTROL
RAIN
/
(p. 7, 9)
Eliminates echoes from rain, snow, fog, and so on.
z
Rotate the control fully counter clockwise to
deactivate the RAIN function.
•The RAIN icon ( ) disappears.
!7
SEA CLUTTER CONTROL
SEA
/
(p. 7, 9)
Eliminates echoes from waves in close range.
Reduces the receiver gain for close objects within a
radius of approximately 8 nautical miles to eliminate
sea clutter.
z
Rotate the control fully clockwise to activate the
automatic SEA control function.
•The SEA icon ( ) is displayed in the upper left of
the screen.
•“AUTO” is displayed below the SEA icon ( ) when
the automatic control function is active.
L
Under normal conditions set the SEA to minimum.
L
Use this control with caution when the sea is rough.
!8
GAIN CONTROL
GAIN
/
(p. 7, 9)
Adjusts the receiver amplifier gain.
z
Rotate clockwise to increase the gain.
L
The increased gain may increase screen noise.
1
2
3
4
5
6
7
8
9
10
11
12
13
14
15
16
17
18
19
20
21

