7
SATELLITE COMMUNICATION
7-2
Loop test procedure
Decide on a usable satellite, and point your antenna
towards it.
L
Monitored audio may cause howling. Using headphones
is recommended.
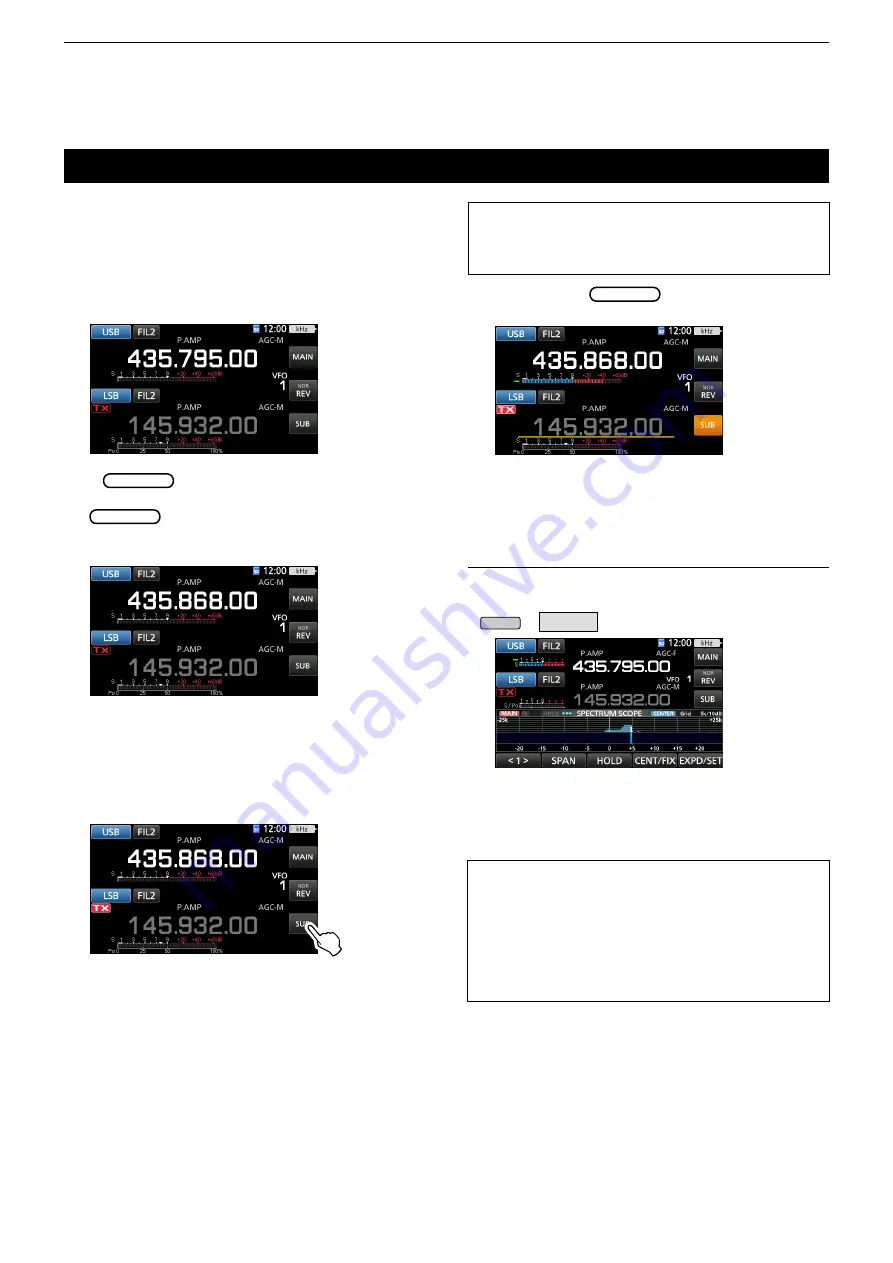
1. Set the downlink frequency (receive frequency) in
the Main band to match the beacon frequency.
Using the spectrum scope
You can visually check the signal presence on the
Spectrum Scope screen.
MENU
»
SCOPE
About the Doppler effect
:
Since the speed of satellite is high, the uplink and downlink
frequency appear to drift due to the Doppler effect.
As the satellite is moving towards your station, the
downlink or uplink frequency appears to be higher, and is
lower as the satellite is moving away. Therefore, you need
to precisely adjust the uplink or downlink frequency to
compensate for the frequency drift.
About the Loop test
:
Loop test is a method to confirm the communication status
between your station and the satellite. By transmitting your
voice (Example: your call sign), check the received audio.
L
The beacon frequency drifts (Doppler effect). Rotate
MAIN DIAL
to adjust the frequency.
2. When you can receive the beacon, rotate
MAIN DIAL
to select a frequency within the
satellite’s coverage, as the downlink frequency on
the MAIN band.
L
Select a vacant frequency within the satellite’s
coverage. Monitor the operating frequency to make
sure transmitting won’t cause interference to other
stations.
3.
Push [PTT] on the microphone to transmit. (or
push [TRANSMIT] on the transceiver)
4.
Touch [SUB].
5. While rotating
MAIN DIAL
, speak at your normal
voice level to the microphone.
• Adjust the uplink frequency so that your voice is
clearly heard.
6. Touch [SUB].
• The Sub band is unselected.
L
By touching on the waterfall zone on the SPECTRUM
SCOPE screen, you can directly tune your frequency on
the displayed area of the band.
L
Refer to Section 5 for details on the Scope screen.
• The Sub band is selected.


