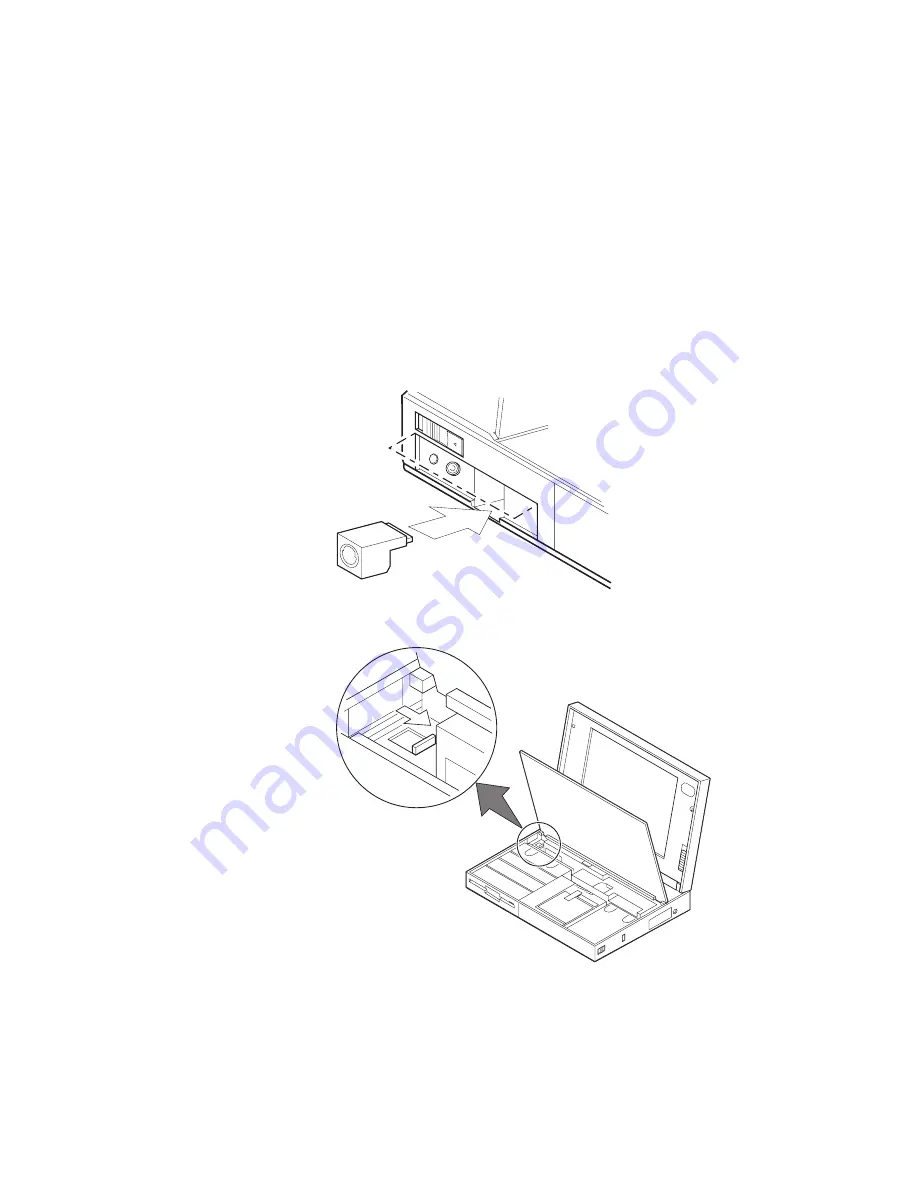
Installing the DAA/Telephony Kit
5
Make sure the latch is at the left-most position; then
install the new plug with the round receptacle and firmly
press it into the connector.
Warning:
Do not leave the lever in its
middle position. Otherwise, you
cannot close the keyboard.
6
Slide the lever to its right-most position until it clicks into
place; then close the keyboard.
Chapter 6. Installing and Removing Options
157
Summary of Contents for ThinkPad 755CX
Page 1: ...i...
Page 6: ...vi IBM ThinkPad 755CX User s Guide...
Page 16: ...xvi IBM ThinkPad 755CX User s Guide...
Page 23: ...Getting Started 2 Right Side View 2 1 1 2 2 1 3 3 1 Chapter 1 Getting Started 7...
Page 25: ...Getting Started 2 3 1 4 5 6 7 Chapter 1 Getting Started 9...
Page 26: ...Getting Started 10 IBM ThinkPad 755CX User s Guide...
Page 30: ...Locations and Functions InsideView RearView Bottom View 6 14 IBM ThinkPad 755CX User s Guide...
Page 48: ...Carrying the Computer 32 IBM ThinkPad 755CX User s Guide...
Page 214: ...Installing the Infrared Device Driver 198 IBM ThinkPad 755CX User s Guide...
Page 242: ...Getting Service 226 IBM ThinkPad 755CX User s Guide...
Page 246: ...Avoiding Hardware Conflicts 230 IBM ThinkPad 755CX User s Guide...
Page 264: ...Additional Information for Telephony Function 248 IBM ThinkPad 755CX User s Guide...


