background image

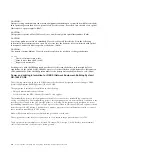
Table 2. Tasks you need to perform when updating or upgrading HMC code

Task

Where to find related information

1. Obtain the upgrade.

“Upgrading your HMC software” on page 69

2. View the existing HMC machine code level.

3. Back up the managed system’s profile data.

4. Back up HMC data.

5. Record the current HMC configuration information.

6. Record remote command status.

7. Save upgrade data.

8. Upgrade the HMC software.

9. Verify that the HMC machine code upgrade installed
successfully

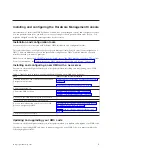
Migrating HMC Version 6 code to HMC Version 7 code

Learn more about the high-level tasks you must perform when you migrate from an HMC Version 6 to
an HMC Version 7.

If you have an existing HMC and want to migrate from Version 6 to Version 7, you must complete the
following high-level tasks:

Table 3. Tasks you need to perform when migrating an HMC Version 6 to an HMC Version 7

Task

Where to find related information

1. Ensure your HMC hardware supports HMC Version 7
code.

2. Ensure that your HMC code level is 6.12 or higher. If
not, you must upgrade your existing HMC code.

“Determining your HMC machine code version and
release” on page 66

“Upgrading your HMC software” on page 69

3. Upgrade your HMC to Version 7.

“Upgrading your HMC software” on page 69

4. Optional: upgrade your managed system's firmware
level to the highest available level.

2

5. If you have a second HMC, perform steps 1-4 for that
HMC.

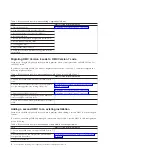
Adding a second HMC to an existing installation

Learn more about the high-level tasks you must perform when adding a second HMC to your managed
system.

If you have an existing HMC and managed system and want to add a second HMC to this configuration,
do the following:

Table 4. Tasks you need to perform when adding a second HMC to an existing installation

Task

Where to find related information

1. Ensure your HMC hardware supports HMC Version 7
code.

2. Gather information and complete the Preinstallation
Configuration Worksheet.

“Preinstallation configuration worksheet for the HMC”
on page 16

3. Unpack the hardware.

2

Power Systems: Installing and configuring the Hardware Management Console

Summary of Contents for Hardware Management Console

Page 1: ...Power Systems Installing and configuring the Hardware Management Console...

Page 2: ......

Page 3: ...Power Systems Installing and configuring the Hardware Management Console...

Page 4: ...Environmental Notices and User Guide Z125 5823 This edition applies to IBM Hardware Management Console Version 7 Release 7 7 0 Maintenance Level 0 and to all subsequent releases and modifications unt...

Page 5: ...server 12 Using Internet SSL to connect to remote support 13 Choosing an Internet Protocol 14 Internet SSL address lists 14 Using a virtual private network to connect to remote support 14 VPN server...

Page 6: ...horizing users to view collected system data 63 Transmitting service information 63 Setting passwords for the managed system 63 Updating your server password 63 Updating your Advanced System Managemen...

Page 7: ...74 Step 5 Record the current HMC configuration information 74 Step 6 Record remote command status 75 Step 7 Save upgrade data 75 Step 8 Upgrade the HMC software from Version 6 to Version 7 75 Step 9 V...

Page 8: ...vi Power Systems Installing and configuring the Hardware Management Console...

Page 9: ...duct The documentation contains the safety information in your national language with references to the U S English source Before using a U S English publication to install operate or service this pro...

Page 10: ...be attached to this product to properly wired outlets v When possible use one hand only to connect or disconnect signal cables v Never turn on any equipment when there is evidence of fire water or str...

Page 11: ...he customer to ensure that the outlet is correctly wired and grounded to prevent an electrical shock CAUTION v Do not install a unit in a rack where the internal rack ambient temperatures will exceed...

Page 12: ...t the weight of the loaded rack cabinet Refer to the documentation that comes with your rack cabinet for the weight of a loaded rack cabinet v Verify that all door openings are at least 760 x 230 mm 3...

Page 13: ...This product might contain one or more of the following devices CD ROM drive DVD ROM drive DVD RAM drive or laser module which are Class 1 laser products Note the following information v Do not remove...

Page 14: ...formation for NEBS Network Equipment Building System GR 1089 CORE The following comments apply to the IBM servers that have been designated as conforming to NEBS Network Equipment Building System GR 1...

Page 15: ...h level tasks you must perform when installing and configuring a new HMC with a new server Table 1 Tasks you need to perform when installing and configuring a new HMC with a new server Task Where to f...

Page 16: ...C Version 7 code 2 Ensure that your HMC code level is 6 12 or higher If not you must upgrade your existing HMC code Determining your HMC machine code version and release on page 66 Upgrading your HMC...

Page 17: ...HMC to managed system Used to perform most of the hardware management functions in which HMC issues control function requests through the service processor of the managed system The connection between...

Page 18: ...is configured to use an Internet proxy a local IP addresses should be included in the exception list Consult your network administrator for more information on the exception list If you still need to...

Page 19: ...n firewall on each of its network interfaces A basic firewall is automatically configured when you run the HMC Guided Setup wizard but you customize your firewall settings after the initial HMC instal...

Page 20: ...be able to connect indirectly to the Internet using an SSL proxy which can forward requests to the Internet One of the other potential advantages of using an SSL proxy is that the proxy may support l...

Page 21: ...ers use Internet Protocol Version 4 IPv4 to connect to a service provider IPv4 addresses appear in the format representing the four bytes of the IPv4 address separated by periods for example 9 60 12 1...

Page 22: ...te network over public lines by substituting encryption and other security measures for the physically separate network lines of traditional private networks In addition to being able to be used for o...

Page 23: ...rs The first available call home server attempts to handle each service event If the connection or transmission fails with this call home server the service request is retried using the other availabl...

Page 24: ...vice provider You can use this communications path to make automatic service calls Your HMC can support up to four separate physical Ethernet interfaces depending on the model The stand alone version...

Page 25: ...Prompt under First party Cookies and Third party Cookies 5 Click OK Enabling session cookies in Firefox 1 Select Tools and click Options 2 Click Cookies 3 Select Allow sites to set cookies 4 Select Ex...

Page 26: ...Internet Protocol Version 6 IPv6 you cannot use Internet VPN to connect to support For more information about the Protocols used see Choosing an Internet Protocol on page 7 The advantages to using an...

Page 27: ...d in Internet SSL address lists on page 7 you can use a direct Internet connection Using Internet SSL to connect to remote support All the communications are handled through TCP sockets initiated by t...

Page 28: ...The following IPv4 addresses are for all locations v 129 42 26 224 v 129 42 34 224 v 129 42 42 224 v 170 225 15 41 v 129 42 56 216 v 129 42 58 216 v 129 42 60 216 The following IPv4 addresses are for...

Page 29: ...network types on page 50 VPN server address list Lists the servers used by an HMC when the HMC is configured to use Internet VPN connectivity The following servers are used by an HMC when it is confi...

Page 30: ...replicate the problem report to any secondary HMC This secondary HMC must be recognized on the network by the primary HMC A secondary HMC is recognized by the primary HMC as an additional call home s...

Page 31: ...0 100 1000 Full Half Duplex For more information about private and open networks see Private and open networks in the HMC environment on page 5 eth0 eth1 eth2 eth3 Specify Private or Open network for...

Page 32: ...age 56 Using IPv4 Complete the following tables for Ethernet adapters specified as open networks using IPv4 eth0 eth1 eth2 eth3 Do you want to obtain an IP address automatically yes no If no list the...

Page 33: ...formation To identify your Hardware Management Console HMC to the network enter the HMC s host name and domain name Unless you are using only short host names on your network enter a fully qualified h...

Page 34: ...P address of your server or are not sure contact your network administrator Port Type the port number of the server to be notified of a system event or use the default port Email addresses to be notif...

Page 35: ...ovider You can connect directly to your service provider by using encrypted Secure Sockets Layer SSL using the existing Internet connection select Use SSL Proxy if you want to configure the use of enc...

Page 36: ...ave been configured as call home servers List of HMC host names or IP addresses that have been configured as call home servers Additional Support Benefits My Systems and Premium Search List your IBM I...

Page 37: ...tion of the HMC the modem might automatically dial out as the HMC follows routine call out procedures This is usual behavior If you are connecting an optional external modem do the following Note You...

Page 38: ...configure your HMC software Continue with Configuring the HMC on page 49 Related concepts Deciding which connectivity method to use for the call home server on page 5 Learn more about the connectivit...

Page 39: ...nt bracket E Cable management support bracket and security tab F Latch strikes 2 G Screws 6 Important This system unit is 1 EIA unit high you will need this information to complete the installation Co...

Page 40: ...te the following steps 1 Plan where you will place the units Place the larger and heavier units in the lower part of the rack 2 If the rack contains filler panels remove the filler panels to allow acc...

Page 41: ...h EIA unit 3 Place another self adhesive dot next to the bottom hole of the above EIA unit Note If you are counting the holes begin with the hole identified by the first dot and count up two holes Pla...

Page 42: ...the two rail pins will protrude through the bottom and middle holes B on the EIA unit 3 Repeat steps 1 on page 27 2 to install the left slide rail which is marked left into the rack Figure 4 Installi...

Page 43: ...A 5 Repeat the previous step to install the latch strike on the front of the left slide rail 6 Move to the rear of the rack Finger tighten screw F to attach the cable management arm mounting bracket E...

Page 44: ...The support bracket of the cable management arm can be used to secure the cable management arm during transportation If the mechanism is engaged after the cable management arm is installed you will no...

Page 45: ...ket to the right and swivel the shipping bracket off the HMC 2 From the front of the rack fully extend the slide rails until the rails lock into place in the extended position A Attention The latch st...

Page 46: ...g Important Do not under any circumstances force the HMC into the slide rails If the HMC does not slide freely into the rack completely remove the HMC from the rails After the HMC is clear of the rail...

Page 47: ...ure in this section to perform this task To install the cable management arm complete the following steps 1 From the rear of the rack locate the cable management arm flange A located on the fixed rear...

Page 48: ...ue with the next step 3 Plug the power cord into the HMC 4 Connect the keyboard monitor and mouse 5 Connect an optional modem If you are connecting an external modem do the following Note You can use...

Page 49: ...n the HMC to the Ethernet port that is labeled HMC1 on the managed server 9 If you are connecting a second HMC to your managed server connect to the Ethernet port that is labeled HMC2 on the managed s...

Page 50: ...or an L left Select one of the slide rails and push up on the front movable tab 1 then pull out the front latch 2 to slide out the front side rail If a thumbscrew is installed in the slide rail 3 remo...

Page 51: ...to the rack Make sure that each front latch is fully seated 4 Pull the slide rails forward 1 until they click twice into place Carefully lift the server and tilt it into position over the slide rails...

Page 52: ...ble management arm on the right side follow the instructions and install the hardware on the opposite side Connect one end of the support arm 1 to the same slide rail to which you plan to attach the c...

Page 53: ...n slide the bracket 2 into the slide rail 9 Pull out the mounting bracket pin 1 and slide the mounting bracket 2 into the slide rail onto which you are installing the cable management arm Push the bra...

Page 54: ...rail Push the tab until it snaps into place 11 Attach the power cords and other cables to the rear of the server including keyboard monitor and mouse cables if required Route the cables and power cor...

Page 55: ...The monitor and keyboard tray occupy 1 Electronics Industries Association EIA unit 1 of space in a rack cabinet You can install a console switch behind the tray to attach more than one server to the...

Page 56: ...d extension cable 1 K Mouse extension cable 1 L The CD containing Windows keyboard and mouse drivers not for use with Eserver pSeries systems or any AIX Linux or OS 400 based system Important Use the...

Page 57: ...es located on the left side of the rack 5 Go to the rear of the rack 6 On the right side find the EIA unit that corresponds to the bottom EIA unit marked on the front of the rack 7 Place a self adhesi...

Page 58: ...ing flanges Do not install screws in the middle holes on the front or rear of the slide rail brackets These holes will be used to attach thumbscrews or optional console switch mounting brackets respec...

Page 59: ...to the ball bearing assemblies in the rails 10 Press the release latches and push the flat panel monitor and keyboard tray completely into the rack You may experience some resistance initially as the...

Page 60: ...route the keyboard and mouse cable through the cord clip on the bottom of the tray up through the opening on the right side of the tray and toward the cable management arm Pull out the full length of...

Page 61: ...to the short jumper cord on the cable management arm 23 Connect all cables and signal connectors to the correct device or connector 24 Ensure that all power switches are turned off Connect the power c...

Page 62: ...e right and left side brackets to the right side and left side of the console switch respectively Note The left side bracket has a channel to route the power video keyboard and mouse cables Ensure tha...

Page 63: ...ired configuration information that you will need to complete the steps successfully See Preparing for HMC configuration on page 16 for a list of the required information When you are finished prepari...

Page 64: ...ch the Hardware Management Console web application 5 Log in to the HMC using the following default user ID and password ID hscroot Password abc123 6 Press Enter Changing the date and time The battery...

Page 65: ...n page 57 4 Configure additional adapters if you have them 5 Test the connection between the managed server and the HMC Testing the connection between the HMC and the managed system on page 64 Configu...

Page 66: ...emote users To configure the HMC network settings so that it can connect to remote users using an open network do the following Table 10 Configuring HMC settings to use an open network to connect to r...

Page 67: ...always defined as eth0 or eth1 on your HMC if you intend to use the HMC as a DHCP server for your managed systems If you have installed additional Ethernet adapters in the PCI slots the port that is...

Page 68: ...en the restricted shell terminal Select HMC Management Open Restricted Shell Terminal 2 Type the following at the command line tail f var log messages The messages log scrolls when new events occur 3...

Page 69: ...etails 4 Select Private and then select the network type 5 In the DHCP Server section select Enable DHCP Server to enable the HMC as a DHCP server Note You can configure the HMC to be a DHCP server on...

Page 70: ...ess to your company network The HMC also has a firewall on each of its Ethernet adapters To control the HMC remotely or give remote access to others modify the firewall settings of the Ethernet adapte...

Page 71: ...y information section enter the gateway address and gateway device of the routing entry you want to set as the default gateway 4 Click OK Configuring domain name services If you plan to set up an open...

Page 72: ...uid but you can use your own attributes 6 Define the distinguished name tree also known as the search base for the LDAP server 7 Click OK 8 If a user wants to use LDAP authentication the user must con...

Page 73: ...HMC so that it can connect to service and support using the call home setup wizard Configure the HMC so that it is a call home server using the call home wizard This procedure describes how to configu...

Page 74: ...server 5 Accept the agreement 6 In the Outbound Connectivity Settings window select the Internet tab 7 Check the Allow an existing internet connections for service box 8 If you are using an SSL proxy...

Page 75: ...Select a number from the list 13 If this is a local number remove the area code from the Telephone number field 14 In the Add Telephone Number panel click Add 15 In the In the Customize Modem Settings...

Page 76: ...k Manage Outbound Connectivity The Call Home Server Consoles window opens 3 Click the Use discovered call home server consoles The HMC displays the IP address or host name of the HMCs configured for c...

Page 77: ...www ibm com support electronic Note You should transmit service provider information as soon as the HMC is installed and configured for use To transmit service information do the following 1 In the n...

Page 78: ...ment 2 Click Test Network Connectivity 3 In the Ping tab type the host name or IP address of any system to which you want to connect To test an open network type the gateway Click Ping If you have not...

Page 79: ...sible from the HMC To complete this task you must shut down and reboot the HMC Use only the HMC to perform these tasks To back up the HMC hard disk drive to a remote system you must be a member of one...

Page 80: ...you must type the remote server s user ID and password 10 Verify the information you entered is correct and click Finish When the backup completes the HMC interface is displayed If you have modified...

Page 81: ...y that the test completes successfully If the test is not successful troubleshoot your connectivity and correct the problem before proceeding with this procedure Alternatively you can obtain the updat...

Page 82: ...ng machine code updates for the HMC using DVD or an FTP server Learn how to obtain machine code updates for the HMC using DVD or an FTP server To obtain HMC machine code updates perform steps 1 5 Step...

Page 83: ...C If you obtained or created the update on a USB memory device insert the memory device 3 In the navigation area click Updates 4 Click Update HMC The Install HMC Corrective Service Wizard opens 5 Foll...

Page 84: ...with Step 3 Back up the managed system s profile data Step 3 Back up the managed system s profile data To back up the managed system s profile data do the following 1 In the navigation area select Sys...

Page 85: ...artitions for which you want to record HMC configuration information 3 In the tasks list select Schedule Operations All scheduled operations for the target you selected are displayed 4 Select Sort By...

Page 86: ...click Next 7 Choose from the following options v If you have saved upgrade data during the previous task continue with the next step v If you did not save upgrade data previously in this procedure yo...

Page 87: ...server support fixes 2 Select the appropriate family in the Product family list 3 Select Hardware Management Console in the Product or fix type list 4 Click Continue The Hardware Management Console si...

Page 88: ...unted to the HMC file system for example NFS or send the backup to a remote site using File Transfer Protocol FTP v To back up to DVD choose Back up to DVD on local system and follow the instructions...

Page 89: ...red automatically during the installation procedure Note Only one level of backup data is allowed Each time you save upgrade data the previous level is overwritten 1 In the navigation area open the Li...

Page 90: ...he HMC version release maintenance level build level and base versions are displayed under the HMC Code Level heading 2 Verify that the version and release match the update that you installed 3 If the...

Page 91: ...unt media cdrom saveupgdata r diskdvd v To save data on the HDD execute the following command saveupgdata r disk 5 Copy the upgrade files to the bootable disk partition on the HMC Run the getupgfiles...

Page 92: ...n the 8202 E4B or 8205 E6B see Part location and location codes for 8202 E4B or 8205 E6B 8202 E4C or 8205 E6C HMC port locations Use this diagram and table to map the HMC ports on an 8202 E4C or 8205...

Page 93: ...C port 2 Un P1 T4 No For more information on HMC port locations on the 8231 E2B see Part location and location codes for 8231 E2B 8231 E1C or 8231 E2C HMC port locations Use this diagram and table to...

Page 94: ...D 8248 L4T or 9109 RMD HMC port locations Use this diagram and table to map the HMC ports on an 8408 E8D 8248 L4T or 9109 RMD Table 18 8408 E8D 8248 L4Tor 9109 RMD HMC port locations Port Physical loc...

Page 95: ...D or HMC port locations Use this diagram and table to map the HMC ports on a 9117 MMC 9117 MMD 9179 MHC 9179 MHD or Table 20 9117 MMC 9117 MMD 9179 MHC 9179 MHD or HMC port locations Port Physical loc...

Page 96: ...Identify LED HMC Connector J02 Ethernet to Bulk power hub BPH Un Px C1 J02 No HMC Connector J03 Ethernet to Bulk power hub BPH Un Px C1 J03 No For more information on HMC ports on 9119 FHB see Part l...

Page 97: ...and or changes in the product s and or the program s described in this publication at any time without notice Any references in this information to websites not owned by the manufacturer are provided...

Page 98: ...pendent data verification before relying on such data in sensitive or critical operations Users should periodically check the manufacturer s support websites for updated information and fixes applicab...

Page 99: ...2 this device must accept any interference received including interference that may cause undesired operation Industry Canada Compliance Statement This Class A digital apparatus complies with Canadia...

Page 100: ...Association JEITA Confirmed Harmonics Guideline products less than or equal to 20 A per phase Japanese Electronics and Information Technology Industries Association JEITA Confirmed Harmonics Guidelin...

Page 101: ...Vertr glichkeit Dieses Produkt entspricht den Schutzanforderungen der EU Richtlinie 2004 108 EG zur Angleichung der Rechtsvorschriften ber die elektromagnetische Vertr glichkeit in den EU Mitgliedsst...

Page 102: ...antwortlich f r die Einhaltung der EMV Vorschriften ist der Hersteller International Business Machines Corp New Orchard Road Armonk New York 10504 Tel 914 499 1900 Der verantwortliche Ansprechpartner...

Page 103: ...complies with Part 15 of the FCC rules Operation is subject to the following two conditions 1 this device may not cause harmful interference and 2 this device must accept any interference received in...

Page 104: ...ogy Industries Association JEITA Confirmed Harmonics Guideline with Modifications products greater than 20 A per phase IBM Taiwan Contact Information Electromagnetic Interference EMI Statement Korea G...

Page 105: ...r International Business Machines Corp New Orchard Road Armonk New York 10504 Tel 914 499 1900 Der verantwortliche Ansprechpartner des Herstellers in der EU ist IBM Deutschland GmbH Technical Regulati...

Page 106: ...tion except in full compliance with all applicable laws and regulations including all United States export laws and regulations IBM MAKES NO GUARANTEE ABOUT THE CONTENT OF THESE PUBLICATIONS THE PUBLI...

Page 107: ......

Page 108: ...Printed in USA...

Reviews: