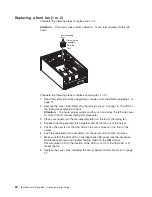


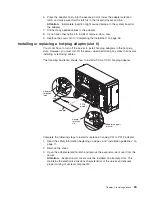
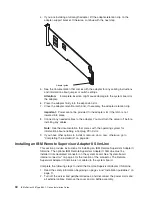
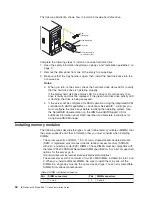
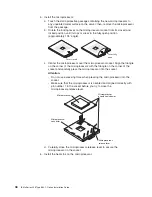

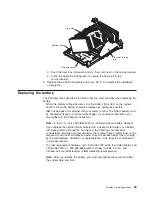

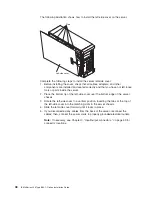
The
following
illustration
shows
how
to
install
a
hot-swap
hard
disk
drive.
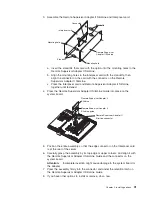
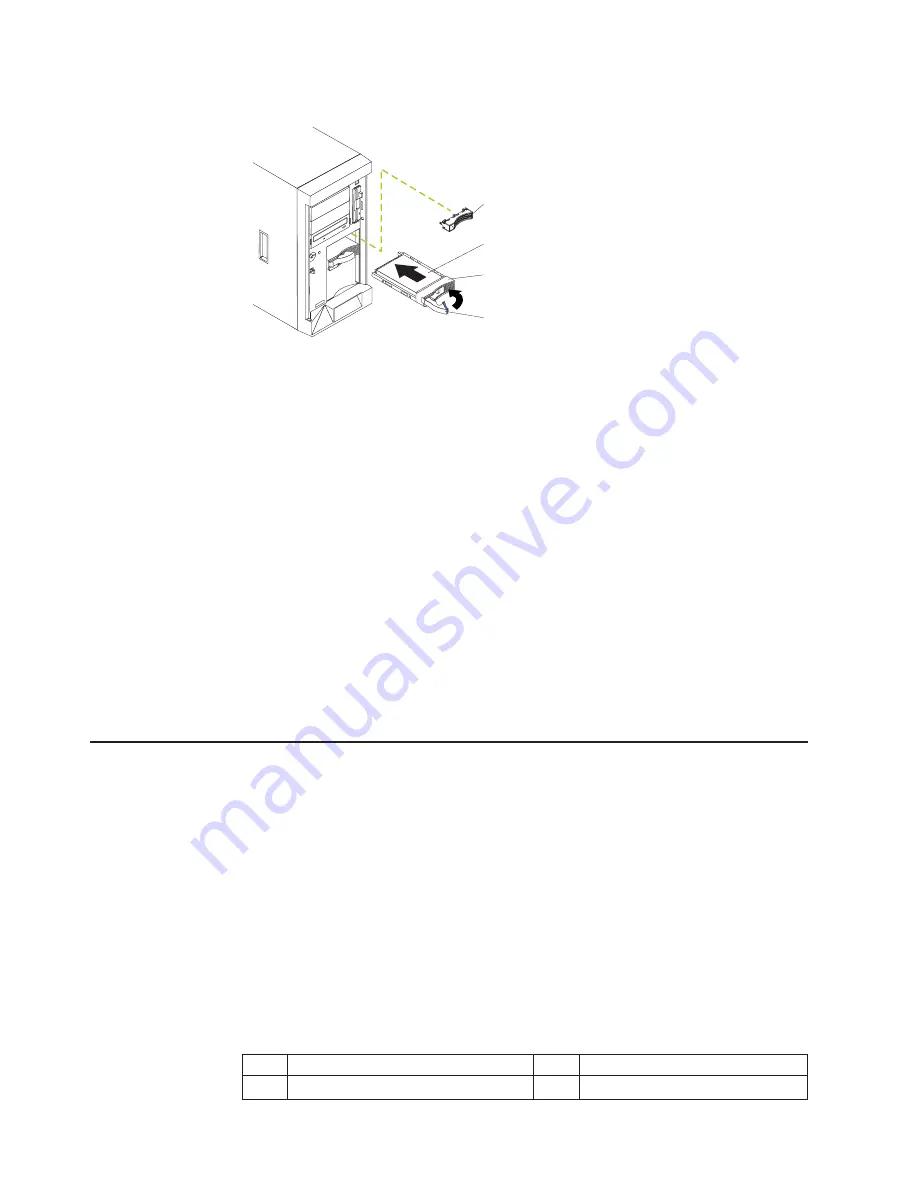
Slim
filler panel
Hard disk drive
Drive tray
Drive tray handle
(in open position)
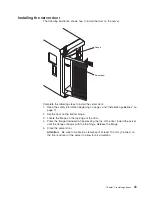
Complete
the
following
steps
to
install
a
hot-swap
hard
disk
drive:
1.
Read
the
safety
information
beginning
on
page
v
and
“Installation
guidelines”
on
page
11.
2.
Remove
the
filler
panel
from
one
of
the
empty
hot-swap
bays.
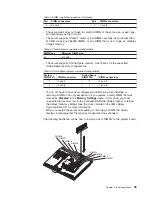
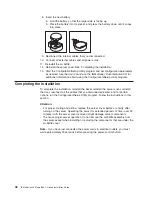
3.
Make
sure
that
the
tray
handle
is
open;
then,
install
the
hard
disk
drive
into
the
hot-swap
bay.
Notes:
a.
When
you
turn
on
the
server,
check
the
hard
disk
drive
status
LEDs
to
verify
that
the
hard
disk
drive
is
operating
properly.
If
the
amber
hard
disk
drive
status
LED
for
a
drive
is
lit
continuously,
that
drive
is
faulty
and
must
be
replaced.
If
the
green
hard
disk
drive
activity
LED
is
flashing,
the
drive
is
being
accessed.
b.
If
the
server
will
be
configured
for
RAID
operation
using
the
integrated
SCSI
controller
with
RAID
capabilities
or
an
optional
ServeRAID
™
controller,
you
must
configure
the
disk
arrays
before
installing
the
operating
system.
See
the
ServeRAID
documentation
on
the
IBM
ServeRAID
Support
CD
for
additional
information
about
RAID
operation
and
complete
instructions
for
using
ServeRAID
Manager.
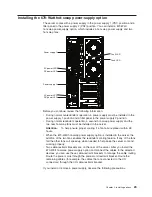
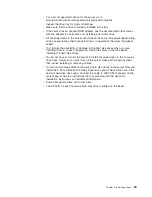
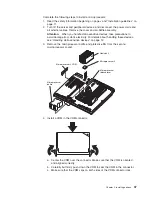
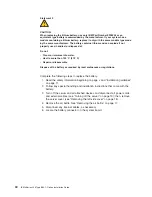
Installing
memory
modules
The
following
notes
describe
the
types
of
dual
inline
memory
modules
(DIMMs)
that
the
server
supports
and
other
information
that
you
must
consider
when
installing
DIMMs:
v
The
server
supports
400
MHz,
1.8
V,
240-pin,
single-stacked,
double-data-rate
(DDR)
II,
registered
synchronous
dynamic
random-access
memory
(SDRAM)
with
error
correcting
code
(ECC)
DIMMs.
These
DIMMs
must
be
compatible
with
the
latest
PC3200
SDRAM
Registered
DIMM
specification.
For
a
list
of
supported
options
for
the
server,
go
to
http://www.ibm.com/servers/eserver/serverproven/compat/us/.
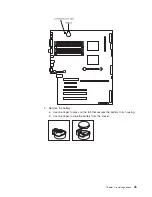
v
The
server
comes
with
a
minimum
of
two
512
MB
DIMMs,
installed
in
slots
1
and
2.
When
you
install
additional
DIMMs,
be
sure
to
install
them
in
pairs.
All
the
DIMMs
in
a
single
pair
must
be
the
same
size
and
type.
You
can
mix
compatible
DIMMs
from
various
manufacturers.
Table
2.
DIMM
installation
sequence
Pair
DIMM
connectors
Pair
DIMM
connectors
1
1
and
2
2
3
and
4
34
IBM
xSeries
236
Type
8841:
Option
Installation
Guide
Summary of Contents for 8841 - eServer xSeries 236
Page 1: ...IBM xSeries 236 Type 8841 Option Installation Guide ERserver...
Page 2: ......
Page 3: ...IBM xSeries 236 Type 8841 Option Installation Guide ERserver...
Page 22: ...10 IBM xSeries 236 Type 8841 Option Installation Guide...
Page 64: ...52 IBM xSeries 236 Type 8841 Option Installation Guide...
Page 73: ......
Page 74: ...Part Number 31R1191 Printed in USA 1P P N 31R1191...


