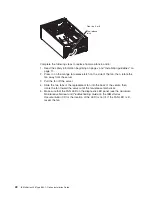


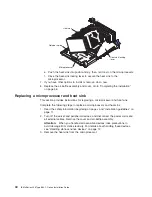


9.
Replace
the
air-baffle
assembly
and
cover.
Go
to
“Completing
the
installation”
on
page
46.
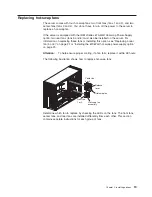
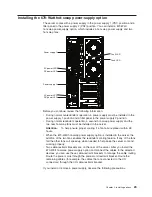
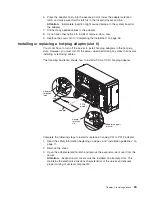
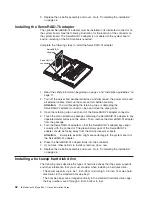
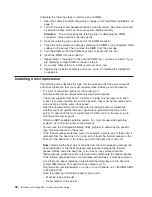
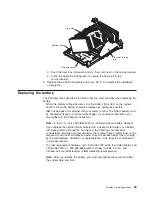
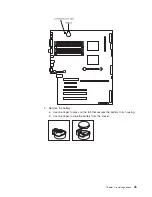
Installing
the
ServeRAID-7k
adapter
The
optional
ServeRAID-7k
adapter
must
be
installed
in
its
dedicated
connector
on
the
system
board.
See
the
following
illustration
for
the
location
of
the
connector
on
the
system
board.
The
ServeRAID-7k
adapter
is
not
cabled
to
the
system
board
and
no
rerouting
of
the
SCSI
cable
is
required.
Complete
the
following
steps
to
install
the
ServeRAID-7k
adapter:
ServeRAID-7k
adapter
ServeRAID-7k
connector
1.
Read
the
safety
information
beginning
on
page
v
and
“Installation
guidelines”
on
page
11.
2.
Turn
off
the
server
and
peripheral
devices,
and
disconnect
the
power
cords
and
all
external
cables.
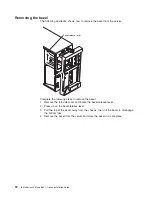
Remove
the
cover
and
air
baffle
assembly.
Attention:
To
avoid
breaking
the
retaining
clips
or
damaging
the
ServeRAID-7k
adapter
connector,
open
and
close
the
clips
gently.
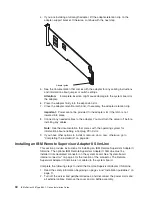
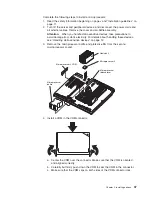
3.
Open
the
retaining
clip
on
each
end
of
the
ServeRAID-7k
adapter
connector.
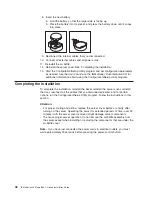
4.
Touch
the
static-protective
package
containing
the
ServeRAID-7k
adapter
to
any
unpainted
metal
surface
on
the
server.
Then,
remove
the
ServeRAID-7k
adapter
from
the
package.
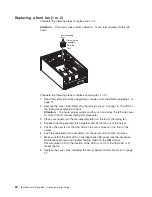
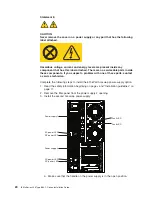
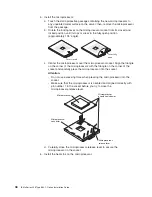
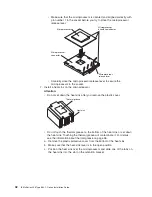
5.
Turn
the
ServeRAID-7k
adapter
so
that
the
ServeRAID-7k
adapter
keys
align
correctly
with
the
connector.
The
green
battery
pack
of
the
ServeRAID-7k
adapter
should
be
facing
away
from
the
microprocessor
sockets.
Attention:
Incomplete
insertion
might
cause
damage
to
the
system
board
or
the
ServeRAID-7k
adapter.
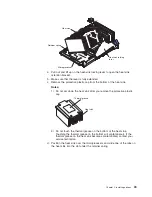
6.
Press
the
ServeRAID-7k
adapter
firmly
into
the
connector.
7.
If
you
have
other
options
to
install
or
remove,
do
so
now.
8.
Replace
the
air-baffle
assembly
and
cover.
Go
to
“Completing
the
installation”
on
page
46.
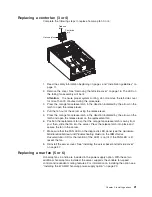
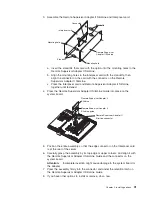
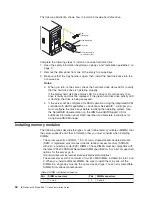
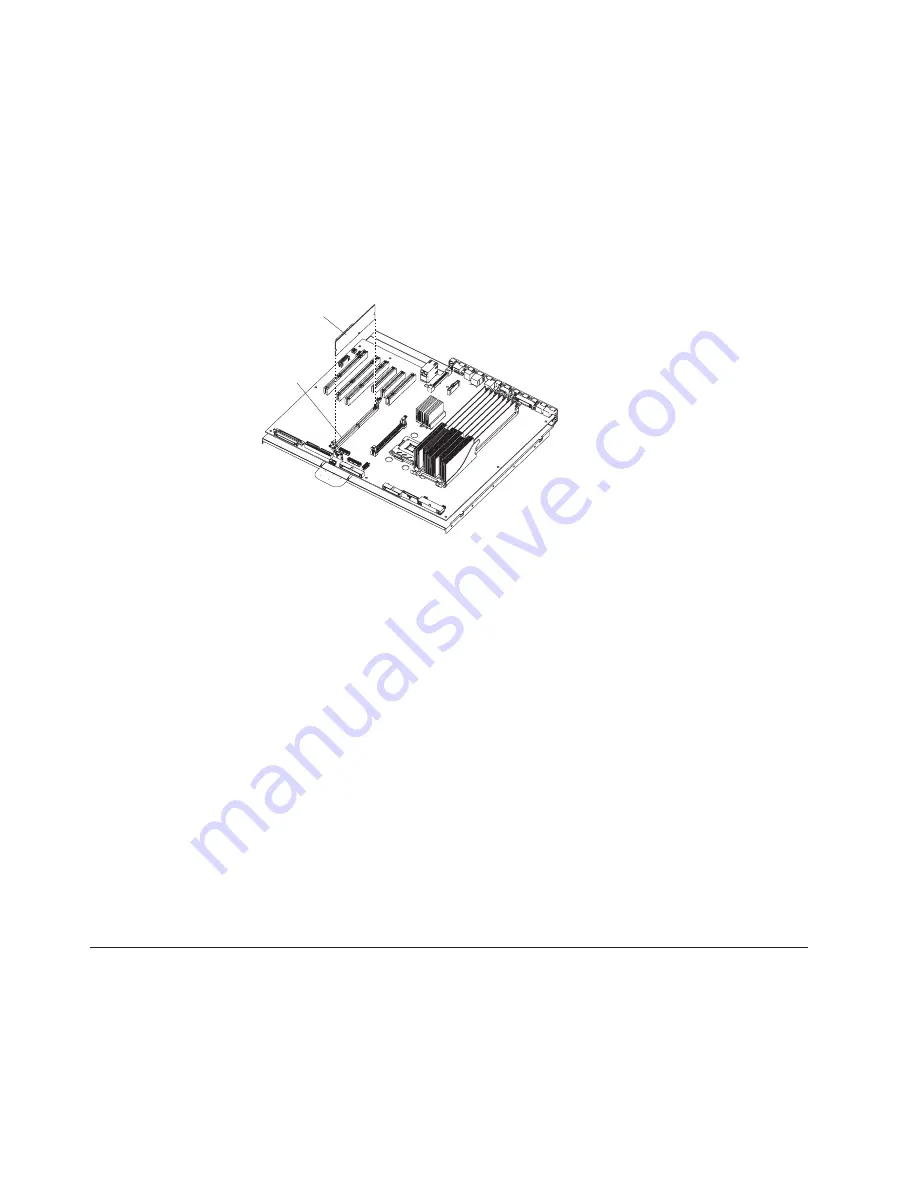
Installing
a
hot-swap
hard
disk
drive
The
following
notes
describe
the
types
of
hard
disk
drives
that
the
server
supports
and
other
information
that
you
must
consider
when
installing
a
hard
disk
drive:
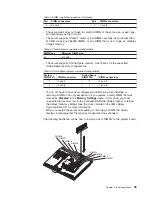
v
The
server
supports
up
to
six
1-inch
(26
mm)
slim-high,
3.5-inch,
hot-swap
hard
disk
drives
in
the
standard
hot-swap
bays.
v
The
hot-swap
bays
are
arranged
vertically
in
the
standard
hard
disk
drive
cage;
the
bay
numbers
are
0
through
5
(from
bottom
to
top).
32
IBM
xSeries
236
Type
8841:
Option
Installation
Guide
Summary of Contents for 8841 - eServer xSeries 236
Page 1: ...IBM xSeries 236 Type 8841 Option Installation Guide ERserver...
Page 2: ......
Page 3: ...IBM xSeries 236 Type 8841 Option Installation Guide ERserver...
Page 22: ...10 IBM xSeries 236 Type 8841 Option Installation Guide...
Page 64: ...52 IBM xSeries 236 Type 8841 Option Installation Guide...
Page 73: ......
Page 74: ...Part Number 31R1191 Printed in USA 1P P N 31R1191...


