Chapter 2: Installation
15
To confi gure the RCM hardware:
1.
You will see the Terminal Applications menu with six options. Select
option 1,
Network Confi guration
.
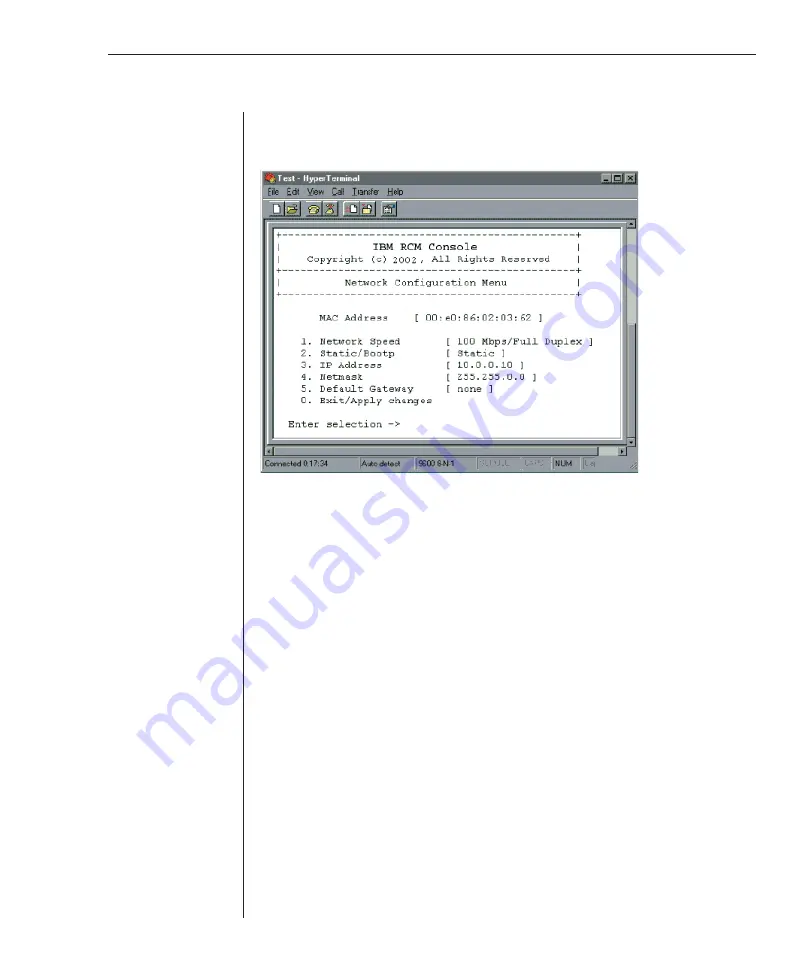
Figure 2.4: Network Configuration Menu
2. Select option 1 to set your network speed. When possible, you should set
your connection manually without relying on the auto negotiate feature.
Once you enter your selection, you will be returned to the Network
Confi guration menu.
3. Select option 2 and specify if you are using a static or BootP IP address.
Use a static IP address for ease of confi guration. If you are using a BootP
address, please confi gure your BootP server to provide an IP address to the
RCM, skip step 4 and continue to the next procedure.
4. Select options 3-5 from the Network Confi guration menu, in turn, to fi nish
confi guring your RCM for IP address, Netmask and Default Gateway. Once
this is completed, type a
Ø
to return to the main menu.
To adjust the mouse acceleration:
Before a server can be connected to the RCM, an adjustment to mouse
acceleration must be made. Use the default Microsoft
®
Windows
®
PS/2 mouse
driver for all attached Microsoft Windows systems attached to the RCM.
For Microsoft Windows NT® (using default drivers):
1.
From the desktop, select
Start
-
Settings
-
Control Panel
-
Mouse
.
2.
Click on the
Motion
tab.
Summary of Contents for 1735R16
Page 3: ......
Page 5: ...RCM Installer and User Guide...
Page 6: ......
Page 8: ...Contents Features and Benefits 3 Safety Precautions 5 1 Product Overview...
Page 9: ......
Page 14: ...Contents Getting Started 9 Installing Your RCM 10 Cabling the RCM 13 2 Installation...
Page 15: ......
Page 29: ...22 RCM Installer and User Guide...
Page 31: ......
Page 53: ...46 RCM Installer and User Guide...
Page 54: ...Contents Configuring the Terminal Menu 49 4 Terminal Operations...
Page 55: ......
Page 59: ......
Page 70: ......
Page 71: ...59P2181 Rev C 590245001B...


