38
-1500/-1700 IHT
ASSEMBLY AFTER A
COMPLETE TEAR-DOWN
If the unit has been torn down completely, the
fol low ing sum ma ry identifies the assembly
pro ce dures necessary to com plete ly assemble
the unit, in the order they must be completed.
Each as sem bly procedure is located by a page
ref er ence.
The part reference numbers provided in each
assembly pro ce dure are keyed to the individual
exploded views, and are also keyed to the com-
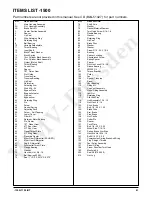
plete unit exploded view, Figure 29.
1. Assemble the Directional Control Assembly
(Page 37).
2. Assemble the Motor/Center Section/Pump
Assembly (Page 34,35,36).
3. Assemble the Planetary Gear Reduction and
Dif fer en tial As sem bly (Page 30,31,32,33).
4. Assemble the Lower Housing/Filter/Man i fold
Assembly (Page 27,28,29).
5. Assemble the Charge Pump Assembly
(Page 27).
6. Assemble the Auxialiary Pump Assembly
(Page 26)
7. As
sem ble the Input Shaft As sem bly (Page
25).
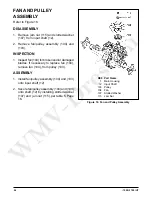
8. Assemble the Fan and Pulley Assembly
(Page 24).
9. Assemble the Torque Bracket Assembly
(Page 23).
10. Assemble the Control Arm Assembly (Page
20,21).
11. Assemble the Bypass Assembly (Page
19).
12. Assemble the Brake Assembly (Page
17,18).
TRANSAXLE INSTALLATION
Use the following pro ce dure to complete in stal -
la tion of the transaxle on the ve hi cle.
1. Install and secure the transaxle on the ve-
hi cle according to instructions in the vehicle
own er’s manual.
2. Install the hub assembly (118, Figure 29) on
the shaft. Install hex nut (119, Figure 29).
3. With the vehicle raised, install the wheel
on the hub, and retain with the wheel lug
nuts.
4. Lower the vehicle wheels to the ground, and
torque the nut re tain ing the hub to 290 to
295 lb.-ft., using an air im pact wrench.
5. Tighten the wheel lug nuts. Consult the
ve hi cle owner’s manual for proper torque.

