OPERATION
16
Joining a Shade to a Group
IMPORTANT:
The shade will not operate using the remote until it has been joined to a group.
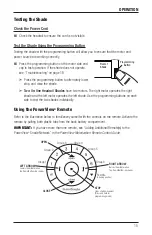
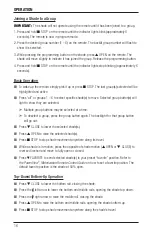
1. Press and hold
■
STOP on the remote until the indicator lights blink (approximately 6
seconds). The remote is now in program mode.
2. Press the desired group number (1 – 6) on the remote. The backlit group number will flash to
show it is selected.
3. While pressing the programming button on the shade, press
▲
OPEN on the remote. The
shade will move slightly to indicate it has joined the group. Release the programming button.
4. Press and hold
■
STOP on the remote until the indicator lights stop blinking (approximately 6
seconds).
Basic Operation
■
To wake up the remote, simply pick it up or press
■
STOP. The last group(s) selected will be
highlighted and active.
■
Press “all” or groups 1 – 6 to select specific shade(s) to move. Selected group button(s) will
light to show they are selected.
➤
Multiple group buttons may be selected at a time.
➤
To deselect a group, press the group button again. The backlight for that group button
will go out.
■
Press
▼
CLOSE to lower the selected shade(s).
■
Press
▲
OPEN to raise the selected shade(s).
■
Press
■
STOP to stop shade movement anywhere along its travel.
■
While a shade is in motion, press the opposite of shade motion (
▲
OPEN or
▼
CLOSE) to
reverse direction and move to fully open or closed.
■
Press
♥
FAVORITE to send selected shade(s) to your preset “favorite” position. Refer to
the
PowerView
®
Motorization Remote Control Guide
on how to set a favorite position. The
default favorite position is the shade at 50% open.
Top-Down/Bottom-Up Operation
■
Press
▼
CLOSE to lower the bottom rail, closing the shade.
■
Press the left arrow to lower the bottom and middle rails, opening the shade top-down.
■
Press the right arrow to raise the middle rail, closing the shade.
■
Press
▲
OPEN to raise the bottom and middle rails, opening the shade bottom-up.
■
Press
■
STOP to stop shade movement anywhere along the shade’s travel.

