INSTALLATION
9
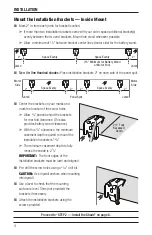
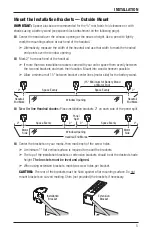
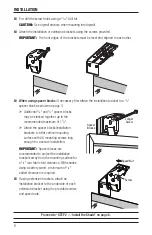
Mount the Headrail
■
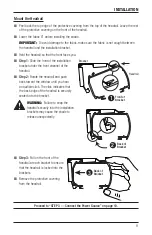
Peel back the top edge of the protective covering from the top of the headrail. Leave the rest
of the protective covering on the front of the headrail.
■
Lower the fabric 6" before installing the shade.
IMPORTANT:
To avoid damage to the fabric, make sure the fabric is not caught between
the headrail and the installation bracket.
■
Hold the headrail so that the front faces you.
■
Step 1:
Slide the front of the installation
bracket under the front channel of the
headrail.
■
Step 2:
Rotate the headrail and push
back toward the window until you hear
an audible click. The click indicates that
the back edge of the headrail is securely
seated into the bracket.
WARNING:
Failure to snap the
headrail securely into the installation
brackets may cause the shade to
release unexpectedly.
■
Step 3:
Pull on the front of the
headrail at each bracket to ensure
that the headrail is locked into the
brackets.
■
Remove the protective covering
from the headrail.
Proceed to “STEP 3 — Connect the Power Source” on page 10.
3
Back of
Bracket
Headrail
Bracket
1
Front of
Bracket
2
Back of
Bracket

