9
Leak Checking, Vacuuming, and Precharging Refrigerant
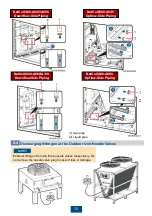
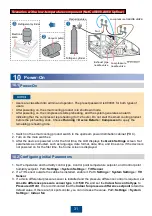
Charge 3.0 MPa nitrogen and preserve the system for 24 hours. If the ambient temperatures before
and after the preservation are similar, the system pressure should not drop. If leaks occur after the
preservation, check them along the pipe, especially at the welding positions, needle valve, and angle
valve.
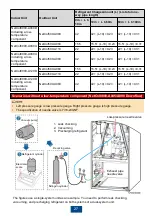
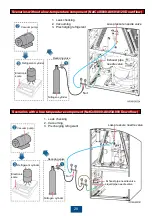
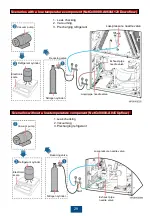
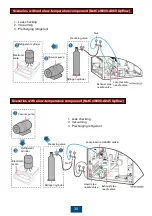
The vacuuming time should be 80 minutes at least and the final pressure (absolute pressure) should
be 60 Pa at most. When the pressure stops dropping, pump for another 10 minutes. After the
vacuumization, close all the vacuum pump and valves. Preserve the system for another 10 minutes
and the pressure (absolute pressure) should be 90 Pa at most. If the pressure gauge cannot be
precise at 60 Pa, ensure that the pressure is displayed at the minimum scale. Extend the preservation
time to one hour. Then check whether the pressure displayed on the pressure gauge increases.
Leak Checking
9.1
Vacuuming
9.2
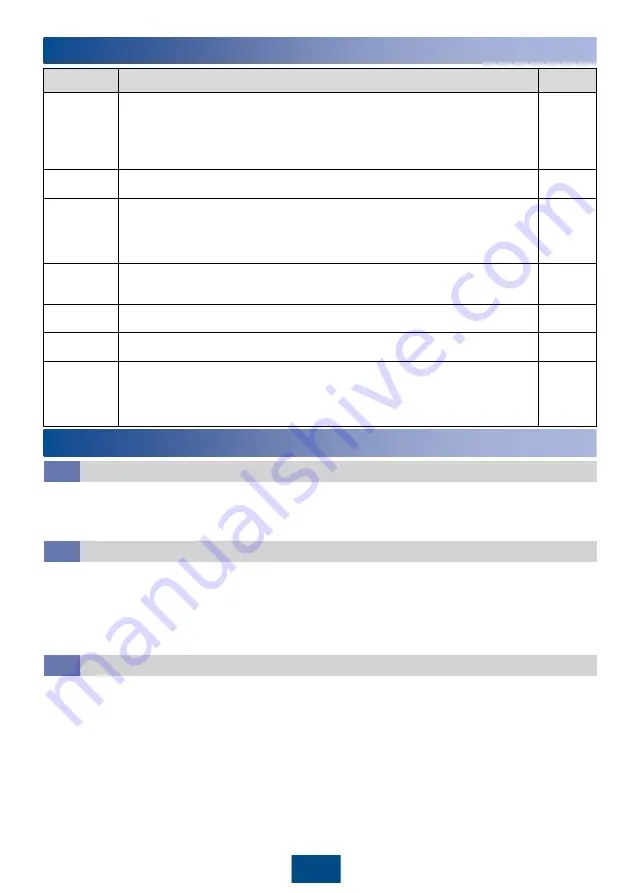
25
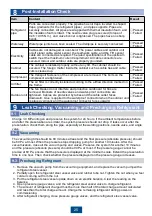
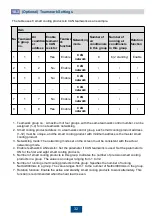
Item
Content
Result
Refrigerant
pipe
Ports are connected properly. The pipeline has oil traps, inverted U-shaped
traps, gradients (for the refrigerant pipes) , and pipe supports. Pipes are
securely connected. All pipes are wrapped with thermal insulation foam, and
the insulation foam is intact. The needle valve plug is secured (torque of
0.45
±
0.05 N.m) , and valve bonnet is tightened. The pipes have no sharp
bends.
□
Passed
□
Failed
Waterway
Water pipe joints have been sealed. The drainpipe is securely connected.
□
Passed
□
Failed
Electricity
Cables are not damaged or over-bent. The power cables and outdoor unit
on/off signal cable, water sensor, the teamwork cable, and the T/H sensor
cable are connected as required. The rated specifications of the upstream
switch meet the maximum current requirement. All cable connectors are
secured. Indoor and outdoor units are properly grounded.
□
Passed
□
Failed
Cabinet
The cabinet is installed properly, without any tilt. The cabinet should be
secured. The foreign matter inside the cabinet such as cable ties and cable
cuts is cleaned up.
□
Passed
□
Failed
Compressor
The transport fasteners of the compressor are removed. The bolts on the
compressor are tightened.
□
Passed
□
Failed
Air filter
The air filter is correctly installed according to the airflow direction marked on
the frame.
□
Passed
□
Failed
Outdoor unit
The fan blades do not interfere and protective cardboard for fins are
removed. Bonnets of needle valves and water-proof connectors are
tightened. Cables are protected by tubes and the cable outlet faces
downward. Glue is applied to the waterproof connector when the outdoor unit
is placed vertically and the waterproof connector faces upward.
□
Passed
□
Failed
8
Post-Installation Check
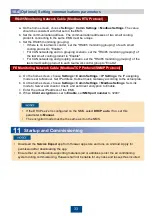
1. Remove the vacuum pump from the vacuuming equipment, and replace the vacuum pump with a
refrigerant steel vessel.
2. Partially open the refrigerant steel vessel valve and rubber tube nut. Tighten the nut when you feel
cold air coming out from the nut.
3. Put the refrigerant steel vessel upside down on an electric balance. Clear the reading on the
balance.
4. Open pressure gauge valves, and the refrigerant steel vessel valve to charge refrigerant.
5. The amount of refrigerant charged must be more than half of the total charge amount calculated
and less than the total charge amount. Charge the remaining refrigerant during power-on
commissioning.
6. After refrigerant charging, close pressure gauge valves, and the refrigerant steel vessel valve.
Precharging Refrigerant
9.3

