Hardware options installation 30
b.
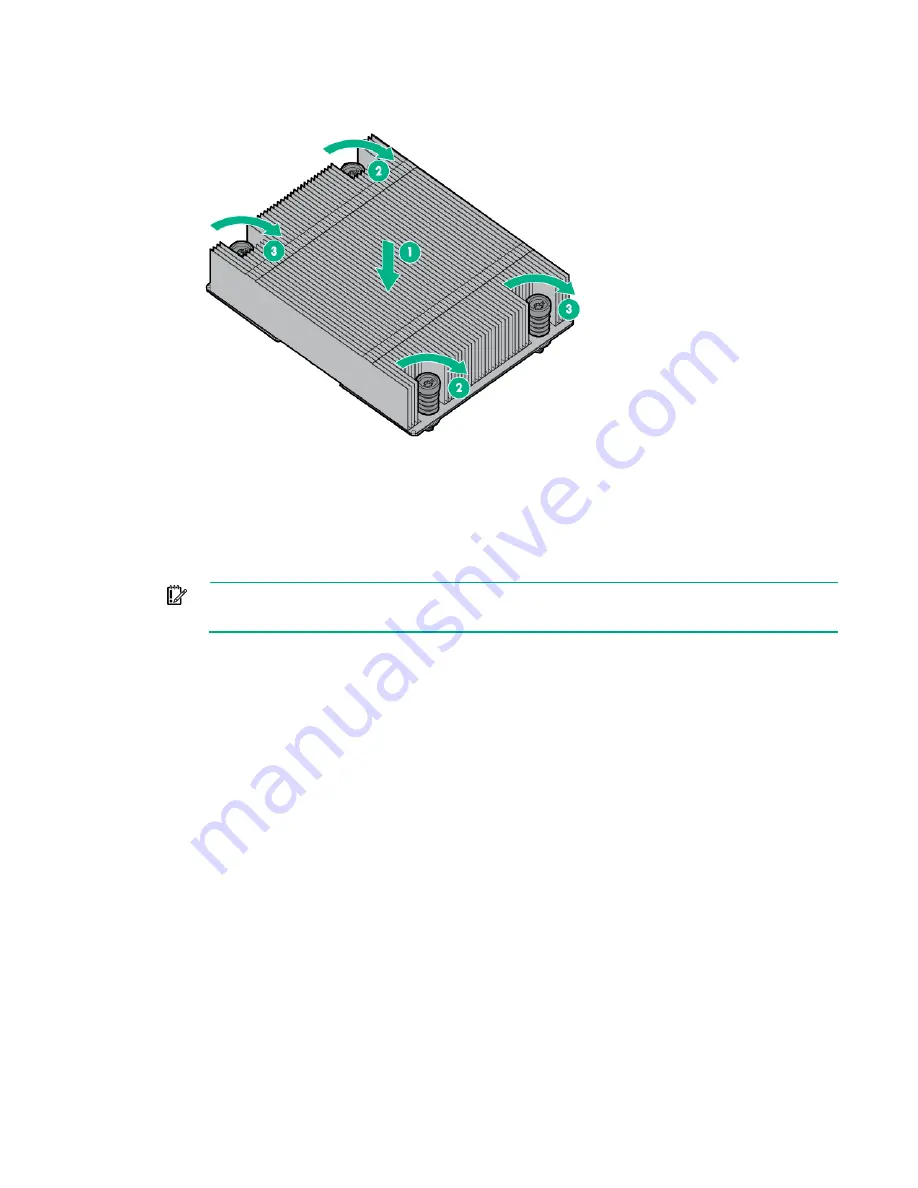
Tighten one pair of diagonally opposite screws halfway, and then tighten the other pair of screws.
c.
Finish the installation by completely tightening the screws in the same sequence.
12.
Install the processor air baffle.
13.
Install the server into the chassis ("
Installing the server into the chassis
" on page
14.
Power up the server.
Memory options
IMPORTANT:
This server does not support mixing RDIMMs and UDIMMs. Attempting to mix
any combination of these DIMMs can cause the server to halt during BIOS initialization.
The memory subsystem in this server can support RDIMMs or UDIMMs. Both types are referred to as
DIMMs when the information applies to all three types. When specified as RDIMM or UDIMM, the
information applies to that type only. All memory installed in the server must be the same type.
The server supports the following DIMM speeds:
•
Single-rank and dual-rank PC3-12800 (DDR3-1600) DIMMs operating at 1600, 1333, and 1066 MHz
•
Single-rank and dual-rank PC3-10600 (DDR3-1333) DIMMs operating at 1333 and 1066 MHz
•
Quad-rank PC3-14900L (DDR3-1866) LRDIMMs operating at 1866 MHz
Depending on the processor model, the number of DIMMs installed, and whether UDIMMs or RDIMMs
are installed, the memory clock speed might be reduced to 1333, 1066 or 800 MHz. For more information
on the effect of DIMM slot population, see "General DIMM slot population guidelines (on page
)."
HPE SmartMemory
HPE SmartMemory, introduced for Gen8 servers, authenticates and unlocks certain features available
only on HPE Qualified memory and verifies whether installed memory has passed Hewlett Packard
Enterprise qualification and test processes. Qualified memory is performance-tuned for HPE ProLiant and
BladeSystem servers and provides future enhanced support through HPE Active Health and
manageability software.
Certain performance features are unique with SmartMemory. HPE SmartMemory 1.35V DDR3-1333
Registered memory is engineered to achieve the same performance level as 1.5V memory. For example,
Summary of Contents for ProLiant SL270s Gen8
Page 16: ...Operations 16 5 Remove the shipping plates 6 Remove the hard drive cage...
Page 17: ...Operations 17 7 Loosen screws securing the GPU shelf 8 Remove the GPU shelf...
Page 36: ...Hardware options installation 36 5 Remove the shipping plates 6 Remove the hard drive cage...
Page 47: ...Hardware options installation 47 o Left node o Right node...
Page 49: ...Hardware options installation 49 5 Remove the shipping plates 6 Remove the hard drive cage...
Page 50: ...Hardware options installation 50 7 Loosen screws securing the GPU shelf 8 Remove the GPU shelf...
Page 53: ...Hardware options installation 53 4 Remove all shipping brackets 5 Remove the shipping plates...
Page 55: ...Hardware options installation 55 8 Remove the GPU shelf 9 Remove the PCI cage...
Page 59: ...Hardware options installation 59 5 Remove the shipping plates 6 Remove the hard drive cage...
Page 60: ...Hardware options installation 60 7 Loosen screws securing the GPU shelf 8 Remove the GPU shelf...
Page 72: ...Cabling 72 Right node Capacitor pack to FBWC on controller card cabling o Left node...
Page 73: ...Cabling 73 o Right node...
Page 97: ...Support and other resources 97...
Page 98: ...Support and other resources 98...
Page 106: ...Index 106 V ventilation 19 W warnings 21 website Hewlett Packard Enterprise 91...


