110
HP Photosmart R707 User’s Manual
3
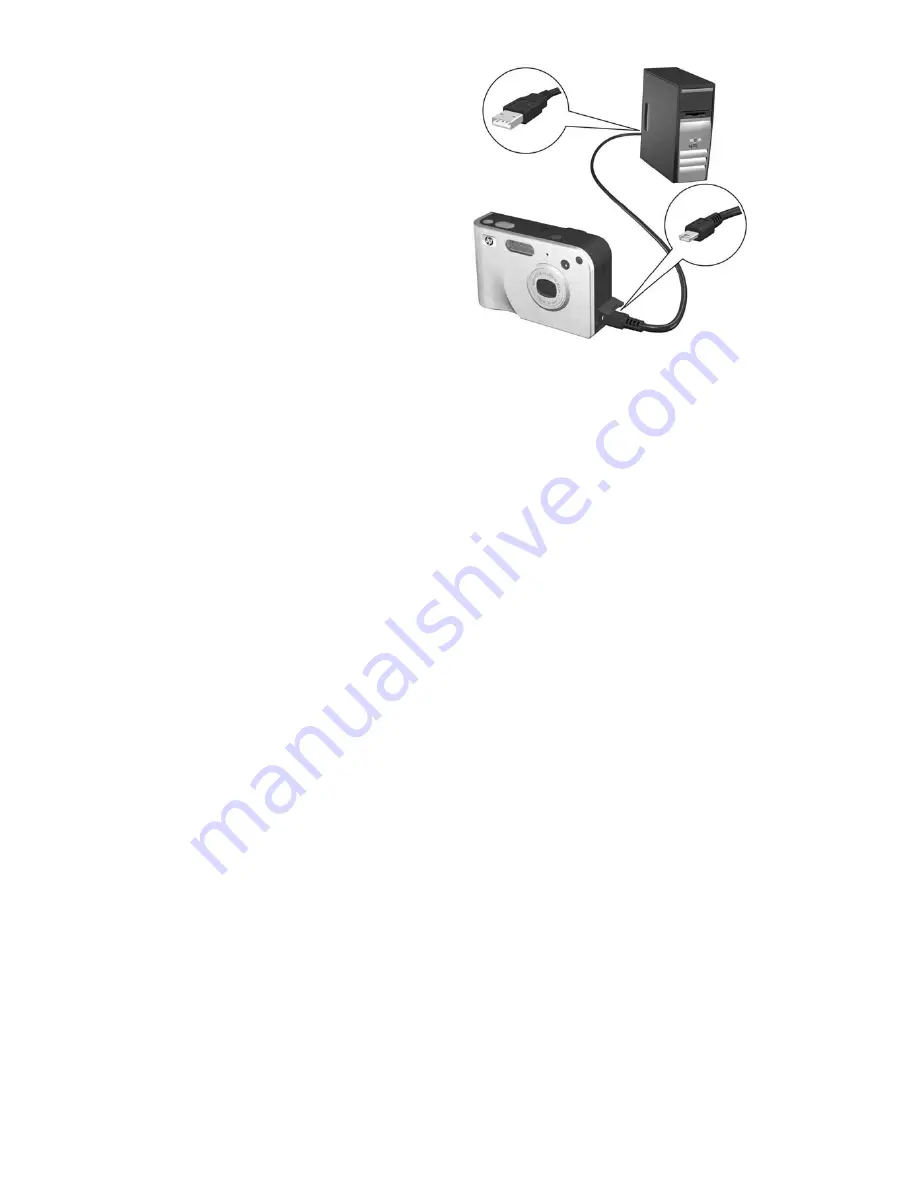
Your camera came with a
special USB cable for
connecting the camera to a
computer. Connect the larger
end of that USB cable to the
computer.
4
Open the rubber door on the
side of the camera and
connect the small end of the
USB cable to the USB
connector on the camera.
NOTE
If your computer is running Windows XP, when you
turn on the camera in the next step, a dialog box will
display that requests you to
Select the program to launch
for this action
. Simply click
Cancel
to close this dialog
box.
5
Turn on the camera. The HP Image Transfer software will
launch on your computer. If you have set the software to
automatically transfer the images in the camera, the images
will automatically transfer to the computer. Otherwise, in the
Welcome
screen, click
Start Transfer
. The images are
transferred to the computer, and then if there are any still
images that were previously selected for printing (page 83)
or selected for
HP Instant Share
destinations (page 97),
those actions are started.
NOTE
If the images being transferred to your computer
include a panoramic sequence of images (see
Using
Panorama Mode
on page 49), the ArcSoft Panorama
Maker software starts automatically. Follow the
instructions on the screen to stitch the images in the
panoramic sequence together as a single panoramic
image on your computer.
Summary of Contents for Photosmart R707
Page 1: ...HP Photosmart R707 Digital Camera with HP Instant Share User s Manual ...
Page 2: ......
Page 4: ......
Page 10: ...10 HP Photosmart R707 User s Manual ...
Page 78: ...78 HP Photosmart R707 User s Manual ...
Page 96: ...96 HP Photosmart R707 User s Manual ...
Page 162: ...162 HP Photosmart R707 User s Manual ...
Page 176: ...176 HP Photosmart R707 User s Manual ...


