background image

9

2. Safety

Prepare the vehicle before driving!

2.6.2 Before each journey

Road safety

•   The electric connection between the tow vehicle (your car) and 

the caravan must function perfectly. 

•   Before driving, check that the signalling and lighting systems and 

brakes function correctly.

•   If the vehicle has been standing for a longer period of time 

(approx. 10 months) have an authorised workshop check the 

brake system, the tyres and function of the of all appliances. It 

is advisable to have a gas safety check carried as well. .

•  Set the vehicle's wing mirror.

•   In winter, the roof must be cleared of snow and ice before driving.  

•   Regularly check the tyre pressure before driving. False tyre 

pressure can cause excessive wear, damage to the tyres or 

even lead to a burst tyre. 

(see also Chapter 14.5)

As the driver of this vehicle, you are responsible for the state of the car 

and caravan. Therefore, you must note the following points:

Exterior

Check around the caravan and ensure everything is secure for 

your journey as follows.

Preparation of the vehicle:

•  The caravan must be hitched up correctly 

(see guidelines for 

the safety hitch WS3000 Chapter 3.4).

•  Release the hand brake for the caravan.

•  Rotate the rotating stanchions and front landing wheel upwards 

and secure them.

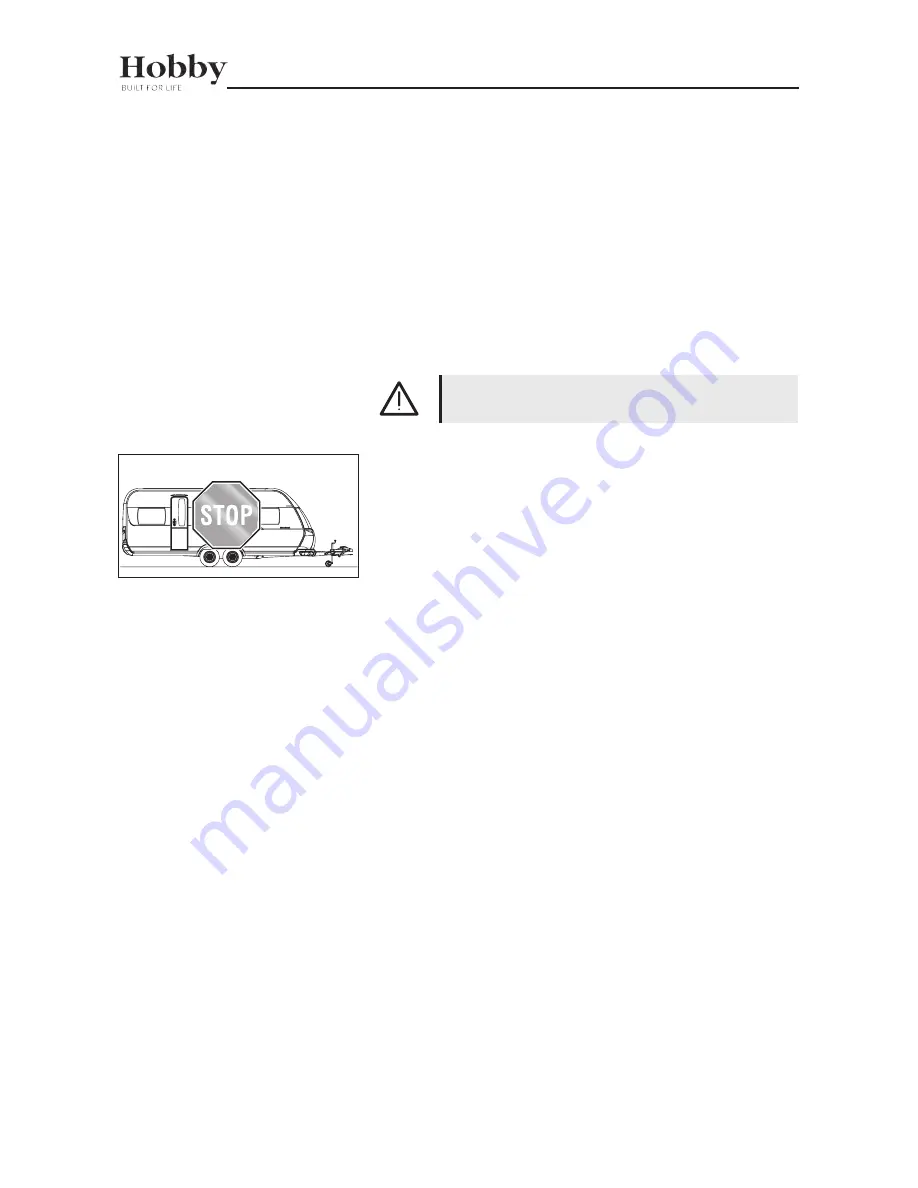
Only begin to drive when your caravan fulfils all of the 

conditions for roadworthiness.

Interior

You must also prepare the interior of the vehicle

Preparing the interior:

•  Sort all loose objects and store them in their respective com-  

partments.

•  Store heavy and / or voluminous objects (e.g. radio,  awning,  

beverage cases) safely before you start your journey, securing  

them to prevent them from moving around. 

(see also Chapter 3.3)

•  If required you can switch the fridge on to 12v operation, this will 

only keep the fridge cold when travelling, the fridge must have 

been already chilled to the desired temperature using 230v or 

gas. The 12v element will not chill the fridge down.

•  Ensure that all fluids, including those in refrigerator, are secured  

to prevent leakage.

•   Close all doors (incl. refrigerator door), lockers (Lock the central 

lock on the kitchen drawers).

•  Open the concertina door and lock it.

•  Latch the sliding door.

•  Secure the table and, if possible, lower it.

•  Should there be an drop down bed, move it to the upright posi

-

tion and lock it into place.

•   If necessary, secure the TV bracket and, if possible, remove the 

TV and store it securely.

•  Remove the TV and store it securely (models with rear washroom).

•  Turn off all interior lighting and if necessary isolate the 12v system

Summary of Contents for DE LUXE 2018

Page 1: ...Version 7 2018 OPERATION GUIDE ONtour DE LUXE DE LUXE EDITION EXCELLENT PRESTIGE PREMIUM GB ...

Page 2: ...help you to avoid operating errors or causing damage to the vehicle and its equipment Following the enclosed instructions will increase your driving comfort and maintain the value of your caravan If this user manual should be unable to provide the required assistance a close pan European network of dealers is available for further help Take advantage of your authorised dealer s experience and tech...

Page 3: ...Handbrake operation 21 3 7 Overrunning equipment and wheel brakes 22 3 8 Electronic Trailer Stabilisation ETS plus 23 4 Wheels and tyres 4 1 Wheels 24 4 2 Tyres 24 4 3 Tyre pressure 25 4 4 Profile depth and age of tyres 26 4 5 Rims 26 4 6 Changing a wheel tyre 27 4 7 Tyre repair kit 29 5 Exterior structure 5 1 Forced and fixed ventilation 32 5 2 Opening and closing doors and lockers 33 5 3 Corner ...

Page 4: ... and hot water system 130 10 3 Electro Boiler 134 10 4 Dometic Refrigerator 135 10 5 Gas hob 138 10 6 Extractor hood 139 10 7 Oven Hob Oven Combination 139 10 8 Microwave 142 10 9 Rooftop Air Conditioning 143 10 10 Satellite System 144 11 Accessories 145 12 Maintenance and upkeep 12 1 Maintenance 147 12 2 Hitch head 148 12 3 Brakes 149 12 4 Changing bulbs in the rear lights 150 12 5 Changing the b...

Page 5: ...journey You should certainly familiarize yourself thoroughly with the contents of this handbook it is much more than a reference book Fill out the warranty cards for the built in appliances in the separate instructions and send the warranty cards to the respective manu facturers In doing so you will secure your right to a warranty for all devices In accordance with guarantee conditions HOBBY gives...

Page 6: ...ists are set out in bullet point form indicated by a hyphen in front of the first word of each point Procedural guidelines Procedural guidelines are also based on key points and begin with a bullet point Guidelines point out important details which ensure the trouble free operation of the caravan and its equipment Please bear in mind that various models have different equipment therefore varying d...

Page 7: ...r technical reasons optional extras cannot always be installed in all models Should you have any questions please speak to your Hobby dealer Relevance of This Manual The high level of quality and security for caravans is ensured by means of continuous improvements and development In very rare cases there may be a difference between the description and the vehicle itself 3 Should there be any equip...

Page 8: ...es and rims that have been approved for your caravan Information on tyre and rim sizes can be found in the vehicle s registration document or in Chapter 14 4 Tyres and Rims 2 3 Fire protection This caravan has been designed as a mobile travel accommodation for private not commercial use This is a recreational vehicle that is fit for habitation It offers accommodation that can be used temporarily o...

Page 9: ...self and notify emergency services Fighting a fire Evacuate all passengers immediately Close the main shut off valve on the gas bottle as well as the shut off valves on gas appliances Shut off the electrical supply Sound the alarm and call the fire service Only fight the fire yourself if this is possible without risk High visibility jacket vest British regulations for carrying and wearing a high v...

Page 10: ...n Internet connection must be available for this The system recognises when the vehi cle changes its location and reports this making you aware of any possible theft The system determines the vehicle s exact location to within 8 feet Pleasereferalsototheseparatesystemmanufacturer s operating instructions and read them carefully before initial operation The system has a rechargeable battery i e it ...

Page 11: ... sticker General inspection Germany In accordance with Section 29 of German Road Traffic Licensing Regulations your caravan must undergo a major inspection every two years A general vehicle inspection can be carried out by an officially recognised expert e g DEKRA Expert mobile home inspection Should your caravan be stolen please do the following Contact the police and inform your insurance compan...

Page 12: ... of the vehicle 4 The following points must be observed because you are responsible for adhering to them If they are not met the maximum speed for the caravan is 50 mph a The base vehicle must be equipped with an anti locking system anti lock device and may not exceed an overall mass of 3 5 tons b The caravan must be equipped with hydraulic vibration dampers shock absorbers naturally your new HOBB...

Page 13: ...or the caravan Rotate the rotating stanchions and front landing wheel upwards and secure them Only begin to drive when your caravan fulfils all of the conditions for roadworthiness Interior You must also prepare the interior of the vehicle Preparing the interior Sort all loose objects and store them in their respective com partments Store heavy and or voluminous objects e g radio awning beverage c...

Page 14: ...ow or leaves as this increases the danger of suffocation Do not overload the caravan The permissible axle loads the technically permissible maximum weight as well as the permissible height width and length of the caravan must be observed Place a note with all important measurements and weights in a clearly visible place on the dashboard Close and firmly lock all of the windows and roof lights Empt...

Page 15: ... the one used when driving up a mountain During long drives over passes or steep and twisty country lanes the can cause the caravan brakes to over run constantly and can cause the wheel brakes to heat up considerably If necessary you should allow enough time to enable them to cool down again Driving around curves The combined length of your car caravan together rig is consi derably longer than a c...

Page 16: ...turning into difficult parking spots especially in reverse Front grab handle When positioning the caravan manually only use the grab handles at the front and rear ends of the caravan Never push on the plastic parts or the walls Rules for driving in reverse The caravan turns in the opposite direction in which you steer Get one someone to guide you when reversing the caravan Driving in reverse Your ...

Page 17: ...e water pipes and the fresh water tank before each journey to ensure they are clean Disinfect and rinse the drin king water facility regularly and always before each journey Please empty any residual water from the water tank before filling it with fresh water Securing the vehicle Rules for securing the vehicle Apply the handbrake brake Only extend the corner steadies to the point where the axle s...

Page 18: ...al modifications are allowed otherwise the terms of operation are no longer valid For the sake of traffic safety the vehicle undercarriage must be maintained just as conscientiously as the base vehicle itself This maintenance should be carried out by your HOBBY dealer If spare parts are required use only the original parts supplied by the manu facturer Technical changes are allowed with the manufa...

Page 19: ...verloading can cause the tyres to break down or even burst This incre ases the danger that you may lose control of the vehicle Therefore you endanger yourself and other road users Do not store additional loads of more than 30 kg in the rear storage locker compartment Premium If you are not sure whether or not you have overloaded the caravan you should have it weighed at a public weigh bridge The l...

Page 20: ...for your HOBBY caravan is 100 kg Exception model 19 EG i e models 720 the permissible nose weight for these models is 150 kg 3 Adjust the nose weight on the caravan to the lower of the two values by loading it carefully At the same time try to make full use of this value 4 The lower of the two specified values for the nose weight i e that of the tow vehicle or the caravan may not be exceeded Nose ...

Page 21: ...l loads for caravans The terms and basic calculation elements used in this description are explained in the following 1 Gross vehicle weight rating g v w r The indication of the gross vehicle weight rating is taken directly from the HOBBY factory This mass takes into account the specific operating conditions that are based on the model of the caravan and its specifications including such factors a...

Page 22: ...2 Maintenance and Upkeep regarding the ball on the tow bar if it has a Dacromet coating a dull silver coating for corrosion protection or is painted lacquered Safety coupling 4 Actual mass Sum of the mass when ready to drive and the optional extras or additional equipment assembled by the manufacturer 5 Loading capacity additional load Difference between the technically permissible maximum weight ...

Page 23: ...ser hitch is set onto the tow ball of the tow ve hicle The stabiliser hitch usually closes by applying downward pressure since the support load is suffici ent lever in position k Insert the 13 pin plug while turning in accordance with the screw thread Secure the jockey wheel see 3 5 Front Landing Wheel Preparation for hitching unhitching To hitch and unhitch open the stabiliser hitch lever in posi...

Page 24: ...age the friction pads Pull the lever backwards and at the same time further into position j so that the coupling opens After the jockey wheel has been wound up the caravan can be disconnected from the tow vehicle 1 2 3 6 If you do not plan on using the caravan for a longer period of time you should store it with the ball coupling closed Also chock the wheels and leave withe the hand brake off to p...

Page 25: ...ure that it is fully effective Hand brake facilities 1 The rapid emergency brake Breakaway cable is combined with the hand brake If the caravan is involuntarily disconnected from the base vehicle the hand brake will be tightened or moved beyond the dead centre position by by the breakaway cable pulling on the handbrakek The hand brake will be employed and the caravan will do an emergency stop This...

Page 26: ... the hand brake lever is completely tilted Then push the hitch head into the overrunning equipment The hitch head should slide back to its fully extended position by itself by means of the gas cushion in the hydraulic damper Should this procedure take longer than 30 seconds the overrunning equipment must be checked by an experienced technician or workshop Checking the overrunning equipment We reco...

Page 27: ...ions into account The limits imposed by the laws of physics cannot be suspended by ETS Plus Please keep this mind when driving on wet or icy roads Caravans with a high centre of gravity may turn over before they begin to sway No improper modifications may be have been made to the brake system as this could interfere with the function of the ETS Plus The ETS Plus system makes use of an LED on the A...

Page 28: ...ruction the tyres on on twin axle caravans may wear out more quickly 4 1 Wheels The following applies for wheel bolts If you are driving a new vehicle or after changing a tyre tighten the wheel bolts or nuts after you have driven the first 50 km and then again after the following 100 km For your safety do not use any tyres or wheel bolts other than what was originally stipulated Wheel bolts and nu...

Page 29: ...re pressure is too low the tyre can overheat This can result in serious damage If the tyre pressure is too high this leads to higher tread wear and it may cause damage to the suspension Please refer to the table on tyres tyre pressure in the chapter on Technical Data or the labels in the gas box as well as on the wheel arch spat for the correct tyre pressure Different tyre pressures Information st...

Page 30: ... year of manufacture here 2017 4 5 Rims Only use rims that are covered by the vehicle licence Should you wish to use other rims please note the following Rules for the use of other rims Size the pitch Circle Diameter PCD and the wheel offset compression depth and the load bearing capacity must be sufficient for the permissible total mass The wheel bolts must be the correct type for the wheel rims ...

Page 31: ...of and behind the wheel that is not being replaced 1 1 1 Chocks in the gas bottle container Placing the chocks under the wheel Spare Tyre model specific The spare wheel is located on a holder under the caravan This is an option and is model specific To remove the spare tyre the caravan must be unhitched and placed on the hitch in order to raise the rear end of the vehicle Remove the spare tyre Unh...

Page 32: ...hten them Lower the jack and remove it Tighten the wheel bolts evenly with the wheel wrench The nominal value of the attachment torque is 110 nm for steel rims and 120 nm for aluminium rims Release the handbrake and push the hitch handle back down to reengage the friction pads activating the stabiliser You should have a functional spare tyre available at all times Therefore have the spare tyre rep...

Page 33: ...re repair kit can be used when the outside tempera ture ranges from 30 C to 70 C There is an expiry date on the tyre repair kit There fore please note this date Kits that have expired no longer offer a guarantee that they will function properly Tyre repair kit Connect the fill hose to the bottle All single axle caravans are equipped with a tyre repair kit this is part of the standard equipment In ...

Page 34: ... tightly into the tyre valve with the valve core remover l Press the entire bottle contents into the tyre C Pull the stopper m from the fill hose j Push the fill hose onto the tyre valve B Unscrew the valve cap from the tyre valve Remove the valve insert k with the valvecore remover l Do not lay the valve insert k down in sand or dirt Unscrew the valve cap Push the fill hose onto the tyre valve ...

Page 35: ...the electric air pump longer than 8 minutes Danger of overheating If sufficient air pressure is unattainable drive 10 meters either forward or in reverse so that the sealant can be evenly distributed within the tyre Repeat the pumping process Resume driving immediately so that the sealant can be evenly distributed within the tyre Maximum speed 80 km h Drive carefully especially in around bends or ...

Page 36: ...caravan Cooking wet clothing etc produces vapor Every person loses up to 35 g of water per hour Therefore depending on the relative humidity please ventilate and dehumidify through the windows and roof lights see also Winter operation Under no circumstances may the safety ventilation be blocked not even slightly Keep the grilles and coverings clean and dust free When using an awning ensure that th...

Page 37: ...model specific It pulls in combustion air from outside o and at the same time discharges the exhaust air from the heating system outside the caravan p Blocked flue openings can cause malfunctions and may channel exhaust fumes inside the camper Danger of suffocation When using the caravan in winter ensure that nothing hinders the air from escaping via the chimney flue Roof vent Locks for ventilatio...

Page 38: ...rgency Therefore never block the door from the outside Only tow the caravan when the entrance door is shut Entrance door Entry step When entering and exiting the vehicle Place the entry step in front of the entrance door to the caravan Ensure that the step is placed on a level surface this prevents the step from falling over Note the varied step heights and when exiting ensu re you will step onto ...

Page 39: ...Emptying the waste bin To empty the waste bin first open the lid Carefully release the grey mounting frame from its position The bin can then be opened by folding it down and the contents can be removed Emptying the waste bin The door blind and flyscreen Pull the door blind and the flyscreen on the entrance door to the desired position To open carefully guide the rail back to the original position...

Page 40: ... the door is not closed correctly it could become misshapen especially when the cara van stands unused for a longer period of time Spray the rubber seals on the access locker doors re gularly with silicone spray to ensure that they will al ways move easily and operate reliably Opening and closing the locker door Garage door Opening Unlock both locks with the key The handles will spring out j Turn ...

Page 41: ... after a few seconds it will fall into the lock by itself To open Unlock the lock j with the key Turn the handle down by 90 to a vertical position Swing the gas box lid slowly upwards To close Close the gas box lid and turn the handle by 90 to a horizontal position to lock it Lock the lock with the key to secure it 1 Gas box lid handle Opening the gas box lid To open Unlock the lock j with the key...

Page 42: ... example fresh water filler cap or city water supply connection external socket and aerial connection in the awning external gas socket CEE external socket Cover flap 1 2 To open Unlock the lock j with the key Press the knob k and swing the door to the side To close Push the cassette door closed until it snaps in Lock the lock j with the key Toilet cassette door Toilet cassette door Door retainers...

Page 43: ...ocated in the gas box at the front it is firmly clipped into a holder on the floor 5 3 Corner Steadies The corner steadies are located in the front and rear under the caravan Winding the corner steadies down Park the vehicle as horizontally as possible On soft ground lay a sturdy mat or suitably sized board under the eet of the corner steadies to prevent the caravan from sin king Push the winding ...

Page 44: ... or icy The maximum total load for the roof rail is 80 kg 5 5 Guide rail for awning and draft skirt The bead of the awning slides into the guide rail for the awning on both sides of the caravan both at the front and rear ends The slot in the awning rail is wider j at the rear end of the caravan above the rear lights This makes it easier to insert the awning Awning rail with opening Further informa...

Page 45: ...y lashed using the straps k The fastenings inclu ded in the accessory kit are used for the frame When driving close the locks l When the caravan is not being moved the lever jcan be folded down in order to access the gas box To do this the locks l must be opened Straps and locks Alternatively a rear mounted bicycle carrier may be selected except in the Premium models The towing characteristics of ...

Page 46: ...of awning sectional view Roof awning An awning offers protection from the sun not against the elements Do not place people or obstacles in the extension re traction area of the awning The awning winding mechanism is fitted with a mecha nical block control to limit the extent to which it can be extended Never attempt to exceed the block control by force Always support the awning with the integrated...

Page 47: ...etract the awning until the canvas is tightly stretched again Retracting Insert the the end of the winding handle into the slot on the win ding mechanism Turn the the handle counter clockwise until the awning has been rolled in except for the last meter Retract the adjustable support legs fold them up and secure them Only then should you roll in the awning completely and secure it Remove the handl...

Page 48: ...ds the short edge twist the handle inwards Pull on the handle until the door opens To close Use the handle to press the door shut until you can feel it lock into place Only the doors on the kitchen wall cabinets have an extra lock The other wall cabinets are shut using the spring force of the hinges Mirror cabinets rear washroom model specific To open Open the door of the mirror cabinet by pressin...

Page 49: ...he door Washroom door handle Furniture doors with a soft close function Wall cabinets storage cabinets To open Use the handle to pull the door upwards To close Use the handle to shut the door until the soft close function automatically brings the door to its final position Furniture doors with a soft close function Store only light objects in the upper storage cabinets These doors are held closed ...

Page 50: ...Press the push lock juntil the knob snaps into place and the drawer is securely shut Please observe the maximum load of 15 kg per drawer Carousel in the Corner Kitchen Release the door of the corner base cabinet by pressing the pushlock j Then use the push lock to swing the door open The lower part of the cabinet will swing open with the door Pull gently on the upper storage shelf to pull it caref...

Page 51: ...tend the TV mount To retract the mount push it back to its original position until it is noticeably locked into place Sliding TV Bracket for Model 620 CL only Extendable flat screen TV 230V sockets and the antenna terminal for the TV and the recei ver are located directly next to the place of installation for the TV model specific location Sliding doors To open Hold the sliding door by the handle ...

Page 52: ...ion Metal elevating table base Single post lifting Single post elevating table leg To lower Move the lever j to the other side Press on table top to lower the table Move the lever j back to its original position 1 Lever j to lower the table 1 The single post lifting table leg can be lowered and the table top can be moved around on top of the leg To unlock pull the locking pin k up and then pull th...

Page 53: ...comfortable beds Converting the seating area to a bed Converting the seating area Notes on arranging the cushions How to arrange the cushions depends on the caravan model In some caravan models one or more additional cushions are required to convert the bed These are included separately in the caravan In main seating area the rear seat cushions j remain in place Depending on the model it may be ne...

Page 54: ...alls In some models the narrow section of the seating arrangement can be widened into a bed Bed extension in the seating area or model specific Conversion Press the outer panel j to unlock the bed extension Lay the outer panel l fully on the floor in order to raise the inner panel k Hook the outer panel l underneath the groove of the inner panel k Carry out this procedure in reverse order to conve...

Page 55: ...e the backs from the seating area Switch off the lighting underneath the alcove bed Release the lock for the drop down bed by holding the knob j firmly pressed Use the handle k to pull the drop down bed to the desired posi tion but no further down than it will go Hang the ladder stored in the wardrobe when the caravan is deli vered over the handle k When sleeping always clip the netting that prote...

Page 56: ...ally lock the door Head rests are only available together with the optio nal leather interior 1 Children s bed with drawing board Windows next to children s beds can only be opened slightly to effectively prevent children from falling out Children s beds If the upper bed is used by children take care to ensu re that they do not fall off Never leave small children unattended in the caravan Never le...

Page 57: ...f the clips do not automatically lock and unlock they must be moved manually 6 5 Washroom 1 2 Securing the shower door while driving Closed shower door Shower cubicle door in the rear washroom To fold the shower door out Loosen the pushbutton j Fold out the handles kon the shower partition Fold out the shower door and guide it to the opposite side To shut the shower door Guide the shower door back...

Page 58: ...s have been used in the caravan Fully adjustable window stays To open Should there be a locking button press it to work the window catch Turn all catches j by 90 Press the window catch outwards with your hand until it is open as far as you would like Then use your other hand to tighten the turn screw l until you feel the resistance and the window is held in place To close Loosen the turn screw l t...

Page 59: ...t blind The blind rolls upward automatically To close the fly screen Pull the fly screen completely down with the handle and let go The screen remains in this position To open the fly screen Pull the fly screen slightly down with the handle and then guide it upward The screen rolls upward automatically Blind fly screen Do not let the blind or the fly screen retract on its own keep hold of it Do no...

Page 60: ...hinges and the opening mechanism Before opening remove snow ice or heavy dirt Make a note of the required space needed before opening the roof light under a tree in a garage etc Do not step on the roof light Close and lock roof lights before driving Open fly screen and blind fully open position Close blind only 3 4 of the way if the sun shines in strongly danger of heat accumulation The openings f...

Page 61: ... place of installation Fly screens and blinds plissés Both plissés are fully adjustable by sliding them horizontally from side to side Before opening the roof light ensure that the area above the opening of the light is free The roof light can be opened to an angle of 60 To open Take hold of the handle and fold it out into the operating po sition Turn the handle clockwise to open the roof light ou...

Page 62: ...t unhooks from its locked position At the same time using the handle k to press the roof vent upwards To close Use both handles k to pull the roof vent firmly downwards until both catches j have latched into place Blind fly screen To close Pull the handle l of the blind to the opposite side and hook the clip m into the counterpartn To open Press the catch and tilt it slightly to enable it to unhoo...

Page 63: ...ystem protects the battery by switching off devices For further information please contact the manufacturer of your car Advice and instructions Important The caravan s electric system should preferably be inspected within a period of less than three years If the caravan is used frequently an electrical engineering specialist should inspect the electric system every year Only specialists may make p...

Page 64: ...ease refer to Chap ter 7 3 Battery Management to calibrate the sensor In the case of misuse the guarantee and manufacturer s liability will no longer apply Ensure that the battery charger is sufficiently ventilated Tank probe The probe with rods measures the contents of the fresh water tank Never let the water stand too long in the tank to prevent scaling in the waste water and waste tanks as well...

Page 65: ...nables you to operate the different lights and several 230 V devices Furthermore various kinds of information and measured values are shown on the TFT display Standard control panel ONTOUR De Luxe Edition Excellent Prestige TFT control panel Premium models or optional extra Vehicles that have been equipped with a Truma Combi heating system or VarioHeat also have a TFT control panel 1 Control knob ...

Page 66: ... tow vehicle if they have been centrally activitated using the main switch on the control panel Wall light lighting in the seating area Ceiling light Functions of the main switch After initially connecting the caravan to the 230 V mains you must press either the main switch or any other control key in order to activate all of the 12 V electrical devices and the 230 V electrical devices that are sw...

Page 67: ...itchen light as well as the spots on and off Memory button This button is used to save and recall the setting of individual lights Press briefly on this button to recall the last saved setting of all switchable 12 V lights Press longer on this button to save the lighting setting of a lamp This button is not used to save the setting of the 230 V electrical devices therme and floor heating The awnin...

Page 68: ...vices These devices cannot be switched on and off if there is no mains connection Align the caravan horizontally to obtain a reliableresult from the water level indicator Filling level indicator only standard panel When you press this button the fill level of the fresh water tank is displayed via an LED chain The level of the fresh and waste water tanks is displayed in 5 steps empty only the left ...

Page 69: ...e acknowledged The warning will not appear again when the defect has been fixed Other wise the warning will continue to be shown until the tow vehicle has been switched off or the 13 pin cable has been disconnected Depending on the source of power either one of the icons on the left will appear If the tow vehicle s engine is started and the mains connection has not yet been disconnected the follow...

Page 70: ...m is starting up or shutting down Soft key menu bar C This is used to access the individual menus for the items fitted and their current settings Soft keys The soft keys are used to carry out the commands displayed in the lower menu bar C For example they enable access to submenus increase or reduce the values shown or represent the Return button Back function Control knob Like the soft keys the c...

Page 71: ...4 C 06 06 16 26 4 C Display battery charging Submenu setting the battery type The temperature of the battery must not exceed 50 C A warning message will be sent if the temperature ex ceeds 50 C and the battery will be shown in red in the main menu on the control panel If the battery is overheated it cannot be charged Should this warning occur repeatedly the caravan must be taken to an authorised s...

Page 72: ...nction otherwise after one minute it will automatically switch back to the main menu on the control panel Setting the battery type The type and capacity of the batteries have been set by the manuf acturer These settings must be changed when the type of battery is changed Use the arrow keys or the control knob to select the desired value Increase or decrease it by means of the functions If the cont...

Page 73: ...versions The awning light automatically switched off as soon as the tow vehicles engine is started Additional lighting model specific blue dot timer activated green dot light switched on Programming the timer To set the timer for the lights rotate the control knob to select the desired light or use the functions to set the time Press the control knob again or use the On Off function to confirm the...

Page 74: ... or OFF The ultraheat electric heating is not switched on white icon is shown The heating system is activated or deactivated using the On Off function in menu bar C The icons for temperature and performance level as well as the info icon shown in menu bar C lead to further submenus by means of the soft keys or setting the control knob to a selection 6 500 W 6 500 W 6 500 W Info menu Information ab...

Page 75: ...ausgewählten Energieart Auswahl der Energieart Zurück MENÜLEISTE HAUPTDISPLAY Energieart Gas Energieart Gas Elektro 900 W Energieart Gas Elektro 1800 W Energieart Elektro 900 W Energieart Elektro 1800 W Das Untermenü der Energiearten kann nur bei den Heizungen TRUMA Combi 4E oder 6E aufgerufen werden The TFT control panel can only be used to control the basic functions of the heating system To use...

Page 76: ... Einstellen der Temperatur Zurück MENÜLEISTE Bestätigen der ausgewählten Energieart Auswahl der Energieart Zurück MENÜLEISTE HAUPTDISPLAY Energieart Gas Energieart Gas Elektro 900 W Energieart Gas Elektro 1800 W Energieart Elektro 900 W Energieart Elektro 1800 W Das Untermenü der Energiearten kann nur bei den Heizungen TRUMA Combi 4E oder 6E aufgerufen werden The menu shown above can only be selec...

Page 77: ...C on 12 25 27 4 C 06 06 16 26 4 C 2 20 C 12 25 27 4 C 06 06 16 26 4 C 19 C 1 Setting the temperature The desired temperature can be set here 16 31 C This is not possible in air circulation mode because neither the cooling nor the heating function are then active ETIC 12 25 27 4 C 06 06 16 26 4 C DOMETIC on 12 25 27 4 C 06 06 16 26 4 C 2 20 C 12 25 27 4 C 06 06 16 26 4 C 19 C 1 Dometic Info Dometic...

Page 78: ... menu Information on the device manufacturer is shown here Dometic Info Dometic Servicepartner http service location dometic com http dometic com 12 25 27 4 C 06 06 16 26 4 C It is possible to move from the main menu for the auxiliary heating ultraheat menu by pressing the back button again After one mi nute all menus automatically switch back to the main menu on the control panel The aforemention...

Page 79: ... C Albania North Countries that can be set have been stored in the country list regions that can be set are North Middle South Submenu set position Setting the country combined with the region Back 19 2 E ASTRA 12 35 27 4 C 06 06 16 26 4 C Submenu set satellite Satellites that can be set have been stored in the satellite list Setting the satellite Back Info menu Information on the device manufactu...

Page 80: ... confirm the changed setting Only then will it be saved The wake up Alarm time is set and confirmed in the same way Use the On Off function to activate the alarm clock The activated alarm clock is shown in green It is also possible to calibrate the indoor and outdoor temperatures shown as temperature effects on the sensors may lead to a deviati on between the temperature displayed and the actual t...

Page 81: ...ension for the telephone contract After 12 months the SIM card will be deactivated if no extension has been purchased It is then possible to extend the existing contract for a further 12 months After this deadline has expired the SIM card will become invalid In order to reactivate the HobbyConnect system a new SIM card must be purchased from the Hobby dealer The MyHobby app is only available for i...

Page 82: ...bbyConnect system can only be controlled via Bluetooth If the contract is not extended the components can only be operated by remote control via Bluetooth when standing in the near vicinity To enable data to be transferred the camper must be located within the group of countries shown in hatched lines on the map on page 87 The telephone contract runs for 12 months Contract extensions must be purch...

Page 83: ...onnect MyHobby j to start the app You will be asked to register the first time you start the app Use the menu k to register To register follow the instructions in the sec tions below for the Android operating system or the iOS operating system depending on which system your mobile device uses If the app has already been started select MyHobby Code p to view your account data Descriptions and illus...

Page 84: ...gistering in the Android operating system is shown on the left Click on Not a member Sign up now l to register Complete registration as described in Ill 4 Use the Forgot password function nto reset the password and have a new password sent to the e mail address entered Ill 3 Ill 4 a Ill 2 Email Password Not a member Sign up now 3 LOGIN 4 Forgot password 5 Login In order to use MyHobby you must fir...

Page 85: ...he cara van has been connected to the app for the first time by entering the access code Before this has been com pleted it is not possible to connect via Bluetooth Ill 5 My Page Login Set up free account MyHobby Code Bluetooth Connections to MyHobby My Settings Messages Terms of Use About us 7 8 Ill 6 When you have received the Hobby code select MyHobby Code p and enter the access code Enter MyHo...

Page 86: ...nnection to the caravan Settings OK Activate and deactivate the Bluetooth connection by means of the On Off function in the submenu 11 The system counts down the remaining time from 2 minutes During this time the caravan is displayed on the mobile device via Bluetooth Ill 10 11 2 Activate the Bluetooth function on your mobile device If necessary use the manufacturer s operating instructions The My...

Page 87: ...already enabled Delete enabled pairing When the Bluetooth functions have successfully been activated use the Bluetooth button q on the app s Start menu to connect the components and then start the Search function 12 This procedure can take up to 30 seconds Ill 11 1 Activate Bluetooth on the control panel Select Bluetooth from the menu on the control panel in the vehicle Now activate Bluetooth 2 Se...

Page 88: ...ill be displayed Activate the notification option to receive a message when the battery is low Battery status Charging Water tank Tank level indicator 32 5 C in the caravan 26 0 C outsidetemperature 2 users Caravan online no of lights on BATTERY OPERATION Send message when battery level low Special features indicate that a connection to the ca ravan could not be set up The overview will be greyed ...

Page 89: ...he function can be programmed to send you a mes sage if the system recognises there is a danger of frost enabling you to switch on the heating if necessary to prevent the caravan freezing up Ill 18 Ill 19 Information If your camper has an air conditioning system please check whether it is connected to the power supply Heating system switched off Air conditioning N A Floor heating binnentemperatuur...

Page 90: ...l light Bathroom light 2 Ambiente 1 Ambiente 2 Ambiente 3 Add lighting Bathroom light 1 Bed left Bed right Light Groups Weather and location The outside temperature is detected via a sensor A weather forecast is displayed for the next three days After parking the vehicle in a certain location activate the function Notify location This enables the system to understand that the camper is not to be m...

Page 91: ...87 7 Installation of electrical devices The MyHobby App is available in the following countries ...

Page 92: ...he location and then check again Only the air conditioning system is not recognised Press the main switch located di rectly on the roof air conditioning system to operate the device Contact your dealer The connection was interrupted Disconnect the power cable from the box for 10 seconds and then restart Still no connection have your dealer check the data App connection exists but ele ments in the ...

Page 93: ... removed from the furniture front by carefully clipping the chrome plated frame out of its holder You will then see the screws that fasten the plastic part to the furniture Loosen these screws to detach the display When replacing the battery please ensure that plus and minus are in the right direction Incorrect polarity may cause the display to become defective Circuit board reverse side of TFT di...

Page 94: ...height that can be reached by children This switch enables them to turn the main lights on and off Remote control bed Briefly press the key to switch the ceiling lighting in the ONTOUR De Luxe model ceiling light over the bed otherwise ambient interior lighting left bed light right bed light on and off Press longer on the key to dim the light if required The brightness you set will be saved when t...

Page 95: ...own m Remove the CEE connector plug k Press the cover flap j down until it clicks into place Automaticcircuit breakerwithFI fast interrupt switch Only plugs and cords that comply with CEE stan dards must be used To connect to a mains hook up point Pull out the 13 pin plug that connects to the tow vehicle Switch off the automatic circuit breaker l by pressing the rocker button down m Take hold of t...

Page 96: ...device RCD with a residual current of 30 mA is less than 0 1 seconds 1 2 Rules for the mains connection Use only a 3 x 2 5 mm cable with a maximum length of 25 m a CEEconnector plug and connector to connect the caravan to an external 230V mains The 230 V mains connection in the caravan has been designed for a total power consumption of 2300 W If additional devices requiring electricity are connect...

Page 97: ...ase when a 12v battery system self sufficient package is installed This check should be carried out at least once a month to ensure that the residual current device functions perfectly in case there should be a fault in the current When the FI switch has been switched off even when testing the customised settings in all mains operated devices are lost and the default settings made by the manufactu...

Page 98: ...ke and capacity Setting the battery type on the control panel see p 68 Before disconnecting or connecting the battery dis connect the electric connection to the tow vehicle and switch off the 230 V supply the 12 V supply as well as all electrical devices Before replacing fuses you must first turn off the battery charger Before replacing a blown fuse you must first fix what ever caused the fuse to ...

Page 99: ...rcuit breaker If the caravan is not used for a long period of time please disconnect the battery from the electrical system in order to prevent the battery from being excessively discharged Pushbutton 1 Pushbutton Battery container Always charge the ancillary battery for at least 10 hours before each journey directly after each jour ney and before you take the caravan temporarily out of service Be...

Page 100: ...sin ambience 3 ambience 1 Electric circuit 7 5 A water pump Toilet flush fridge light Assignment of fuses The fuses for the individual internal electric circuits are located in the lighting control module They are assigned as follows from left to right In some models there may be slight deviations in this assignment Only replace blownfuses if you know what caused the fuse to blow and have fixed th...

Page 101: ...che 47 48 Zusatzleuchte Taster links Ambiente 2c 24 Ambiente 3a 21 25 27 Dusche Ambiente 3b Ambiente 3C 28 22 29 Ambiente 1c Ambiente 1b Ambiente 1a Küche Kind 1 Küche Kind 2 Funk Fernbedienung Bett 1 Bett 2 Bad 1 Bad 2 Zusatzpanel 1 Hauptpanel CI BUS CI BUS CI BUS CI BUS CI BUS CI BUS CI BUS Hobby Connect Ext HS GAS 53 Küche 2 Küche Protective conductor Bridge circuit from S37 to 4 Therme Boiler ...

Page 102: ...t or an output socket For further information please speak to your Hobby dealer 7 7 TV Connections External socket and antenna terminal in the awning TV unit The installation area for the flat screen TV differs from model to model The required connections can be found right next to this space possibly in a cupboard TV connections The corresponding connection for the satellite antenna E3 is loca te...

Page 103: ...ion pull off the foil that prevents battery contact The lamp can be removed from its holder and used as a torch Wardrobe light 2 Touch spotlight model specific The touch spotlights are switched on and off by using the rocker switch j The light can be regulated with varying intensity 1 Touch spotlight Children s bed light Children s bed light is switched on and off by turning the bear s nose This l...

Page 104: ...ity Under no circumstances should garden hoses watering cans and similar materials that are unsu itable for drinking water be used to fill the mobile system If the caravan will not be used for a long period of time the entire water system must be emptied completely After long periods of stagnation the water system must be rinsed thoroughly before it is used again If you find that it is contaminate...

Page 105: ...ove it To close Put the blue cap back on and turn it clockwise to shut it Lock again with the key If you put too much water into the tank the excess will run out through an overflow l underneath the caravan Water can be emptied from the tank by unscrewing and removing the overflow pipe l The water in the tank should be replaced regularly see Chap 12 2 Check the red cap mregularly they may become l...

Page 106: ...ap Never introduce anti freeze or other chemicals into the water system This can be poisonous When operating during winter ensure that the fresh water tank is sufficiently heated insulated Use the control panel to check the amount of water in the fresh water tank Therme Filling the water system Site the caravan in a horizontal position Shut all of the water taps Switch on the main switch on the co...

Page 107: ...insert the overflow pipe and the water pump in the fresh water tank and close the openings Leave the taps p and the drain valves q open Clean the tank and rinse it thoroughly Allow the water system to dry for as long as possible Do not forget to empty the toilet cassette 8 Diagram of hot water supply 7 6 8 Outlet valves for therme If the vehicle is not being used and there is a danger of sub zero ...

Page 108: ...nk is stored in the gas box to save space Empty the waste water tank before beginning your journey and then use the belt in the gas box Empty the waste water tank if there is danger of frost Never pour boiling water into the sink waste This can lead to deformities and leakages in the waste water system Waste water tank Handle Waste water tank in the gas box Position of the Frost Control valve only...

Page 109: ...es the water intake Disconnect the hose connector to remove the caravan from the permanent water system City water supply connection 1 Sink in the kitchen unit When necessary the sink waste j can be removed by unscrewing the screw k When the waste jis then replaced in the sink and fastened please observe the maximum tightening torque of the screw The maximum tightening torque for the fixing screw ...

Page 110: ...iquids directly through the sliding flap or the toilet bowl because this may damage the washer sliding flap in the top of the waste tank cassette Always add liquids through the empty ing support Fig 3 We recommend that you press the vent button at the rear topside of the cassette before putting the waste tank back into its original position To avoid water damage in your caravan ensure that you are...

Page 111: ... flap every time you have finished using the toilet Never leave any water in the bowl when the toilet is not being used This prevents unpleasant odours Using the bench toilet The button for flushing j is on the control panel The LED for the filling level indicator k is located behind the turning unit and lights up when the waste tank is full and needs to be emptied The lever l for opening the slid...

Page 112: ...y press the vent button when the drain tube is in a downward position Please refer also to the manufacturer s operating manual included in this package To prevent damage by water to your vehicle the wa ste tank should be no more than full when driving Otherwise it may leak through the ventilation system The cassette can only be removed when the drain valve is closed Emptying the waste tank cassett...

Page 113: ...r is responsible for arranging the inspection This also applies for vehicles that are not licensed to drive on public roads The gas operation pressure is 30 mbar You are not permitted to operate the heating system while driving If you suspect that gas is leaking take the following measures immediately Close the stop valve on the gas bottle Ignition sources such as open flames or smoking are strict...

Page 114: ...ace the hose Connections on gas pressure regulators are screwed on anti clockwise High pressure gas hoses must be replaced every 5 years the manufacturing date printed on the hose is decisive for determining when this must be done Before first use The outlet pipe must be securely attached to the heating sys tem and the flue making sure that it does not leak It must not be damaged in any way Ventil...

Page 115: ... valves on the gas bottles can be easi ly reached at any time The ventilation of the gas bottle box gap between the bottom of the bottle box and the front wall must not be blocked Lock the gas bottle box to prevent unauthorised people from obtaining access 6 Gas bottles must only be carried in the gas bottle container Gas bottles must be turned off whenever you are driving Securing the top of the ...

Page 116: ...cause small leaks to occur If you suspect leaks have your dealer or another expert inspect for leaks Such an inspection may never be conducted in the presence of open flames Never smoke or light open fires when changing gas bottles After changing bottles check whether gas is escaping from the any gas fittings by spraying these with a leak indicator When the pig tail is connected to the liquid gas ...

Page 117: ...ucted in such a way that the emergency shutoff valve can only be opened if a gas hose has been attached When connecting the plug connection is plugged into the safety coupling If no gas hose has been attached always use the protective cap to close off the opening of the valve The operating pressure of devices to be connected must be 30 mbar Maximum performance of devices to be connected 1 5 kW The...

Page 118: ...will become void and in some countries this means that the operating licence for the vehicle is also void Please also refer to the instructions in Chapter 9 for operating gas devices gas regulators and gas bottles Please observe the instructions in Chapter 7 for ope rating electrical devices Having the heater lit while driving is not allowed The space behind the heater may not be used as stowage s...

Page 119: ... will continue to click until the control knob j is switched to 0 To turn off Turn the control knob j to position 0 The automatic ignitor is then shut off Switch off the fan set the rotary switch to 0 If the caravan is not in use for a long period of time close the valve on the bottle and the shutoff valve for the heating in the kitchen drawer see Chapter 9 1 During initial operation of the heatin...

Page 120: ...satisfaction To start the fan the heating system must either be con nected to a 230V power supply or 12V via the camper s battery should you be using a stand alone power supply Manual control Turn the lower ring to M Set the fan speed on the upper ring To switch off Turn the lower ring to 0 Automatic operation Turn the lower ring to A B A B B The electronic system regulates the required blower spe...

Page 121: ... the electric component will switch itself off to prevent the stronger gas burner from possibly overheating To switch on Set the rotary switch to the desired power setting green indica tor light will light up during Operation Set the desired room temperature using the rotary switch To switch off Use the rotary switch to turn off the heater Ultraheat 230 V 2000 500 1000 1 3 5 7 9 Standard rotary sw...

Page 122: ...gas bottle and gas shutoff valve in the kitchen drawer An additional 12V 230V connection is required to start the device Place of installation side seat in the seating area Only operate the device if it is in perfect technical condition Always have malfunctions repaired immediately Only repair malfunctions yourself if such malfunc tions are described in the troubleshooting instruc tions in this ma...

Page 123: ...saved by briefly pressing the button Selected menu items flash Turn to the right Goes through the menu list from left to right Increases the values Ì ªΩ ı ı Ì ªΩ ı ı Turn to the left Goes through the menu list from right to left Decreases the values Press the button briefly Saves a selected value Selects a menu item changes to the setting mode If the system s power supply is interrupted the time m...

Page 124: ...ng knob pushbutton Previously set values operating parameters will be reactivated when the control panel is switched back on To switch off Press the control knob pushbutton for longer than 4 seconds Combi heating system only iNet ready After 2 seconds APP appears on the display after a further 2 seconds OFF appears on the display Due to an internal lag feed in the heating or air condi tioning syst...

Page 125: ...es will be saved Turning off the APP mode The APP mode is turned off when new values are transferred via the Truma APP or the air conditioning system s infra red remote control when the Truma CP plus control panel is alerted by pressing the control knob pushbutton The previously saved values will then be imported for renewed operation Use the control knob pushbutton to select the icon in the menu ...

Page 126: ...he control knob pushbutton to select the icon in the menu line l Press to switch to the setting mode Use the adjusting knob pushbutton to select the desired type of energy Press the adjusting knob pushbutton to confirm the temperature Selecting the type of energy for Combi E heating only Electric heating power Level 1 900W level 2 1800W 1 Mixed operation electric and mixed operation are optional e...

Page 127: ...depending on the size of the vehicle and the outside temperature Use the control knob pushbutton to select the icon in the menu line l Press to switch to the setting mode Use the control knob pushbutton to select the desired fan speed Press the control knob pushbutton to confirm the temperature Selecting the fan speed a b c d 3 e Special features in electric operation If the 230V power supply is i...

Page 128: ...ly be taken into account after the next start end time has been reached Until then the operating parameters set outside the timer will remain valid Setting the room temperature Use the control knob pushbutton to select the desired room temperature Press the control knob pushbutton to confirm the temperature Danger of poisoning from exhaust fumes The activated preselection timer switches the heatin...

Page 129: ...emperature for Combi heating system only has been set Activating the timer ON Use the control knob pushbutton to activate the timer ON Press the control knob pushbutton to confirm the time entered Deactivating the timer OFF Press to switch to the setting mode Use the control knob pushbutton to deactivate the timer OFF Press the control knob pushbutton to confirm the time entered The timer will con...

Page 130: ...changed in 10 increments Changing the background illumination of the control panel The temperature sensor for the heating can be individually adjusted to the size of the vehicle The offset can be set in increments of 1 C within a range of 5 C to 5 C VarioHeat range of settings from 5 C to 5 C possible Setting the time The hours flash Use the control knob pushbutton to set the hours 24 hour mode Af...

Page 131: ...rol knob pushbutton to select the icon Press the control knob pushbutton The current warning code will be displayed Use the error list to determine the cause of the warning and eliminate it W Warning 42 Error code H Heating Cause eliminated Return to setting mode Press the control knob pushbutton Cause not eliminated Return to setting mode Press the reset button In this case the warning will not b...

Page 132: ... restarted Cause not eliminated Return to setting mode Press the reset button If the cause has not been eliminated the malfunction will occur again and the control panel will once again go to Malfunction mode Due to an internal lag feed in the connected devices this may take a few minutes In this case the malfunction will not be acknowledged on the control panel and the warning icon will continue ...

Page 133: ...ton Position m and the boiler filled if the valve temperature is above approx 7 C If the temperature of the safety drain valve is lower than approx 3 C the push button will pop out Position n and the contents of the boiler will be emptied via the drain outlet o The heated area is located in the central walking area of the floor It is 60 cm wide It serves not only to heat the room but also reduces ...

Page 134: ...2V 230V connection is required to start the device Alde hot water heating system Installation position in the wardrobe Modes of operation LPG operation Mains electricity 230 V Combined LPG and heating cartridge operation Function modes Water heating Heating and water heating Heating Operating device When in the idle position the device shows which heating functions have been activated the backgrou...

Page 135: ... been activated Is a de icer has been installed the icons will be displayed for the set mode together with the bottle icon H Nighttime automatic system This icon is displayed when this function is activated I 230 volts This icon is displayed when a voltage of 230 V is applied to the heating system J On Off button Main switch for the heating system K MENU key Key for the settings menu The functions...

Page 136: ... settings for hot water if the daytime or nighttime automatic system is in ope ration and you have switched off the hot water The plus and minus icons are then greyed out If the Operation function for the pump has been set to Cont you cannot select this If the Operation function for the pump has been set to Cont the function Permanent pump operation will be disabled for 30 minutes but then returns...

Page 137: ...r of the vehicle Switching the hot water floor heating system on and off To operate the hot water floor heating system the hot water he ating system must be switched on This can be controlled via the TFT control panel or via HobbyConnect see also descriptions in Chapters 7 3 and 7 3 1 as well as via the manufacturer s own control panel for the ALDE 3020 HE The hot water floor heating system is con...

Page 138: ...f the boiler Operating on electricity Use the control panel to switch on the boiler therme switch The control light will shine When operating on electricity it is not possible to preselect the water temperature This is automatically set to approx 70 C When operating on electricity the boiler functions only when the caravan is connected to the 230 V mains supply 10 3 Electro Boiler The optional boi...

Page 139: ...ee ways The desired mode of operation is set using the energy selection switch 12 V operation electrical supply from the battery of the towve hicle j ignition on 230 V operation electrical supply from mains hook up k liquid gas gas bottles from the caravan l Modes for operating the refrigerator If the external temperature is high full refrigerating capacity can only be ensured by means of sufficie...

Page 140: ...se the button when the the indicator is in the green zone Use the thermostat o to regulate the cooling capacity No absolute temperature values have been assigned to the tempe rature levels To switch off turn the energy selection switch to 0 m Close the main shutoff valve on the gas bottle and the gas valve marked refrigerator 12 V operation 12 V operation can only be used while driving when the mo...

Page 141: ...the base of the freezer Removing the base of the freezer Do not leave the refrigerator in the ventilation position while driving The freezer compartment is suitable for making ice cubes or for storing frozen food for a short period of time It is not suitable for freezing food It is not suitable for freezing food nor for the proper storage of medication Environmental conditions influence the perfor...

Page 142: ...igher than the top edge of your pot keep it lower Never allow gas to escape without burning Danger of explosion Do not shut the glass cover j after cooking until the burners have cooled down Do not store easily inflammable objects such as dish cloths towels etc near the cooker Danger of fire 2 Glass cover Control knobs for burners on the gas hob 1 10 5 Gas hob The kitchen segment of the caravan is...

Page 143: ...m kitchen odours Extractor hood Control knobs for the fume hood The ventilation openings on the device must not be blocked A skylight or window must be open when operating this device Open the gas valve for the oven Hob oven combi nation Should you smell gas immediately close the valve and the gas bottles The oven door must be open during ignition Never operate the device if there is nothing in it...

Page 144: ...n the 12 V power supply using the main switch on the control panel Open the main shutoff valve on the gas bottle and the gas valve marked oven Open the oven door completely Position the baking tray or grill so that it is not in direct contact with the flame Lightly press on the temperature control knob and turn it to the desired ignition position oven or grill Press the temperature control knob Ga...

Page 145: ...e control knob k to the 0 position Switching the grill on Open the grill door and press the control knob l Hold the control knob l pressed and turn it to the High Fla me position Hold the control knob l pressed for 10 15 seconds and then release it Set the desired temperature To switch off Turn the control knob l to the 0 position Close the main shutoff valve on the gas bottle and the gas stop val...

Page 146: ...r level 400 W is selected the maximum amount of cooking time is 30 minutes Please refer to the separate operating instructions for safety instructions and detailed information on how to operate use and care for the microwave Operating the microwave Cooking Put the food in the microwave and shut the door Press POWER j to select the desired level 600 W 500 W 400 W Press the preset number key m to en...

Page 147: ...Avoid opening doors and windows unnecessarily Do not plug or cover up air intakes and openings Do not spray water into the air conditioner Keep all easily inflammable material away from the system Keep all doors and windows closed and only air thoroughly occasionally When the windows are open warm and therefore humid air will flow into the caravan where it is cooled down The resultant moisture wil...

Page 148: ...park position Increasing the normal height of the caravan by means of an aerial or satelitte dish that has not been lowered can increase the risk of accidents The car driver is solely responsible for the condition of the superstructures and fittings A maximum speed of 100 km h is permitted Should there be a gale or thunderstorm both the turning device as well as the caravan itself may be damaged T...

Page 149: ...d of tyre repair kit 26 00 Spare tyre with AL KO mount mounted underneath the chassis 28 20 Spare tyre with AL KO mount instead of tyre repair kit mounted underneath the chassis 26 00 Superstructure A frame bicycle carrier for 2 bicycles 9 70 External storage locker beneath bunk bed 5 00 Front window hinged cannot be retrofitted 11 30 Optional locker door THETFORD 0 50 Rear mounted bicycle carrier...

Page 150: ...ank incl CI BUS 0 10 USB charging double socket 0 00 Heating air conditioning Electric auxiliary heating system TRUMA Ultraheat 2 00 Floor heating 4 00 6 00 Heating TRUMA Combi 6 instead of S heating 3 70 Heating TRUMA Combi 6 E instead of S heating up to 4 80 Heating TRUMA Upgrade from Combi 4 6 to Combi 6 E up to 1 10 Heating TRUMA VarioHeat Comfort 3 7 kW up to Type 495 1 20 Hot air system TRUM...

Page 151: ...ravan must be taken to a Hobby dealer 12 18 months after receipt of the vehicle After the initial inspection for leaks this inspection must be repeated every 12 months during the warranty period Hobby recommends that you contact a service partner before driving there and enquire whether they have the necessary capacity e g an adequate car lift in order to avoid any misunderstanding The inspection ...

Page 152: ...s regularly Greasing and oiling Regularly examine and grease the sliding parts and stationary parts of the chassis If the caravan is used seldom yearly mainte nance is required Rubber spring axles require no maintenance The axle s of the caravan is are fitted with compact wheel bearings The cylinder hub compact bearings and axle nuts form a closed unit The compact bearings are free of maintenance ...

Page 153: ...e stabiliser hitch head 5 the towbar or brake rod in the linings of the overrunning equipment are running dry Hints For 1 2 3 and 4 Sand down the surfaces of the tow ball and clean them with a thinning solvent or spirit for 5 Use a lubricating nipple to grease the linings Pull back the shock absorber and grease the bare hitch shaft 1 12 3 Brakes Initial inspection The brakes must first be inspecte...

Page 154: ... be defect the entire rear light must be replaced Changing the licence plate illumination To change the registration plate light first unscrew these screws j Remove the two wires k and attach them to the new light They can re connected to any terminal When putting in the new light take care to ensure that the clo sed side l of the light points towards the plastic on the rear bumper k Otherwise the...

Page 155: ...ent models 1 Loosen the screws Reverse side of rear light Remove the two screws j Remove the rear light from the light pillar Remove the bulb from the socket by turning it Carry out this procedure in reverse order to install a new bulb and replace the rear light Remove the bulbs from the socket ...

Page 156: ...r Inserting the rear lamp in the sealing Place the rear lamp back in the sealing by carefully pushing the rear light into the inner corner and pressing it lightly into place Then press the outer edge into the sealing whereby the inner corner of the lamp must not be shifted Check that the lamp is fully locked into place and fits smoothly j Rear light LED k Fog tail light light bulb l LED m Reversin...

Page 157: ...r anti clockwise until it can be removed from its mount Take out the used block battery and unpin it from the pins Connect the new block battery to the pins ensuring that the pins click into place on the poles of the block battery Place the battery in the smoke detector s battery container Place the cover of the smoke detector so that the holes for the lock are over the locking pegs Carefully turn...

Page 158: ...aning products not recommended for use abrasive cleaning agents scratch the surface cleaning agents that contain acetone immediately damage the plastic dry cleaning products diluents alcohols aggressive or solvent based cleaners cleaners from the chemical group such as ketone ester and aromatic solvents aromatic hydrocarbons e g all automotive fuels Direct contact with plastics such as PVC soft PV...

Page 159: ...ner can damage the caravan The temperature of the water must not exceed 60 C Keep the water jet constantly moving during the entire washing process The spray from the high pressure cleaner must never be pointed directly at the cracks of the doors or windows acrylic windows ventilation grills in the refrigerator service doors waste gas flues or skylights This may damage the caravan or water could g...

Page 160: ... The chassis of the caravan has been specially coated If the pro tective coating is damaged repair it immediately Coated areas should not be treated with spray oil The combustion air intake duct for the heating system is located underneath the floor of the vehicle Under no circumstances may liquid sprays underbody protection or similar products be allowed to interfere with it Skylights windows and...

Page 161: ...spreads and curtains dry cleaned do notwash them yourself Clean with the foam with a gentle detergent if required To reduce problems arising from dampness use wa ter sparingly when cleaning inside Always treat spots immediately Sponge spots but do not rub them Work from the edge towards the middle of the spot Never use household cleaners to remove spots Use a vacuum cleaner on the cushions regular...

Page 162: ...um cleaner or broom Rules for cleaning the toilet area Clean with neutral liquid soap and a nonscouring cloth Do not use a vinegar concentrate to clean the toilet and the water system or to decalcify the water system Vinegar concentrate can damage gaskets or parts of the system The rubber seals of the toilet should be cleaned regularly with plain water and a lubricant for seals not Vaseline or any...

Page 163: ...ust be operated regularly at least twice a year to remove lime deposits and to ensure that it is not blocked The glycol mixture in the ALDE hot water heating system should be replaced every two years because certain properties such as protection against corrosion deteriorate Oven Hob oven combination Neverusescouringagents hardbrushesorsharpmetalscrapers to clean the device or the glass surface En...

Page 164: ...containers Clean disinfect descale and completely empty all water pipes and taps Leave taps open Clean the fresh water tank and empty it by pulling out the over flow pipe see Chapter 8 2 Fresh water Clean and empty the waste water tank Clean and empty the toilet flushing tank model specific and the waste tank Clean the toilet sliding flap apply a lubricant for seals and leave it open Completely em...

Page 165: ...um and smooth surfaces Empty and clean the refrigerator Leave the refrigerator door in the ventilation position see 10 4 After cleaning them leave storage spaces cupboards drawers and furniture doors open to help air circulation Leave vents for forced ventilation open If the caravan is kept in an enclosed space you can leave the skylight open Air the caravan thoroughly every four to six weeks when...

Page 166: ...d not freeze Fill all of the water containers only after the interior has been thoroughly heated Since waste water is collected outside the vehicle add antifree zer or common salt to it The drain cock of the waste pipe must be kept clear The toilet can be used normally even in cold weather as long as the interior of the caravan is heated If there is a danger of frost both the cassette and the flus...

Page 167: ...te water in greenery or in drains Street surface water drains often do not lead to waste water treatment plants Empty the waste water tank as often as possible even if it is not yet full for hygienic reasons If possible rinse the waste water tank out with fresh water each time after emptying Only empty the toilet cassette at designated sites never out in the open Generally waste disposal stations ...

Page 168: ...est areas Always clean up picnic spots before you leave even if the rub bish has been left by someone else Never dispose of your household rubbish in the containers pro vided in rest areas Do not let the motor of your tow vehicle run unnecessarily while standing still A cold motor causes a lot of contamination while idling The quickest way to reach operating temperature is while driving Protecting...

Page 169: ...A 540 WLU 24EG 1500 1500 VGB 15 MV 20 2425 1 KFL 20 A WS 3000 H50 ZHL 15 A 540 KMFe 24EG 1600 1600 VGB 16 MV 20 2425 1 KFL 20 A WS 3000 H50 ZHL 15 A 515 UHK 24EG 1600 1600 VGB 16 MV 20 2425 1 KFL 20 A WS 3000 H50 ZHL 15 A 515 UHL 24EG 1600 1600 VGB 16 MV 20 2425 1 KFL 20 A WS 3000 H50 ZHL 15 A 545 KMF 24EG 1600 1600 VGB 16 MV 20 2425 1 KFL 20 A WS 3000 H50 ZHL 15 A 545 KMF 24EG 2000 2000 DB 20 MV ...

Page 170: ... 5 J x 14 5 112 ET 30 Steel 185 R 14 C 5152 2300 2050 4207 5591 6079 7271 5 J x 14 5 112 ET 30 Steel 185 R 14 C 5323 2300 2050 4269 5762 6250 7442 5 J x 14 5 112 ET 30 Steel 185 R 14 C 5411 2300 2050 4459 5850 6338 7530 5 J x 14 5 112 ET 30 Steel 185 R 14 C 5411 2300 2050 4459 5850 6338 7530 5 J x 14 5 112 ET 30 Steel 185 R 14 C 5323 2500 2250 4422 5762 6253 7422 6 J x 15 5 112 ET 30 OJ 15 5 225 7...

Page 171: ...L24A 1800 1800 VGB 18 MV 195 70 R 15 C LI 104 25 2025 KFL 20 A ZHL 15 A 495 UL L24H 1700 1700 VGB 18 MV 195 70 R 15 C LI 104 25 2025 KFL 20 A ZHL 15 A 495 WFB D64 1500 1500 VGB 15 MV 185 R 14 C LI 102 20 2425 1 KFL 20 A ZHL 15 A 540 UL M24 1500 1500 VGB 15 MV 185 R 14 C LI 102 20 2425 1 KFL 20 A ZHL 15 A M24 540 FU E37 1500 1500 VGB 15 MV 185 R 14 C LI 102 20 2425 1 KFL 20 A ZHL 15 A E37 540 UFf K...

Page 172: ...o 0 0 1750 1800 1750 1800 VGB 18 MV 34 1462 93 03 195 70 R 15 C LI 104 25 2025 no no 29 0 1600 1600 VGB 16 MV no no no no no 0 0 1750 1800 1750 1800 VGB 18 MV 34 1462 93 03 195 70 R 15 C LI 104 25 2025 no no 29 0 1600 1600 VGB 16 MV no no no no no 0 0 1750 1800 1750 1800 VGB 18 MV 34 1462 93 03 195 70 R 15 C LI 104 25 2025 no no 29 0 1600 1600 VGB 16 MV no no no no no 0 0 1750 1800 1750 1800 VGB 1...

Page 173: ...3A 650 KFU C46M 1900 1000 1000 VGB 10 M 155 80 R 13 XL LI 84 20 2425 1 KFL 20 A ZHL 20 A C46M 650 UFf J40H 2000 1100 1100 VGB 13 M 165 R 13 C LI 93 20 2425 1 KFL 20 A ZHL 20 A 650 UKFe R45H 2000 1100 1100 VGB 13 M 165 R 13 C LI 93 20 2425 1 KFL 20 A ZHL 20 A 660 WFC T65M 1900 1000 1000 VGB 10 M 155 80 R 13 XL LI 84 20 2425 1 KFL 20 A ZHL 20 A 660 WFU P50H 2000 1100 1100 VGB 13 M 165 R 13 C LI 93 2...

Page 174: ...o 4 3 2000 1100 1100 VGB 13 M no 165 R 13 C LI 93 no no no 4 0 2200 1200 1200 VGB 13 M no 165 R 13 C LI 93 no KFL 27 A no 4 3 2000 1100 1100 VGB 13 M no 165 R 13 C LI 93 no no no 4 0 2200 1200 1200 VGB 13 M no 165 R 13 C LI 93 no KFL 27 A no 4 3 2200 1200 1200 no no no no KFL 27 A no 0 3 2200 1200 1200 no no no no KFL 27 A no 0 3 2000 1100 1100 VGB 13 M no 165 R 13 C LI 93 no no no 4 0 2200 1200 1...

Page 175: ...e 1035 62 1097 1300 203 455 UF de Luxe 1082 62 1144 1350 206 460 LU de Luxe 1118 62 1180 1350 170 460 UFe de Luxe 1139 62 1201 1350 149 490 KMF de Luxe 1193 62 1255 1400 145 495 UL de Luxe 1218 62 1280 1500 220 495 WFB de Luxe 1229 52 1281 1500 219 540 UL de Luxe 1261 87 1348 1500 152 540 KMFe de Luxe 1290 87 1377 1600 223 515 UHK de Luxe 1373 87 1460 1600 140 515 UHL de Luxe 1368 87 1455 1600 145...

Page 176: ... 1900 224 660 WFC Prestige 1581 77 1658 1900 242 720 UKFe Prestige 1779 87 1866 2200 334 720 KWFU Prestige 1766 77 1843 2200 357 720 WLC Prestige 1756 77 1833 2200 367 495 UL Premium 1348 62 1410 1700 290 560 CFe Premium 1508 87 1595 1800 205 560 UL Premium 1515 87 1602 1800 198 650 UFf Premium 1614 87 1701 2000 299 650 UKFe Premium 1688 87 1775 2000 225 660 WFU Premium 1690 72 1762 2000 238 Model...

Page 177: ... 14 C LI 102 4 5 495 UL L24 1500 1500 5 x 14 185 R 14 C LI 102 4 5 6 x 14 OJ14 5 silver 185 R 14 C LI 102 4 5 495 UL L24A 1800 1800 Lightalloyrimsarepartofthestandardequipment 6 x 15 OJ15 5 silver 195 70 R 15 C LI 104 4 5 495 UL L24H 1700 1700 Lightalloyrimsarepartofthestandardequipment 6 x 15 OJ 15 5 black 195 70 R 15 C LI 104 4 5 495 WFB D64 1500 1500 5 x 14 185 R 14 C LI 102 4 5 6 x 14 OJ14 5 s...

Page 178: ...15 C LI 104 4 5 1750 1750 Lightalloyrimsarepartofthestandardequipment 6 x 15 OJ15 5 black 195 70 R 15 C LI 104 4 5 1600 1600 5 x 14 185 R 14 C LI 102 4 5 6 x 14 OJ14 5 silver 185 R 14 C LI 102 4 5 1750 1750 5 x 15 195 70 R 15 C LI 104 4 5 6 x 15 OJ15 5 silver 195 70 R 15 C LI 104 4 5 1600 1600 5 x 14 185 R 14 C LI 102 4 5 6 x 14 OJ14 5 silver 185 R 14 C LI 102 4 5 1750 1750 5 x 15 195 70 R 15 C LI...

Page 179: ... 80 R 13 XL LI 84 3 3 5 x 13 TR1 503 silver 165 R 13 C LI 93 3 8 650 KMFe B33 1900 1000 1000 4 x 13 155 80 R 13 XL LI 84 3 3 5 x 13 TR1 503 silver 165 R 13 C LI 93 3 8 650 KFU C46M 1900 1000 1000 4 x 13 155 80 R 13 XL LI 84 3 3 5 x 13 TR1 503 silver 165 R 13 C LI 93 3 8 650 UFf J40H 2000 1100 1100 Lightalloyrimsarepartofthestandardequipment 5 x 13 OJ13 4 black 165 R 13 C LI 93 3 8 650 UKFe R45H 20...

Page 180: ...3 8 5 x 13 TR1 503 silver 165 R 13 C LI 93 3 8 2000 1100 1100 4 x 13 165 R 13 C LI 93 3 8 5 x 13 TR1 503 silver 165 R 13 C LI 93 3 8 2200 1200 1200 4 x 13 165 R 13 C LI 93 3 8 5 x 13 TR1 503 silver 165 R 13 C LI 93 3 8 2000 1100 1100 4 x 13 165 R 13 C LI 93 3 8 5 x 13 TR1 503 silver 165 R 13 C LI 93 3 8 2200 1200 1200 4 x 13 165 R 13 C LI 93 3 8 5 x 13 TR1 503 silver 165 R 13 C LI 93 3 8 2200 1200...

Page 181: ...s a loss of pressure of 0 1 bar every two months Check the pressure regularly to avoid damage to tyres or a puncture Tyre size Air pressure in bar 155 80 R 13 XL or reinforced 3 3 165 R 13 C 3 8 185 R 14 C 4 5 195 70 R 14 XL or reinforced 3 2 195 70 R 14 C 4 5 195 R 14 C 4 5 195 70 R 15 C 4 5 225 70 R 15 C 4 5 ...

Page 182: ...on 9220 460 LU De Luxe Edition 9340 490 KMF De Luxe Edition 9470 495 UL De Luxe Edition 9710 545 KMF De Luxe Edition 10030 560 KMFe De Luxe Edition 10130 650 KMFe De Luxe Edition 10870 460 UFe Excellent 9220 460 SFf Excellent 9340 495 UFe Excellent 9350 Model Perimeter measurements mm 495 UL Excellent 9710 495 WFB Excellent 9710 540 WLU Excellent 9860 540 FU Excellent 9860 540 UL Excellent 9880 54...

Page 183: ... 147 Mass definition weights 17 Microwave 142 O Oiling 148 Index A Accessories 145 Additional equipment 17 Additional loads 15 Air circulation blown air fan 116 Air conditioning 73 Airing 154 B Basic equipment 17 Bed conversion 49 Bicycle carrier 41 Boiler water heater 133 Brakes 149 C Changing the tyre 27 Chassis 156 Checking the gas system 109 Children s beds 52 Choosing a parking space 12 Clean...

Page 184: ...ng 12 Shutoff valves Gas place of installation 112 Single post elevating table 48 Step plastic entry step 34 Suitability for a speed of 100 km h 8 T Tables 48 Technical data 165 Technically permissible maximum weight 17 TFT display 61 Therme water heater 65 Toilet 106 Toilet cassette door 38 TV bracket 47 Tyre pressure 25 Tyre profile depth 26 Tyre repair kit 29 Tyres 24 Tyres age of 25 U Ultrahea...

Page 185: ...Hobby Wohnwagenwerk Ing Harald Striewski GmbH Harald Striewski Straße 15 D 24787 Fockbek Rendsburg www hobby caravan de ...

Reviews: