

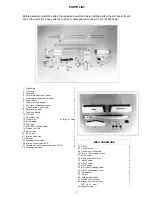


MAIN LANDING
GEAR INSTALLATION
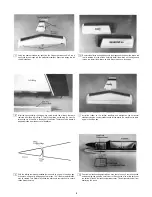
Place a small bead of silicone sealant in the groove, then insert the landing gear strut
into the fuselage in the holes on the bottom as shown. Secure the struts in place with
the metal straps and m3x10 screws.
If using the Snap 'R' Keeper make a 90° bend 5/16" from the end of the
17 3/4" control rod as shown If using the E-Z connector, install the connector
on the bottom of the nose gear control horn following the manufacturer's
instructions.
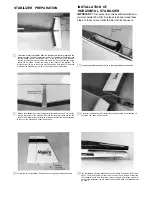
NOSE GEAR CONTROL ROD
Drill a 1/8" hole in the fuselage bottom right side at a 30° angle so that the drill
also drills through the front fuel tank mount Insert the 17 3/4" x 1 /16" rod through
the holes and mark where the rod hits the rear fuel tank mount Remove the rod
and rough-up the white plastic tube with 240 grit sandpaper Drill a 1/8" hole
where you made the mark in the rear fuel tank mount Insert the white plastic
tube through the holes so that the end of the tube is even with the bottom of the
fuselage. Epoxy the tube to the fuel tank mounts and the bottom of the fuselage.
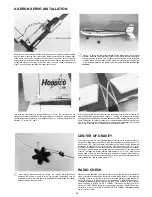
Slide the nose gear shaft through the nose gear mount Secure the gear in place
with a 4mm x 10mm wheel collar and m3x4 screw Slide the 17 3/4" control rod
into the white tube in the bottom of the fuselage Connect the rod to the nose
gear control horn using the Snap R' Keeper or E-Z connector and following
the manufacturer's instructions
WHEEL INSTALLATION
Install the nose gear control horn parallel to the nose gear axle and tighten the
mounting screw Next install a 4mm x 10mm wheel collar on top of the control
horn and secure with a m3x4 screw.
Install a wheel on the nose gear Then install a 4mm x 10mm wheel collar and secure
it with a m3x4 screw Install a 4mm x 10mm wheel collar on each side of the main
landing gear Then install the wheels and then the other 4mm x 10mm wheel collar.
Secure the wheel collars with the m3x4 screws All three wheels should turn freely.
11
Summary of Contents for avistar 40
Page 20: ......


