background image

!7#

Remote control operation 

#
#
#
#

Adjustment procedure (basic adjustment)

#

Item 

Input 

Procedure 

POSITION 

Image position adjustment

RGB1 
RGB2 
RGB3 

%

Press the


4


or


5

  key to move the image up or down. 

%

Press the


6


or


2

  key to move the image left or right. 

SAMPLE CLOCK 

Horizontal size adjustment

RGB1 
RGB2 

%

Press  the


6


or


2

  key  to  change  the  horizontal  size  of 

image. 

8

The sampling clock frequency of input signal will change. 

If  the  sampling  clock  frequency  is  known,  set  the  on-screen 
display value to that.

9


SAMPLE PHASE 

Adjust  if  the  image  is 

noisy 

RGB1 
RGB2 

%

Press the


4


or


5

  key to adjust to the optimum value. 

:

Adjust  to  minimize  noise  in  image.  If  the  adjustment  is 

incomplete, fine lines of image will be distorted. 

:

Adjust so that vertical lines are clear and sharp. 

PICTURE 


Brightness  (picture  level) 
adjustment 

RGB1 
RGB2 
RGB3 

%

Press  the


4


or


5

  key    to  adjust  the  brightness  of  bright 

(white) portion of image.


Caution    

“0” is the reference of adjustment value displayed on screen. Note 
that if the value is larger than necessary in the plus (+) direction, the
bright portion of image will be crushed.


BLACK LEVEL 


Black 

depression 

adjustment 

RGB1 
RGB2 
RGB3 

%

Press  the


4


or


5

  key  to  adjust  the  brightness  of  dark 

(black) portion of image.


Caution    

“0” is the reference of adjustment value displayed on screen. If the 
value  is  negative,  the dark  portion  will  be  depressed.  Basically, 
perform  adjustment  in  the  direction  that  will  make  the dark  portion 
bright [the value will be plus (+)].


COLOR BALANCE 


Tint adjustment 

RGB1 
RGB2 
RGB3


%

After entering this adjustment, use the arrow keys to select the 
color

;

R ADJ.

<8

red

9

or 

;

B ADJ.

<8

blue

9

to be adjusted. 

%

The brightness of the selected color can be adjusted using the


4


and


5

  keys.


Caution  

%

“0”  is the reference of  adjustment  value displayed on screen. 
Note that if the value is larger  than  necessary  in  the  plus  (+) 
direction,  the  bright  portion  of  image  of  that  color  will  be 
crushed. 

%

If green is too intense, use PICTURE to decrease the brightness, 
and then perform this adjustment.


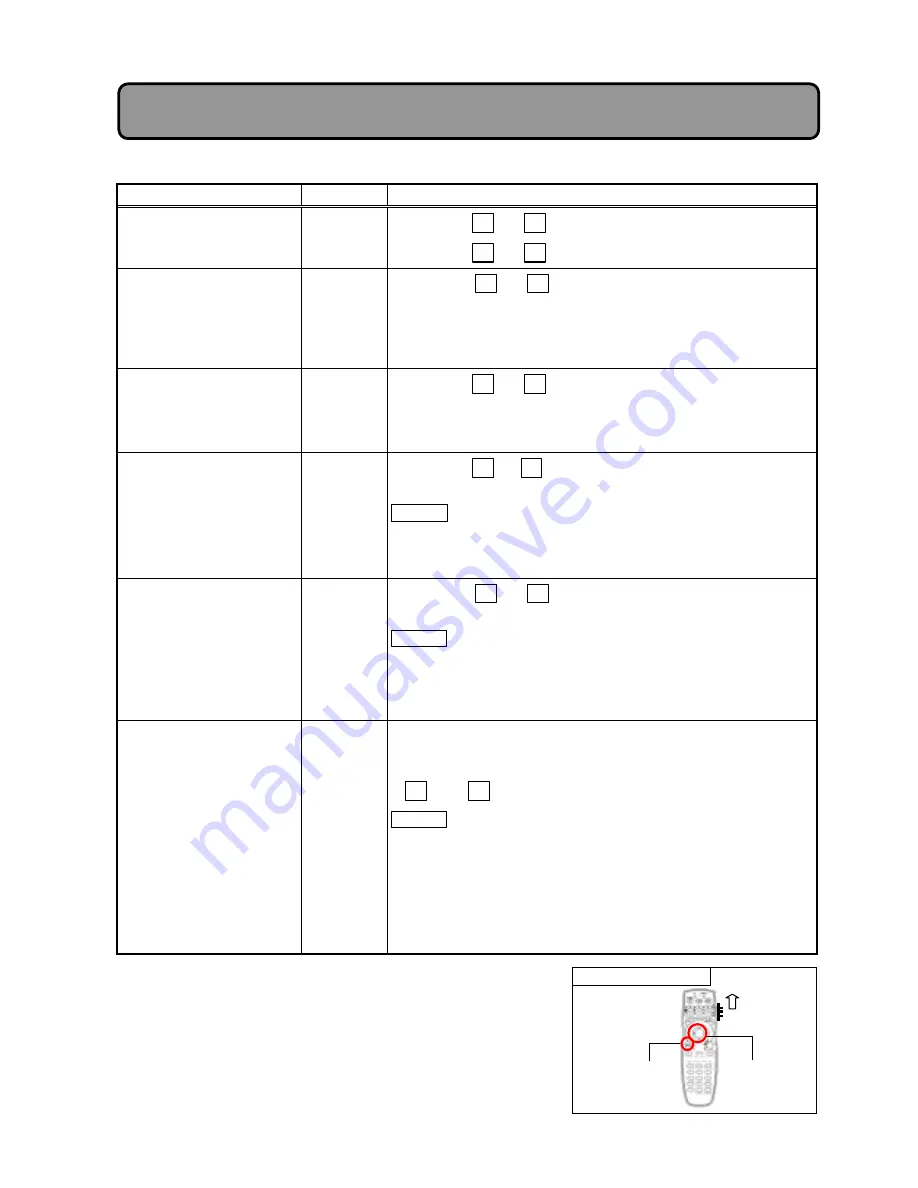
Adjustment Items and Functions:


Basic adjustment


MENU 
Button 

USER
Mode

DISK PAD 
(

4526

)Key 

Summary of Contents for es50-116cmw

Page 1: ...F G 4E HF 4 IF4 J J 8 KF 8 4EJ 9 I4 6 8 JI9 EL 3 8 J J 4F H F 9 4 F99E 4 I4 I 4 FJ A 8 D I 4 F F4 4 4 L 01234 5 6 012 78 4 9 7 5 65 7 8 5 A 4 8 5B79 579 7 5 C7 B B78B D7 7 76 E78B 96 9 4 CB79B 7 DD 9 7 78B 4 7 E78B 5 5 C7 9B7 8 F C 2 6 79 5G B 8 ...

Page 2: ... 76 2 9 7 8 6D 2 9B6 H 79 5 76 CF4 54 6 4 1 8 1 2N O 4 9 2 9 OH 2 L K 9 76 P86FJ H 7 F 2 4 JI9 E M J P86FJ H 2 4 P86FJ H JI9 E 1I 4 F4J 78 6 9 76 2 L J 69 0 HIF 4 2 9QP 9 R 0 HIF 4 2 9Q 9R 5 2 6 5 B 8 0 123 45 7 6D M N 8 7 2 7 6D J 6L 9 6 O 5 4 7 8 J 6 9 5 97D79 76 P 2D G Q79 0 J ...

Page 3: ... I JJ S9E I 4J 9 6F4E 4 H 4 9 8 H 8F 44 89 L C J JEHS 9 8 J 88 9 N 4 Q 9F8 F JRL P 99FJ 4 J I4 G 8 8 9 4 E JL C J JEHS 9 8 J HIF9J 4E L C J N 99 S 9 49E 8 8 99FJ 4 4 4SE Q JEHS 9 9 8 J I N 4 I9F J F98 S 8 J 8 4 H I N 4 F 9 RL T 4 FJ JEHS 9J 4 FJ 8 J H F 9A FJ 4UJ H F 9 8 I4 8F J 9 JF4 44 FJ A I4 G 8 4 FJ 4 8 4JA 8 I4 G I4 I 4 E 8 H L C H J J JEHS 9J 4 8 J 4 S 8 S 9 NL O J HI 4 E F 4 8 J 8 J 4 I J ...

Page 4: ...7 20 7 0 10 35 12 0 4 9 21 3 1 75 7 20 7 1 7 4 7 5 7 7 4 1 07 7 7 7 7 20 7 2 0 7 5 12 0 4 9 21 3 1 75 7 7 0 0 7 1 7 7 9 7 9 7 2 2 3 2 9 7 7 0 4 02 5 3 9 2 2 2 2 8 3 4 9 7 2 9 2 4 9 1 75 C 21 19 321 0 2 2 0 1 5 7 07 8 3 0 5 3 7 8 44 19 2 33 0 0 8 0 12 3 4 0 2 1 9 2 1 5 3 9 2 2 2 2 8 3 4 9 7 2 9 2 4 9 1 75 7 20 0 7 0 7 2 4 1 7 7 5 7 20 3022 3 022 1 7 7 5 62 9 4 7 20 0 2 0 9 2 9 4 78 7 20 0 0 7 0 7 7...

Page 5: ...211 5 12 0 4 9 2 0 7 21 3 1 75 G211 5 G1 9 5 C 7 5 G1 1 5 B 0 2 0 4 4 7 2 4 4 1 7 0 7 5 61 8 1 9 8 211 5 12 0 4 9 2 0 78 21 3 1 75 0 4 4 I J 7 8 3 J 4 1 K8 9 2 1 1 0 5 12 4 9 21 3 1 75 L 3 4 2 0 12 8 12 3 0 11 5 3 12 2 4 19 8 3 4 9 7 2 9 2 4 9 1 75 F 3 9 G 2 ...

Page 6: ...lace the unit in a humid or dusty location Do not place the unit in a humid or dusty location6 7 2 5 2 3 4 3 0 32 6 Do not place the unit near a cooking table humidifier or any other place here it is likely to be exposed to oil smoke or steam 7 2 5 2 3 4 3 0 32 6 Do not handle the power cord roughly Do not place the power cord near a heating appliance 7 2 5 2 3 4 3 2 3 0 2 5 4 9 12 2 4 3 0 32 6 Do...

Page 7: ... 26 0 2 3 3 8 5 9 1 2 4 1 2 2 2 2 3 44 3 5 3 0 5 1 2 1 2 56 7 32 00 1 2 5 26 I 5 5 2 2 6 When looking at the screen for a long period E2 2 3 0 59 3 3 0 4 4 4 8 0 6 Condensation 0 2 1 4 4 0 4 5 9 5 3 4 0 4 2 3 5 4 39 3 2 4 6 0 8 2 3 5 0 12 9 2 5 3 1 5 5 3 3 2 4 3 4 J 5 2 4 4 9 5 2 4 1 4 6 Lamp 4 2 0 3 2 4 3 4 2 5 2 4 6 0 4 2 59 3 33 5 3 6 H 3 5 0 4 0 4 6 G 2 L 3 L 5 2 4 M 5 0 2 4 6 C2 0 4 0 2 4 3 N...

Page 8: ...ons of Each Part pro ector Main Power Switch O Indicator Shows the power supply status or pro ector operation status Power 2utton Pressing will alternate between ON and STAND9Y Input Select button To switch RG9 input Fault Indicators Light when lamp is faulty or temperature is abnormal It shows model ES50M116CMW below ...

Page 9: ...ks 9NC Analog sync signal is connected and the 75 ohm termination or TTL input can be selected using the switch on the right Digital interface output terminal DVIMD This outputs digital RG9 signal The selected RG9 1M3 input signal will be output as digital signal 9G2 signal input Hacks RG91 inputs 9NC Analog video signal is connected terminated with 75 ohm Sync signal termination switch To switch ...

Page 10: ...ed value of the menu item in memory and then return the cursor to one item before See p 17 DISK PAD Used to select menu item and adjust when the menu screen appears See p 17 Note The arrow keys in the text correspond to the operation of upper lower left and right keys on disk TIMER BUTTON Displays the accumulated projector operation hours and lamp use time on the menu screen See p 21 MUTE Has no f...

Page 11: ...g will switch all colors off 0 1 2 DISPLAY Turns on or off any on screen information SERVICE setting indicator The indicator lights in the SERVICE mode The indicator turns on after push any effective key The light turns off if you push no key within a time If you push unavailable key the light turns off for a while even if the indicator is ON MODE Checks the frequency of RGB input set at each scan...

Page 12: ...fault Wired or Infrared transmission of remote control 1 Wired transmission Connect the provided remote cable when using the remote control in the following conditions When using at least two projectors Using infrared transmission may cause malfunction or rewrite the projector internal data When the projector is inoperable because of illumination or is affected by remote control of another device ...

Page 13: ...ncy device is used in the vicinity the high frequency waves emitted by it may cause the projector to malfunction Note also that the projector itself emits high frequency waves although they are weak This can conceivably cause interference to a television set that uses an indoor antenna a radio receiver or a transceiver For this reason keep the unit at least 30 m away from such appliances Ambient l...

Page 14: ...t your dealer when projector is installed Professionals carry out assembly and securing of anchor Caution Professionals carry out assembly and adjustment of install to keep up image performance Professionals carry out securing of anchor to prevent projectors from falling Assembly and Securing of Anchor ...

Page 15: ...p operation to light the lamp of light source After several seconds the lamp of light source will light and the ON indicator on control panel will change to a steady green light 2 To turn power off Step Details of operation 1 Hold down the POWER button on remote control or the power button on control panel for approximately one second The lamp will turn off The ON indicator on control panel will c...

Page 16: ...TE key on the remote control The entire white image will appear on the screen Pressing WHITE key on the remote control will vary the brightness as follows 255 240 204 165 127 72 48 0 Grayscale 255 Operational procedure Displaying crosshatch image Step Display Details of operation Crosshatch Set the remote control to SERVICE mode Press the HATCH key on the remote control will display The crosshatch...

Page 17: ...ss of red and blue ZOOM Zoom up a portion of image VOLUME Has no function TIMESETTING To adjust the time DIGITAL I 0 To set the polarity of edge in digital input output MORE 2 3 To set the clamp pulse position that determines When select the MORE2 USER xxx Shows user adjustments SPEAKER OUT Has no function CLAMP POS To set the clamp pulse position that determines the black level of image 2 Basic K...

Page 18: ...tment value displayed on screen Note that if the value is larger than necessary in the plus direction the bright portion of image will be crushed BLACK LEVEL Black depression adjustment RGB1 RGB2 RGB3 Press the 4 or 5 key to adjust the brightness of dark black portion of image Caution 0 is the reference of adjustment value displayed on screen If the value is negative the dark portion will be depre...

Page 19: ...occur in image After entering this adjustment use arrow keys to select INPUT or OUTPUT Select only RGB3 in INPUT and RGB1 2 3 in OUTPUT Press the 6 to select RISE Press the 2 to select FALL SPEAKER OUT Has no function CLAMP POS Adjusting the clamp position of black level of video signal RGB1 RGB2 To adjust the clamp position of black level pedestal Press the 4 to move the clamp position to the lef...

Page 20: ...e changed mode numbers can be allocated to each signal in detail using special settings Consult your dealer The mode number that the projector has automatically been allocated can be checked by pressing the MENU key on remote control or MODE key in case of SERVICE mode and viewing the display on the following screens Check the mode number in the Input signal When MENU key is pressed in case of USE...

Page 21: ...mp is trouble LAMP2 FAILURE Shows trouble of lamp2 Red display in the case Contact your dealer to lamp replacement 2 Operational procedure 8When setting the USER mode for the remote control9 Step Procedure 1 Press the TIMER key The projector LCD panel and lamp operation hours with the number of lamp lightings will appear on screen 2 Press the TIMER key to terminate the display 8When setting the SE...

Page 22: ...er Use the remote control to adjust the following items so that the position and size of displayed image are correct SAMPLE CLOCK See p 17 18 POSITION See p 17 18 Adjust the phase of image Finely adjusting the phase of image will display a sharp image Use the SAMPLE PHASE adjustment to adjust so that small characters and vertical lines are brightest See p 17 18 If the SAMPLE PHASE value which make...

Page 23: ...l 1 Signal connection Connect digital computer signal to the RGB3 terminal 2The following shows the specifications and input terminal of digital computer signal used in this projector If a terminal with other specifications is to be connected the shape must be changed to match the following pin assignment 2This projector conforms to VESA standard signal It may not display another digital signal no...

Page 24: ...lect R ADJ and use the key to darken red If the image is yellowish select B ADJ and use the key to brighten blue If the image is light bluish select R ADJ and use the key to brighten red Digital output signal The signal obtained by digitizing the selected signal will be output from the digital output terminal The specifications of digital signal and terminal are the same as those for digital input...

Page 25: ...iod of time or used exceeding the period of replacement You are advised to follow instructions for lamp replacement as soon as they are given See p 26 p 27 Avoid any reuse of an old lamp used lamp since such reuse can result in burst In case the lamp gets blown up in a short period of time after use some electrical failures or troubles other than the lamp itself may be suspected as causes Under su...

Page 26: ...er if the projector runs continuously as 24 hours Projector s lamp is no warranty So we suggest you to use the alternative lamp operation of Automatic lamp changer Lifetime of Lamp is defined as the average time that mortality of Lamp is 50 The Intermittent condition is defined as the cycle that ON time is 3 5 hours and that OFF time is 0 5 hour The following shows the on screen information corres...

Page 27: ...ction of forced lamp out The message will disappear in approx 1 seconds and power will also go off The message will disappear in approx 1 minute and power will also go off Indicators LED lamps No Name Operation Remarks 1 Power indicator ON STAND BY Terminal plate Lights orange in the standby status main power on Blinks green during warm up power on by power switch or remote control Lights green du...

Page 28: ...he specifications of computer Bright portion of image is likely crushed Termination of video signal is off Amplitude of input video signal is too high Correct video cable connection 5In case of computer signal6 It is necessary to adjust the amplitude of input signal with amplitude exceeding 0 75 V Consult your dealer P9 Adjustment status varies Signals with similar timings are connected and the ad...

Page 29: ...llowing adjustment CLAMP POS Clamp position Basic adjustment P19 Image is blurred This does not indicate a fault It becomes clear image after 30 minutes since power on If image is not back to normal check the following adjustment SAMPLE CLOCK SAMPLE PHASE P18 P22 When a still image remains displayed an after image occurs This does not indicate a fault Anytime the same image is displayed for severa...

Page 30: ...t being covered with fine scratch marks f the screen is noticeably dirty gently wipe off the dirt with a cloth that has been immersed in water or water to which a small quantity of a neutral detergent has been added about 0 5 cc of detergent in about 2 liters of water then wrung hard Finish off with a soft dry cloth Never use a luster a chemically treated cloth or a volatile solvent to clean the s...

Page 31: ...Operating temperature humidity ranges Temperature05H835H during non operation 0H840H Humidity020 880 during non operation 8 890 13 Provided accessories Remote Transmtte AA batteries User s manual Power cord Remote Control Cable for repair service Joint Parts Cleaning Cloth IIIIII IIIIII IIIIII IIIIII IIIIII IIIIII IIIIII 1 2 1 1 1 1 set 1 1 The frequencies shown are for reference The actual range ...

Page 32: ...e company Item No Replacement part Quantity used 1 Lamp ASSY LCOS One per screen 2 FANASSY 109R0812F4J03 Lamp PWB Unit Three per screen 3 FANASSY 109R0612H4J04 Circuit Power supply One per screen 4 FANASSY 109L0812F4J03 LCD panel One per screen 5 FANASSY 109L0612H4J03 Optical Unit One per screen 6 LCOS panel Lens ASSY One per screen List of spare parts periodically replaced Warranty and After sale...

Page 33: ...es uses and can radiate radio frequency energy and if not installed and used in accordance with the instruction manual may cause harmful interference to radio communications Operation of this equipment in a residential area is likely to cause harmful interference in which case the user will be required to correct the interference at his own expense CAUTION Changes or modifications not expressly ap...

Page 34: ... Digital Media Division OR61331 Printed in Japan Hitachi Ltd ...

Reviews: