- 8 -
Before Switching on your TV
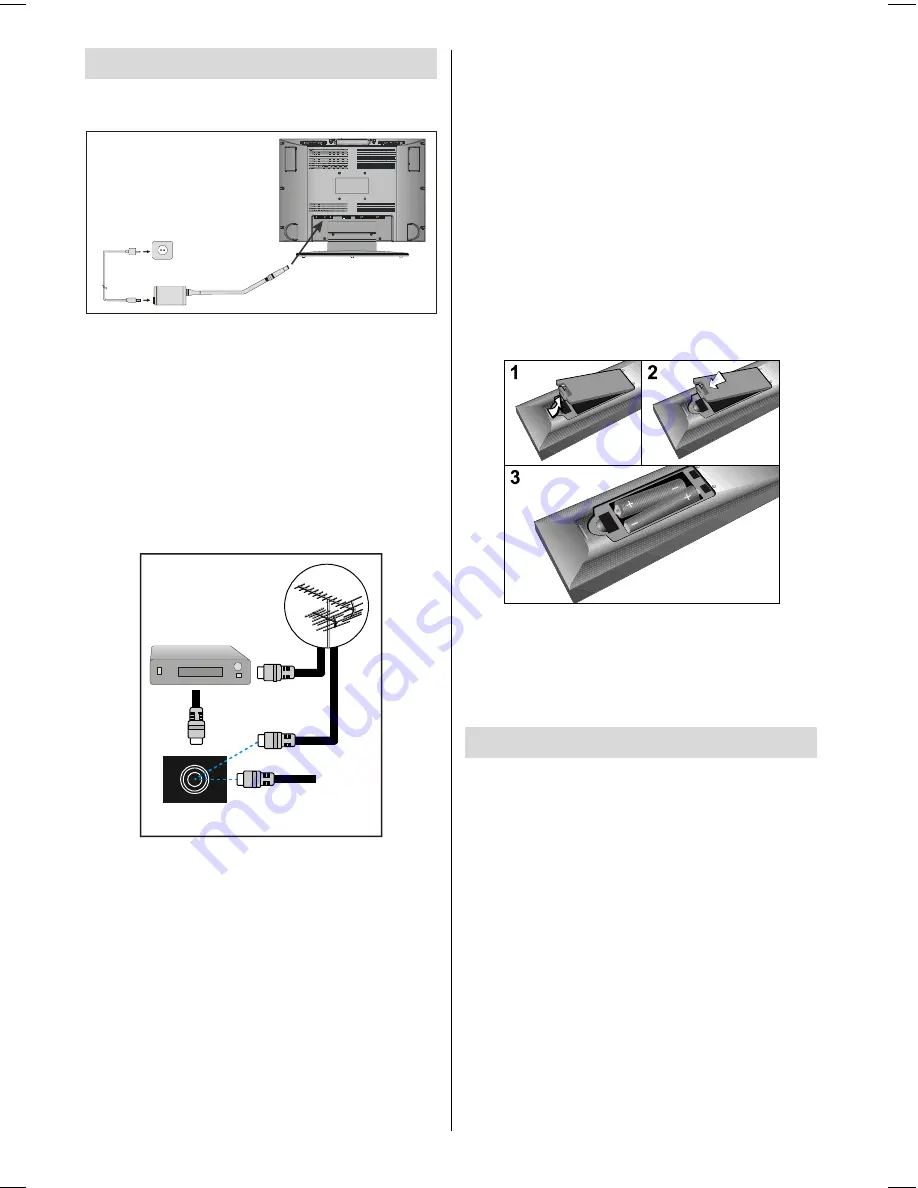
Power connection
3 &, 138 7
' &9
3& $8',2
$17:
$9
$9
$&DGDSWHU
7R32:(5
,1387'&9
WHUPLQDO
IMPORTANT:
The TV set is designed to op-
erate on
15 V DC.
For this, an adaptor is
used which gives
15V DC
voltage. Connect
this adaptor to a system that supplies 100-
240V AC, 50-60 Hz.
After unpacking, allow the TV set to reach the
ambient room temperature before you con-
nect the set to the mains.
Connections to the
Aerial socket
9+)8+)
:
795($53$1(/
&$%/(79
6$7(//,7(5(&(,9(5
Connect the aerial or cable TV plug to the
aerial socket on the back of the TV. If you
are also connecting a video recorder or sat-
ellite receiver you should connect the aerial
or cable plug to this device first and then
connect the RF out socket on the device to
the aerial socket on the TV (see P27 for
more details).
How to connect other devices
IMPORTANT:
Switch off the TV before con-
necting any external device.
Sockets for external connections are at the
back of the TV. For connection of other de-
vices via Euroconnector refer to the manuals
of the related devices.
Inserting batteries in the remote
control handset
Remove the battery cover located on the
back of the handset by gently pulling up-
wards from the indicated part.
Insert two AAA (R03) or equivalent type of
batteries inside.
Replace the battery cover.
NOTE:
Remove battery from remote control
handset when it is not to be used for a long
period.Otherwise it can be damaged due to
any leakage of battery.
Switching the TV ON/OFF
To switch the TV on:
Your TV will switch on in two steps:
1-
Connect the power supply cord to the sys-
tem. Press the
POWER
button at the top of
the TV. Then the TV switches itself to stand-
by mode and the led becomes red located
on the front of the TV.
2-
To switch on the TV from stand-by mode
either:
Press a digit button on the remote control so
that a programme number is selected,
or,
Press
-P/Ch
or
P/Ch+
button at the top
of the TV or press
-P/CH
or
P/CH+
button
ENG-2200-1547UK-22 INCH TFT IB.p65
03.03.2004, 17:59
8
Summary of Contents for 22LD4200
Page 1: ...GB Instructions for use 22LD4200 ...
Page 34: ......
Page 35: ......
Page 36: ......
Page 37: ......


