


82
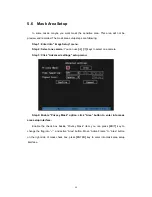
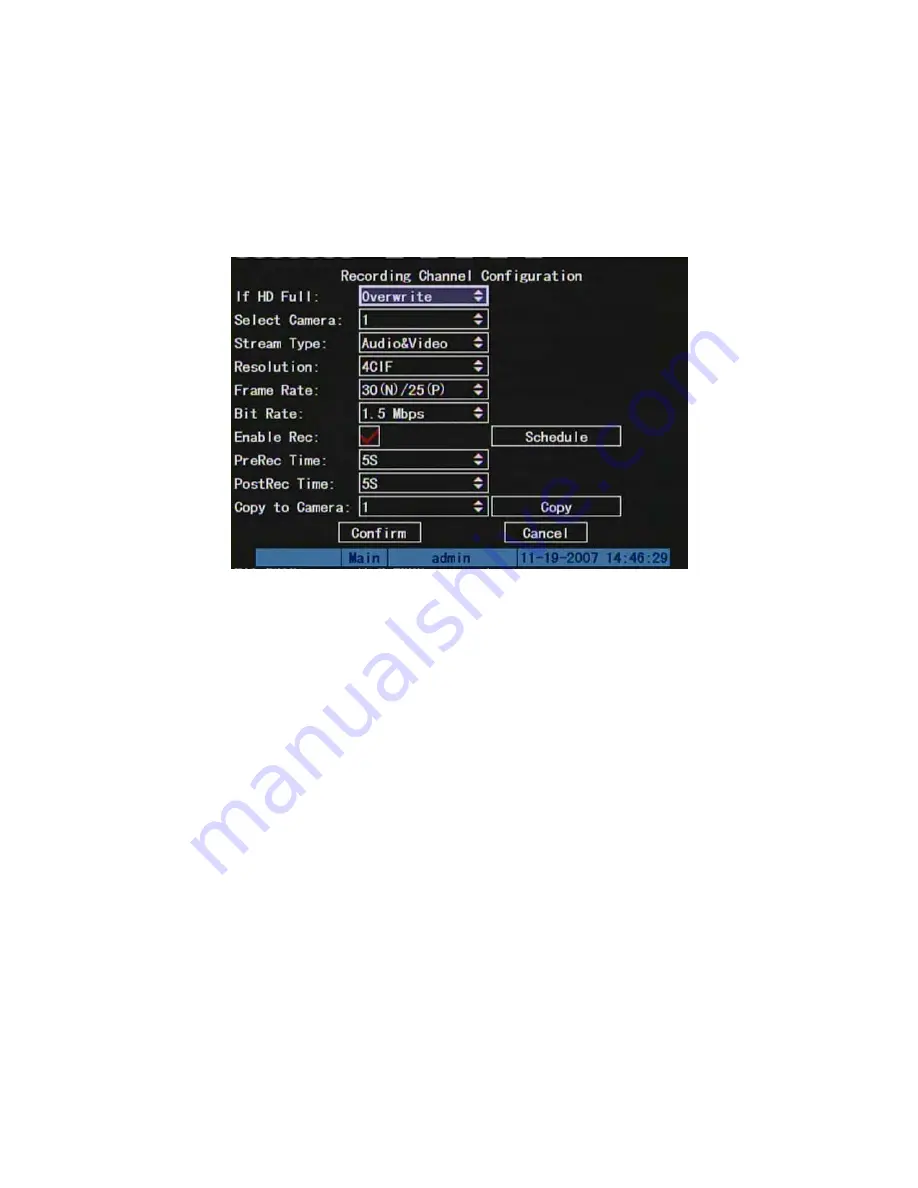
5.11 Recording Setup
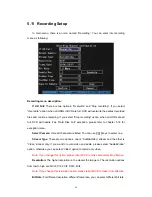
In main menu, there is an icon named “Recording”. You can enter into recording
menu as following:
Recording menu description:
If HD Full:
There are two options: “Overwrite” and “Stop recording”. If you select
“Overwrite” option, when all HDDs in DVR are full, DVR will overwrite the earliest recorded
files and continue recording. If you select “Stop recording” option, when all HDDs are all
full, DVR will handle it as “Hard Disk Full” exception, please refer to chapter 5.16 for
exception menu.
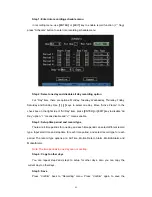
Select Camera:
Here all channels are listed. You can use
[
↑
][
↓
]
keys to select one.
Stream Type:
There are two options, one is “Audio&Video” stream and the other is
“Video” stream only. If you want to record video and audio, please select “Audio&Video”
option, otherwise you can select “Video” option to record only video.
Note: If you change this option, please reboot DVR to make parameter into effective.
Resolution:
The higher resolution is, the clearer the image is. The resolution options
from low to high are: QCIF, CIF, 2CIF, DCIF, 4CIF.
Note: If you change this resolution option, please reboot DVR to make it into effective.
Bit Rate:
For different resolution, different frame rate, you can select different bit rate.
Summary of Contents for DS-7000HI Series
Page 11: ...11 1 4 Typical Application ...
Page 14: ...14 5 Connect HDD and main board with HDD cable Then connect HDD s power cable ...
Page 27: ...27 How to exit menu Press PREV or ESC key to exit menu and return to preview mode ...
Page 54: ...54 In this case press ENTER to return password edit box and input new password again ...
Page 60: ...60 ...
Page 70: ...70 ...
Page 108: ...108 Step 6 You can preview the image of 192 1 0 2 by using client end software ...
Page 125: ...125 In the formula a means alarm occurrence rate ...
Page 127: ...127 The corresponding relationship of cross cable ...
Page 137: ...137 Suggestions ...


