


User Manual of 4-inch High Speed Dome
© Hikvision Digital Technology Co., Ltd. All Rights Reserved.
30
Note:
You can configure up to 8 zones.
3.
Edit the label of the zone.
Please refer to
Step 3. Edit the label of the preset
in
Section 3.4.2.
4.
Configure the zone area.
Steps:
(1)
Move the cursor and click
IRIS+
button to enter
EDIT ZONE
submenu.
(2)
You can see
SET LEFT LIMIT
on the screen. Click the direction buttons to set the left limit
stop.
(3)
Follow the prompts on the screen to set the right limit, up limit and down limit.
(4)
Click
IRIS+
button to save the settings and exit.
5.
Set the zone status and scan status.
SCAN STATUS:
enable/disable the scanning in the zone.
Note:
ZONE STATUS
is not editable. After you edited the zone, it will switch to
ON
automatically;
if you delete the zone, the
ZONE STATUS
will switch to
OFF
.
Task 2:
Clear the zone settings.
Move the cursor to
CLEAR ZONE
and click
IRIS+
to clear all the settings of the current zone.
3.4.7
Clearing PTZ Control Settings
Purpose:
You can clear all user-defined PTZ control settings, including presets, patrols, patterns, zones and
time tasks. You can also clear privacy masks on this menu.
Steps:
1.
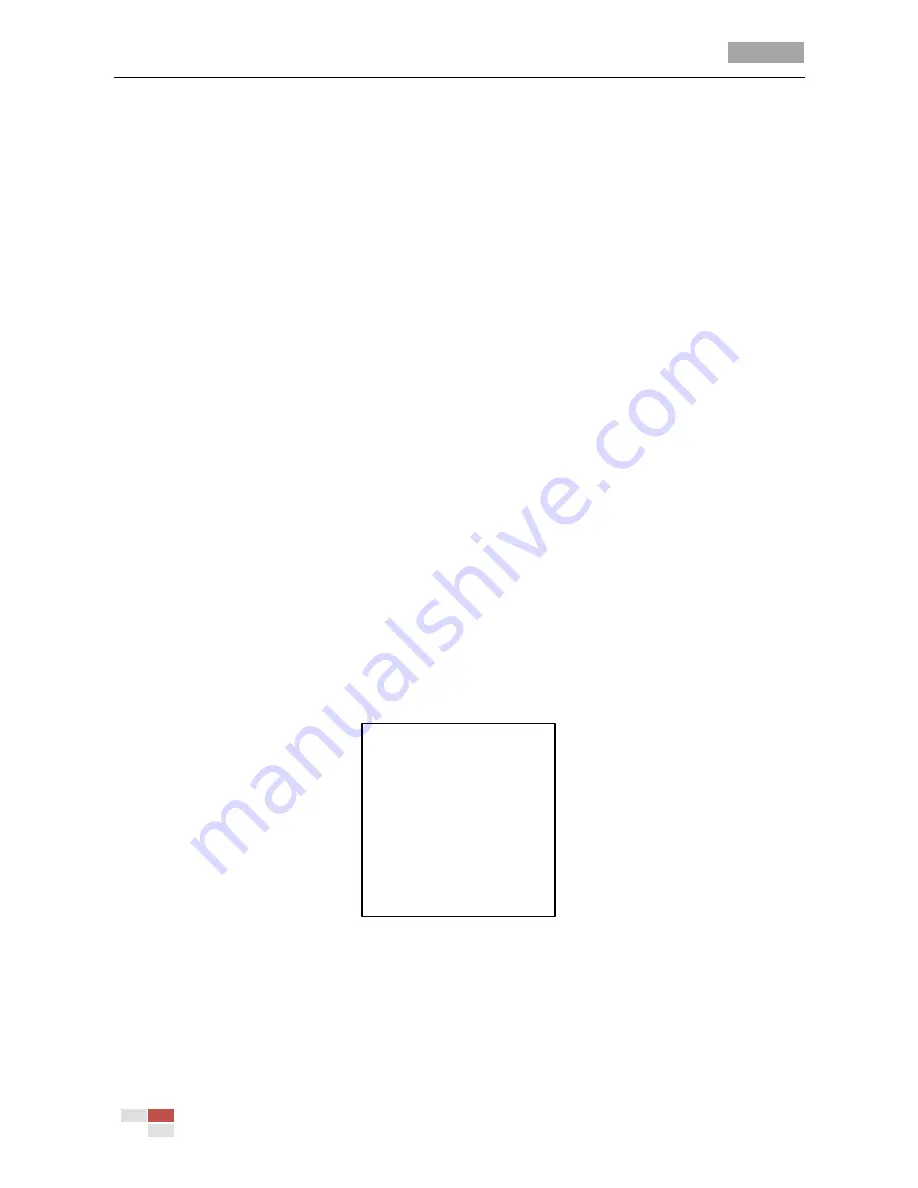
Enter the
CLEAR SETTINGS
menu:
MAIN MENUS > DOME SETTINGS > CLEAR SETTINGS
CLEAR SETTINGS
CLEAR ALL PRESETS
CLEAR ALL PATROLS
CLEAR ALL PATTERNS
CLEAR ALL BLANKS
CLEAR ALL ZONES
CLEAR ALL TIME TASKS
<DIAGNOSTICS>
BACK EXIT
Figure 3-24
Clear Dome Settings
2.
Click
IRIS+
on each submenu, e.g., CLEAR ALL PATTERNS. Click
IRIS+
again to confirm and exit.
On
DIAGNOSTICS
submenu, you can also see the self-diagnostics information of the speed dome,
including the occurrence of high temperature, the highest temperature, the occurrence of low
temperature, the lowest temperature, the occurrences of video loss, low voltage, dome reboot,