


Installing and Configuring Your AV Equipment
N2612S/N2622S Manual
16
NOTE:
If the computer does not need Internet access, you can simply enter a unique 169.254.xxx.xxx IP address with a 255.255.0.0
subnet mask. Contact your network administrator if you are unsure of how to configure the existing network. N-Series units will not
self-assign in the 169.254.0.xxx range.
NOTE:
If the computer has a statically-assigned IP address, click the Advanced button. Then click Add to enter a unique
169.254.xxx.xxx address with a Subnet Mask of 255.255.0.0 and a Default Gateway of 169.254.1.1.
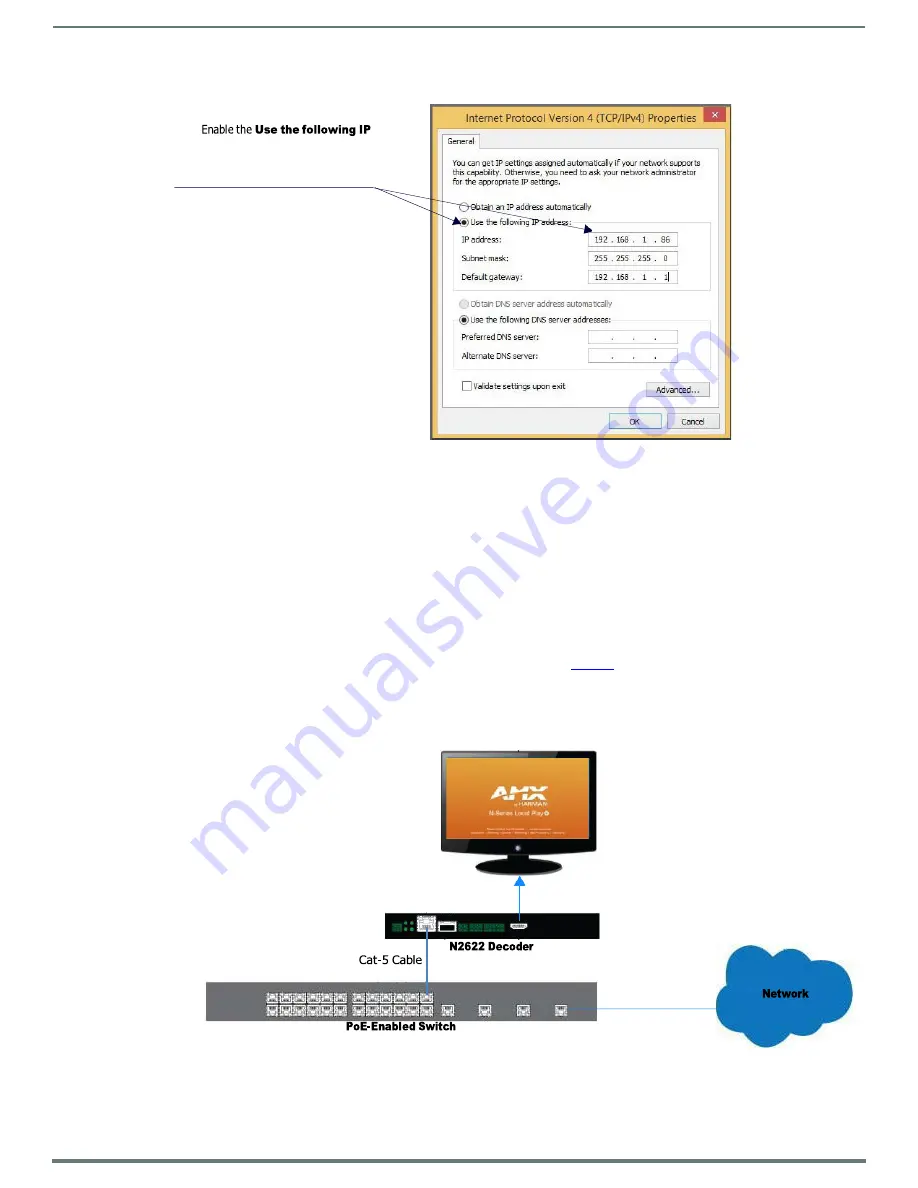
Step 2: Connecting Decoders to the Network
The digital connection from a Decoder
HDMI OUT
port to a display is accomplished using either a HDMI cable or DVI-D (through
adapter). N2600 units support embedded audio input and output on the HDMI ports; however, some display devices (e.g., many
monitors)
do not
support embedded audio. When using such a display, use the
AUDIO
port for separate transmission of sound and
turn
HDMI Audio
off (on the
Settings
page) to avoid video display issues.
Power is supplied via a PoE-enabled switch. Refer to the following steps and
for guidance.
1.
Using a minimum Cat-5e cable, connect your N-Series Decoder’s
P0
port to a PoE-enabled switch. This provides both network
and power connection.
2.
Connect the display you would like to use for that Decoder (monitor, projector, etc.) to the Decoder’s
HDMI OUT
port using an
HDMI cable (or DVI through adapter). This must be a digital video connection.
FIG. 9
Decoder Connections
3.
Repeat Steps 1 and 2 until all Decoders are installed on the network.
5.
address
option and enter the
static IP address provided to you
by your network administrator.
HDMI Cable


