23
SETUP MENU
Setup Menu
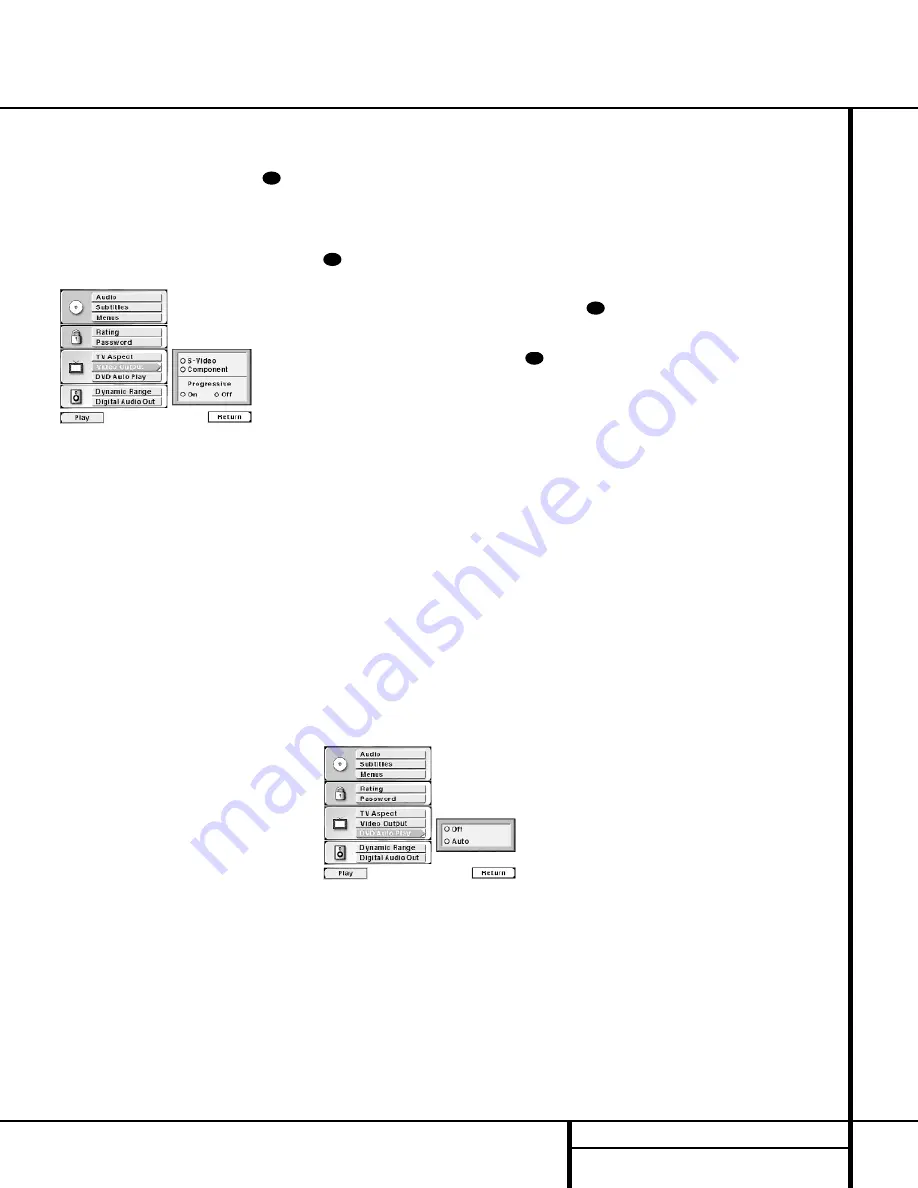
To select the Video Output you must first be
viewing the Setup Menu (Figure 1), which is
available by pressing the
Menu Button
while the unit is in the Stop mode. At the Setup
Menu, press the
¤
Navigation Button
e
until the Video Output option is highlighted.
Press the
Enter Button
`
to view the
options for this selection (Figure 11).
Figure 11
If you are using the S-Video output only, no
change is required, but it is a good idea to
check this option to make certain that the circle
next to the S-Video option is orange.
If you are using the Component Video jacks, but
are connecting the DVD 50 to a standard (ana-
log) television, press the
⁄
/
¤
Navigation
Buttons
e
so that the circle next to the
word “Component” is orange. Press the
Enter
Button
`
to store the setting in the DVD 50’s
memory, but DO NOT change the setting in the
bottom half of the menu box. The orange circle
in the Progressive section of the menu should
be next to “Off”.
If you are using the Component Video jacks for
connection to a video display that is compatible
with a progressive scan signal, first press the ‚
Navigation button so that the circle next to
the word “Component” is orange. Next, press
the
Enter Button
`
, then press the
‹
/
›
Navigation Buttons
e
so that the orange
circle in the lower portion of the menu box
under the word “Progressive” is next to the
word “On”. Press the
Enter Button
`
to
enter the setting to the DVD 50’s memory.
WARNING:
Once the setting for progressive
scan output is entered, an image will only be
visible on a progressive scan-compatible
video display. If you change the setting to
“Progressive” Scan in error, you must reset the
unit by first pressing the
Stop Button
j
/
!
to stop any disc that is playing. Next, press the
Stop Button
j
/
!
again and hold it for
five seconds before releasing it. Turn the unit
off and pause for a few seconds. When you turn
the DVD 50 on again, the video output will be
restored to the standard setting, and a picture
will once again be visible on a conventional
analog display.
If you have no further changes to make after
setting this default, press the
Menu Button
to remove the Setup Menu from the
screen, or press the
Play Button
g
/
#
to
resume playback.
To enable the Auto Play function you must first
be viewing the Setup Menu (Figure 1), which is
available by pressing the
Menu Button
while the unit is in the Stop mode. At the Setup
Menu, press the
⁄
/
¤
Navigation Button
e
until the Auto Play option is highlighted.
Press the
Enter Button
`
to view the
options for this selection (Figure 12).
DVD Auto Play
The DVD 50’s Auto Play function makes it easier
and more enjoyable to view DVDs. When this
feature is activated, the unit will automatically
start playback when the Main Menu of a DVD
appears if no other button is pressed within
three seconds of the time the Main Menu
appears. In normal use, most discs stop at the
Main Menu to wait for your input, requiring
some user intervention. With Auto Play, DVD
viewing is seamless, as the start of the movie is
automatically selected unless another function
is specifically requested. Of course, even with
Auto Play in effect, you may always customize
the disc’s playback by pressing any button to
make your selection within three seconds.
Figure 12
To enable the Auto Play function, press the
¤
Navigation Button
e
so that the circle
next to the word “Auto” is orange. Next, press
the
Enter Button
`
to activate the feature
and store the setting in the DVD 50’s memory.
Note that the
AUTOPLAY
Indicator
I
will light to remind you that DVD discs will go
directly into the Play mode, rather than stop at
their Main Menu.
To disable the Auto Play function, press the
⁄
Navigation Button
e
so that the circle
next to the word “Off” is orange. Next, press
the
Enter Button
`
to store the setting in
the DVD 50’s memory. If the setting was previ-
ously active, the
AUTOPLAY
Indicator
I
will go out.
If you have no further changes to make after
setting this default, press the
Menu Button
to remove the Setup Menu from the
screen, or press the
Play Button
g
/
#
to
resume playback.
28
28
28
28


