7
Hangar 9 Christen Eagle II 90 ARF
Landing Gear Installation
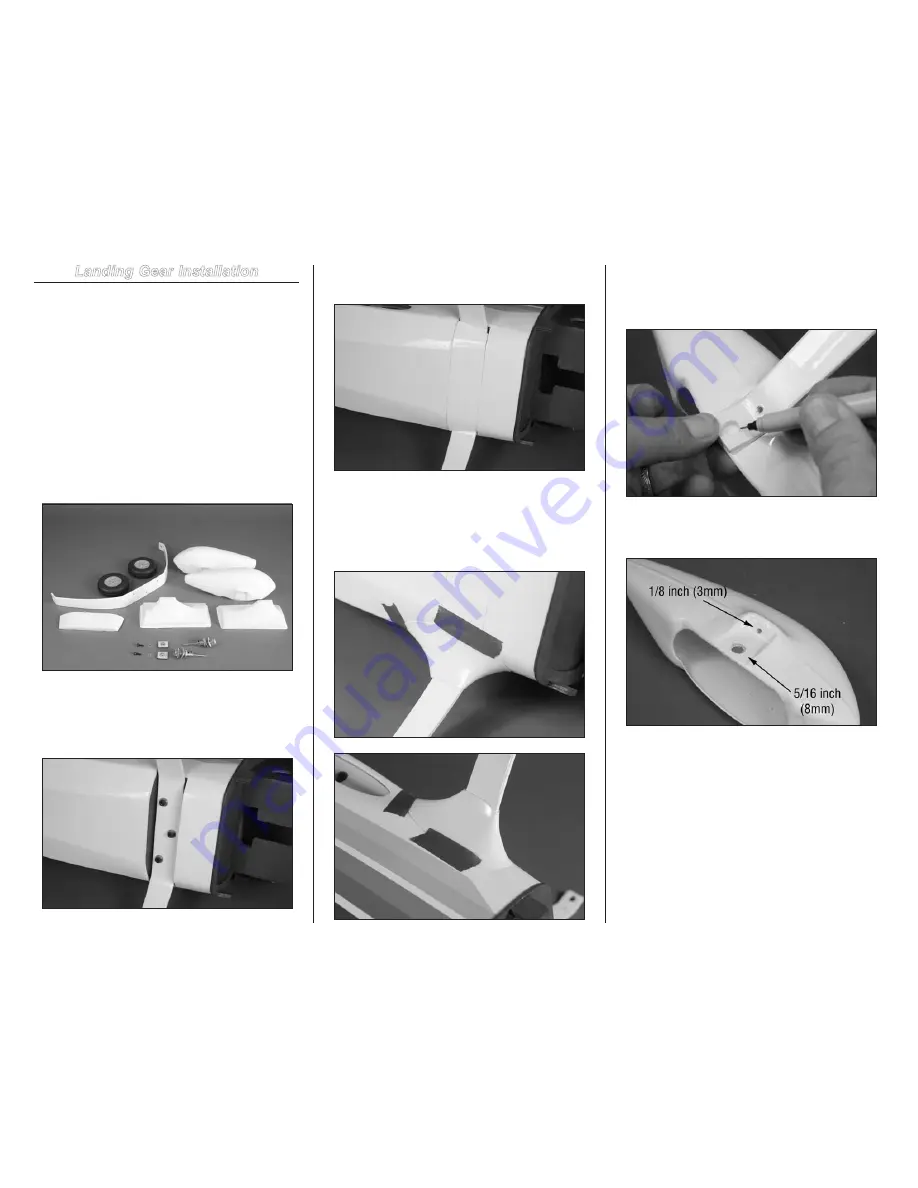
Required Parts
Fuselage
Landing gear
M3 washer (2)
Wheel pant (right and left)
Landing gear cover
75mm foam wheel (2)
20mm x 15mm plywood plate with M3 blind nut (2)
5/16-inch metal washer (2)
5/16-inch plywood washer (2)
5/32-inch wheel collar with setscrew (4)
5/32 x 1
1
/
2
-inch axle (2) with nut (2)
M3 x 10 socket head machine screw (2)
Landing gear intersection fairing (right and left)
1. Locate the items for this section of the manual.
2. Temporarily remove the three M4 x 20 socket head
screws from the fuselage. Use the M4 x 20 socket head
screws and a 3mm hex wrench to secure the landing gear to
the fuselage. Use threadlock on the screws to prevent them
from vibrating loose.
3. Use medium CA to glue the landing gear cover in place
on the bottom of the fuselage.
4. Use hobby scissors to trim the landing gear
intersection fairings. Open the narrow end to allow the
fairing to fit over the landing gear. Trim as necessary so the
fairing fits the contour of the fuselage. Use silicone adhesive
to glue the fairings to the fuselage. Use low-tack tape to hold
the fairing in position until the adhesive fully cures.
5. Position the wheel pant on the landing gear. The
recess of the wheel pant will fit snugly to the shape of the
landing gear. Use a felt-tipped pen to mark the location for
both the axle and wheel pant retaining bolt.
6. Use a drill and 5/16-inch (8mm) drill bit to drill the
hole for the axle, and a 1/8-inch (3mm) drill bit for the wheel
pant mounting screw.


