16
Hangar 9 Christen Eagle II 90 ARF
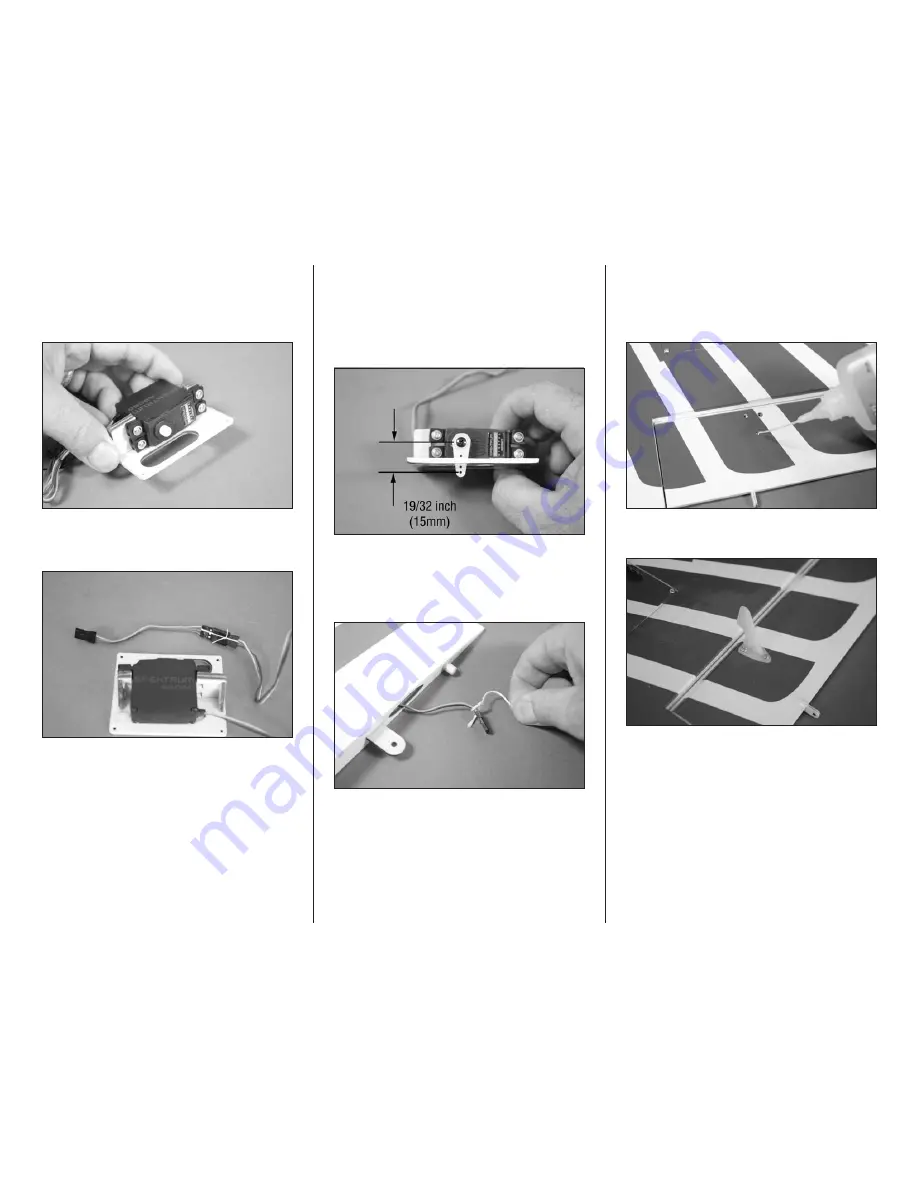
5. Prepare the aileron servo by installing the grommets
and brass eyelets. Use a #1 Phillips screwdriver and the
screws included with the servo to secure the servo to the
cover. Make sure the output shaft for the servo aligns with
the opening in the aileron servo cover.
6. Secure a 3-inch (76mm) servo extension to the
aileron servo lead using string or dental floss so it does not
disconnect inside the wing accidentally.
7. Use the radio system to center the aileron servo.
Attach the servo horn so it is perpendicular to the servo
center line. Use side cutters to remove any arms from the
horn that may interfere with the operation of the servo. The
clevis for the aileron pushrod will attach to the hole on a
4-way servo horn that is 19/32 inch (15mm) from the center
of the horn.
8. Tie the string located in the wing around the end
of the aileron servo extension. Use the string to pull the
extension and servo lead through the wing. Secure the aileron
servo and cover to the wing using the M2 x 12 self-tapping
screws removed in step 3 and a #1 Phillips screwdriver.
9. Use a #1 Phillips screwdriver to thread an M2 x 12
self-tapping screw in each of the three control horn mounting
holes. Be careful not to thread the screws through the top of
the aileron. Remove the screws, then apply 2–3 drops of thin
CA in each hole to harden the surrounding wood.
10. Mount the aileron control horn using three M2 x
12 self-tapping screws and a #1 Phillips screwdriver.


