17
Hangar 9 Christen Eagle II 90 ARF
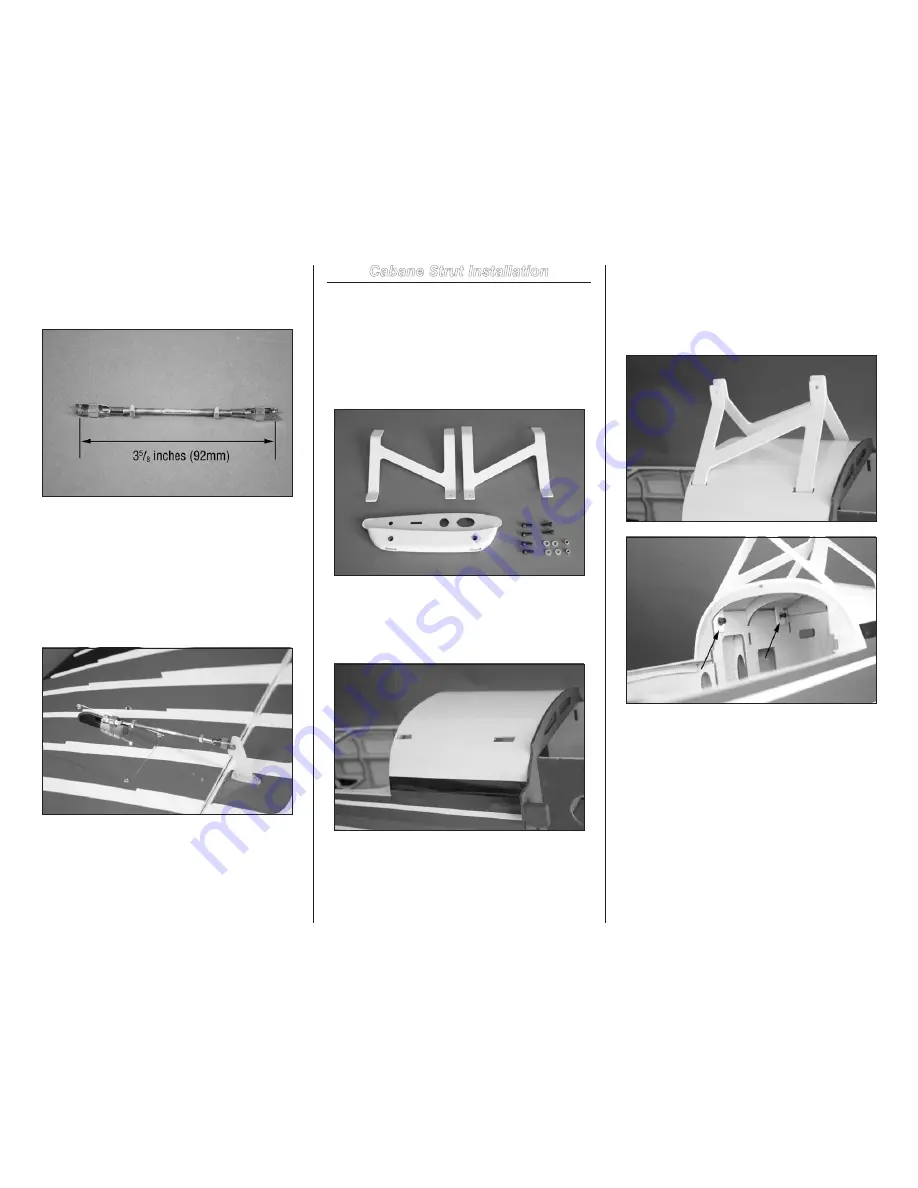
11. Thread a clevis on each end of the 3mm x 70mm
threaded rod. Set the distance between the pins of the
clevises so they are 3
5
/
8
inches (92mm) apart. Make sure
each clevis is threaded equally on the rod.
12. Connect the servo to the control horn using the
linkage prepared in the previous step. With the aileron servo
centered, fine-tune the length of the linkage so the aileron is
centered. Make sure there is an equal amount of thread in
each clevis. Once the length of the linkage is set, use pliers
to tighten the M3 nuts against the clevises so they don’t
vibrate and change position. Use threadlock on the nuts
and clevises to prevent them from vibrating loose. Slide the
silicone retainers over the forks of the clevises so they don’t
open accidentally in flight.
Cabane Strut Installation
Required Parts
Fuselage assembly
Cabane strut (right and left)
M3 nut (2)
M3 washer (4)
Upper wing center rib
M3 x 10 socket head screw (6)
1. Locate the items for this section of the manual.
2. Use a hobby knife with a #11 blade to remove the
covering on the top of the fuselage so the cabane struts
can be inserted into the fuselage. We recommend using a
trim seal tool to iron the covering neatly into the openings
in the fuselage.
3. Place the cabane struts in position, noting their
position as shown in the photo. Loosely install the four
M3 x 10 socket head machine screws and M3 washers.
Leave the hardware loose so the struts can be positioned
while installing the upper wing center rib. Make sure to use
threadlock on the screws so they won’t vibrate loose.


