36
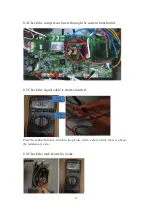
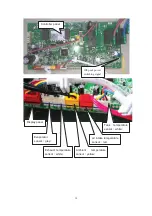
Press the yellow button to switch to the picture shown, turn the heating power
measurements, if leakage resistance is zero, if not leak, show resistance.
8.7 Check that the power cord L, N lines are in the same order into the
leakage protection coil
9. The method of dismantling products
Make sure the power cord is disconnected.
9.1
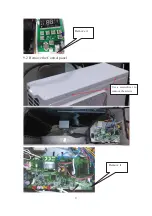
Remove the Display
leakage protection coil
Use a screwdriver
to remove the two
screws
Use a screwdriver
to remove the two
screws
Summary of Contents for HP200S1
Page 5: ...5 3 Technical parameters ...
Page 6: ...6 4 Description of parts and components 4 1 Heat pump structure HP200 300S1 ...
Page 7: ...7 4 2 Exploded view 4 2 1 Exploded view tank unit ...
Page 13: ...13 5 2 Installation dimensions mm ...
Page 21: ...21 ...
Page 23: ...23 5 13 Wiring diagram ...
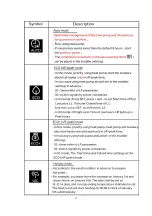
Page 24: ...24 6 Operation and functions Display 6 1 Description of the pictograms ...
Page 25: ...25 ...
Page 29: ...29 8 Faults and protection 8 1 Fault type ...
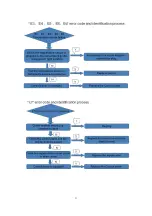
Page 30: ...30 8 2 Fault code identification method ...
Page 31: ...31 ...
Page 32: ...32 ...
Page 33: ...33 ...
Page 37: ...37 9 2 Remove the Control panel Use a screwdriver to remove the screws Remove it Remove it ...

