43
Step Command
3.
Enable the none authentication mode.
authentication-mode none
4.
Specify the user privilege level 3.
user privilege level
3
To log in to the CLI through the AUX port, connect a terminal to the AUX port by using a console cable
and follow the steps for logging in through the console port.
Performing basic configurations
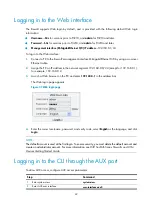
To enable the firewall to communicate with other devices on the network, you must perform some basic
configurations on the firewall. To do so, first log in to the CLI or Web interface of the firewall.
To use an interface as a service interface, you must add it to a non-management security zone and
configure the security policy before configuring relevant service functions. For more information, see the
firewall configuration guides and command references.
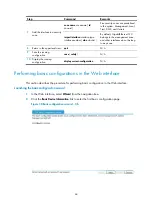
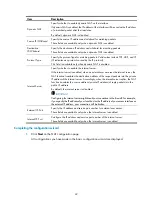
This section describes the steps for performing basic configurations on the firewall. For how to configure
protocols and features on the firewall, see the firewall configuration guides.
The syntax of commands and the Web interface vary with software versions.
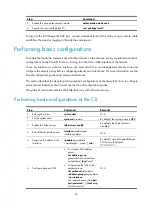
Performing basic configurations at the CLI
Step Command
Remarks
1.
Enter system view.
system-view
N/A
2.
Set the system name.
sysname
sysname
By default, the system name is
H3C
.
3.
Enable the Telnet server.
telnet server enable
By default, the Telnet server is
disabled.
4.
Enter Ethernet interface view.
interface
interface-type
interface-number
N/A
5.
Assign an IP address to the
interface.
ip address
ip-address
{
mask-length
|
mask
}
[
sub
]
By default, only M-GigabitEthernet
0/0 has an IP address
(192.168.0.1).
6.
Configure dynamic NAT.
•
To create a NAT address
group:
nat address-group
group-number
start-address
end-address
[
level
level
]
•
To associate the ACL to the
address group:
nat outbound
acl-number
[
address-group
group-number
[
vpn-instance
vpn-instance-name
] [
no-pat |
port-preserved
] ]
[
track vrrp
virtual-router-id
]
N/A

