


CUC 2030 / 2030N / 2031 / 2031 N
Allgemeiner T
eil / General Section
GRUNDIG
Service
1 - 19
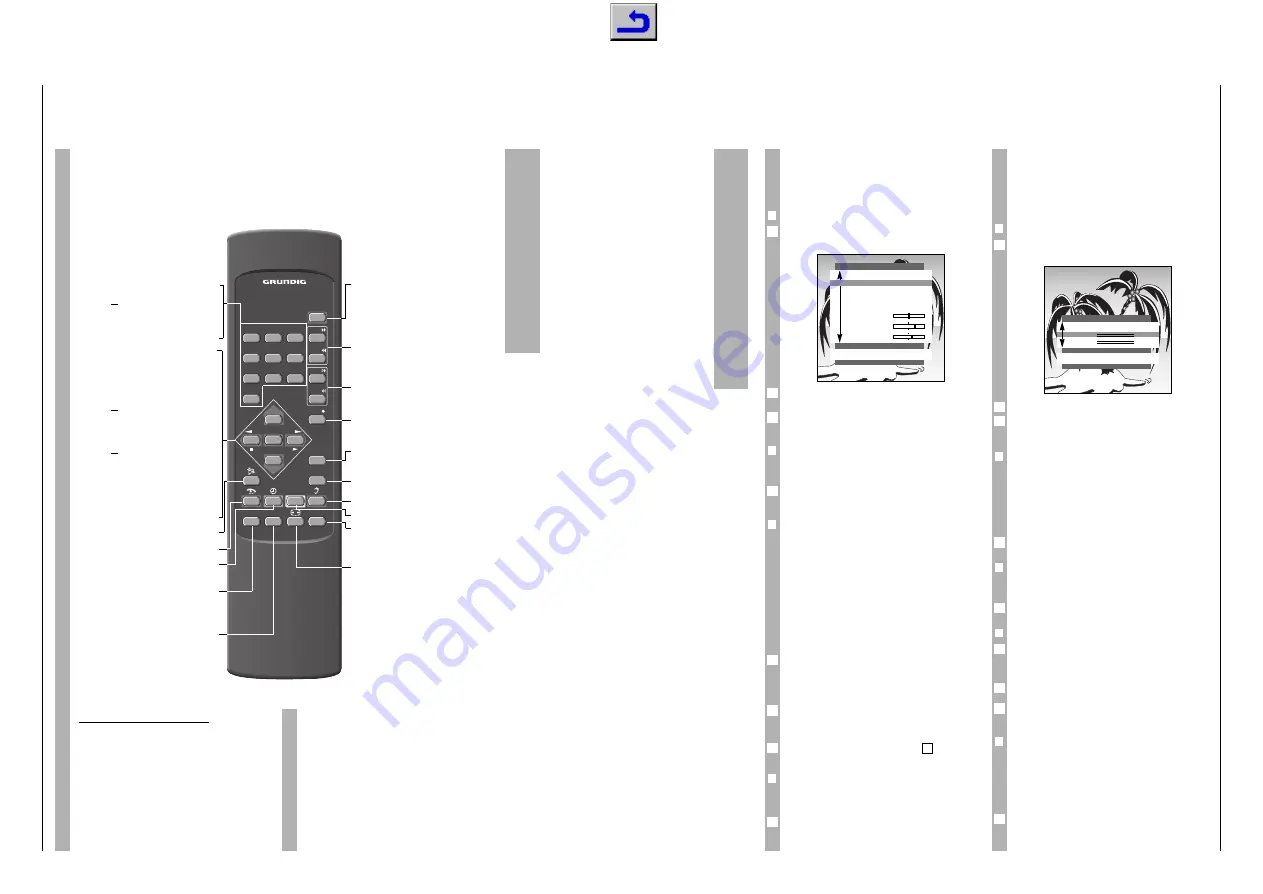
The remote control
Short description for TV operation
On this page the buttons of the remote control are
only briefly explained. Detailed descriptions can be
found in the various chapters.
ik
(button –
E
) = Frame search backwards
ju
(button
E
+) = Frame search forward
●
(button
6
)
= Start recording
■
(button
r
- ) = Stop
ii
(button –
R
) = Fast wind
uu
(button
R
+) = Fast forward
e
(button +
e
) = Playback
P-
= Program position –
P+
= Program po
Remote control video recorder
You may also use the remote control for this TV set
to operate a GRUNDIG video recorder. Your
specialist dealer can inform you on which ones are
suitable.
Press the VIDEO button and keep it depressed.
This converts the remote control to video recorder
operation.
Now press the required button.
The following list tells you which button operates
which recorder functions.
0 … 9
Switch on set from standby;
or
select programme position.
0
AV
Select AV.
P+
Move forwards from one
programme position to the next
(1, 2, 3 …).
P-
Move backwards from one
programme position to the next
(… 3, 2, 1);
or
P-, P+
Move the cursor up/down.
r
- +
e
Volume;
or
r
- +
e
Move the cursor to the left/right.
OK
Changes and activates several
functions,
Switches to optimum values
(button AUX and OK).
a
Sound on/off (mute).
z
Select » Picture « menu.
´
Clock ON/OFF (Time display only for
TV programmes with videotext).
SAT
Remote control GRUNDIG satelli-
ten receiver (keep SAT button
depressed and select satellite
program using button P+ or P-).
PIP
No function.
3
6
7
8
9
0
AV
OK
E
8
6
+
–
TP 713
TXT
–
5
4
1
P–
P+
AUX
2
+
VIDEO
–
R
OK
+
PIP
SAT
8
Switch set to standby.
R
Adjust brightness.
E
Adjust colour intensity.
6
Call up » DIALOG CENTER «
(button
6
and OK).
AUX Select » Aux « menu;
sound selection (with AUX and 2).
TXT Videotext operatation
Ç
TV operation.
F
Select » SOUND « menu.
No function.
VIDEO
Remote control GRUNDIG video
recorder (keep VIDEO
button
depressed).
E
Switch picture format from 4:3 to
16:9 (at AV programme position).
Sound and picture tuning
Sound tuning
To make individual picture adjustments, select the
menu page » Sound «.
❒
Select the menu » Sound «
Press button
F
.
The menu page » Sound « appears.
Select the desired adjustment using button P+
or P-.
The following adjustments are all terminated using
button
F
.
❒
Stereo width
Widens the sound effect for stereo transmissions
and improves mono reception.
Select the line »
+
..
« and using button
r
- or
+
e
select the adjustment »
+
.......
«.
❒
Sound (stereo/two-tone, mono)
If the device receives two-tone transmissions – e.g.
a film in the original on sound channel B (display:
» DUAL B «) and the synchronized version on sound
channel A (display: » DUAL A «) – then you may se-
lect the desired sound channel.
If the set receives stereo or NICAM transmissions,
it automatically switches to stereo sound (display:
Stereo).
If the stereo reception is bad, then the sound
should be switched to » Mono «.
Select the line »
+
Sound P01 « and using button
r
- or +
e
select the desired sound type; » Mono «
or » Stereo « and for two-tone transmissions
» Dual A « or » Dual B «.
If the sound for a particular programme is to be
permanently in mono, then select the line »
+
Sound P « and press the
G
button.
To reverse the function, repeat step
and press
the
G
button again.
❒
Treble, bass, balance
Tone settings can be adjusted to your individual
wishes.
Select the line »
u
« (balance), »
"
« (bass) or
»
!
« (treble) and make the desired adjustment
using
r
- or +
e
.
1
2
6
2
1
1
6
2
1
Picture tuning
If you would like to make individual picture adjust-
ments, you may do this using the menu page »Pic-
ture« or using the remote control buttons.
❒
Call up the » Picture « menu
Press button
z
.
The menu page » Picture « appears.
Select the desired adjustment by pressing P+ or P-.
The following adjustments are all terminated by
pressing button
z
.
❒
Contrast
The set has been tested using maximum contrast,
in order to check for reliability of all modules.
Depending on the location of the set and the
brightness in the room (surrounding light) it does
however make sense to reduce contrast slightly for
the best possible picture impression.
Adjust » Contrast « using button
r
- or +
e
.
❒
Sharpness
This allows you to adjust optimum picture sharp-
ness according to your wishes.
Adjust » Sharpness « using button
r
- or +
e
.
❒
Brightness and colour contrast
Press » – « (minus) or » + « (plus) of the corre-
sponding button until the desired adjustment is
obtained.
Adjust » Brightness « with button
R
.
Adjust » Colour contrast « (colour intensity) using
button
E
.
❒
Switching the picture format to 16:9
If the set receives a PALplus transmission via video
recorder, camcorder or a PALplus decoder the pic-
ture format must be switched to 16:9. This is possi-
ble on an AV programme position or a programme
position with an activated decoder.
Press button
E
until the message » 16:9 «
appears.
1
2
1
6
1
1
6
2
1
PICTURE
TXT
Contrast
r
■■■■■■■■■■■
e
Sharpness
■■■■■
SOUND
TXT
+
..
r
+
..
e
+
Sound
P 01
MONO
U
Sound
MONO
u
"
!


