


Revision A9 36
GRT Avionics Mini-X Installation, Setup & User Manual
3. Select a blank table entry in the correction table using the knob. If no entries are blank, then
select an entry and press Delete to clear the entry. The START CAL softkey will be displayed
when the cursor box is on a blank entry.
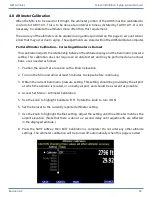
4. Press the START CAL softkey to begin.
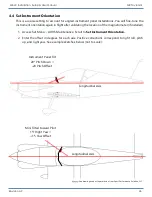
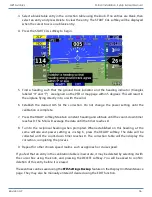
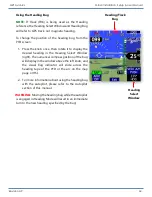
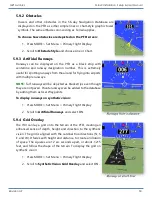
5. Find a heading such that the ground track indicator and the heading indicator (triangles
labeled “H” and “T”) are aligned on the PFD or map page within 5 degrees. This will result in
the airplane flying directly into, or with the wind.
6. Establish the desired IAS for the correction. Do not change the power setting until the
calibration is complete.
7. Press the READY softkey. Maintain constant heading and altitude until the count-down timer
reaches 0. The Mini will average the data until the timer reaches 0.
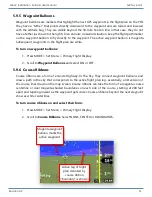
8. Turn to the reciprocal heading when prompted. When established on this heading, at the
same altitude and power setting as in step 6, press the READY softkey. The data will be
collected until the count-down timer reaches 0. The correction table will then display the
correction, completing the process.
9. Repeat for other chosen speed realms, such as approach or cruise speed.
If you feel that an entry in the calibration table is inaccurate, it may be deleted by selecting it with
the cursor box using the knob, and pressing the DELETE softkey. You will be asked to confirm
deletion of this entry before it is erased.
These entries can be saved using the
EFIS Settings Backup
feature on the Display Unit Maintenance
page. They may also be manually entered if desired using the EDIT function.


