GPO Display
Video Walls - Commercial Monitors - Digital Signage - Visual Solutions www.gpodisplay.com
Install Wall Mounts (3x3 example)
14
STEP 2
Chapter 3 Mounts Installation
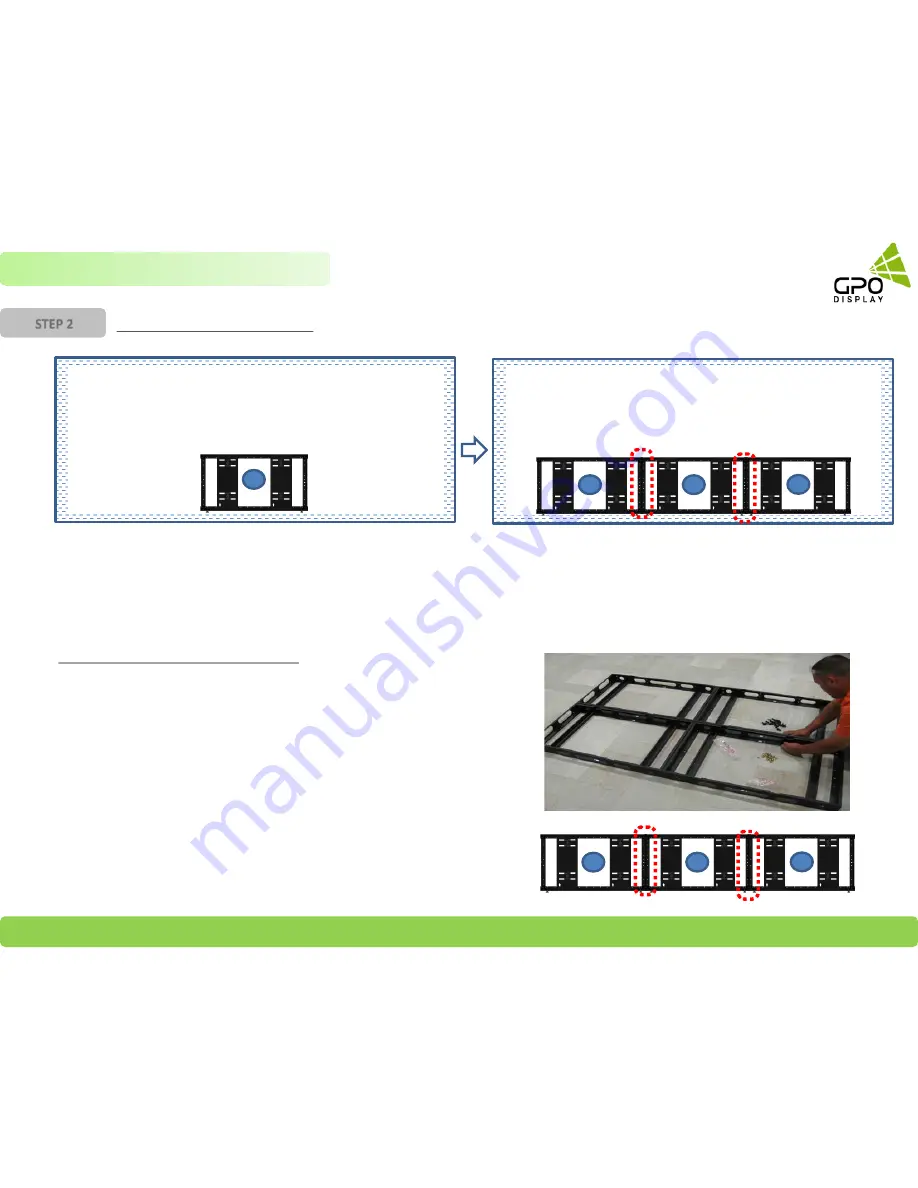
Affix first H-Mount to Wall or Wall Reinforcement frame with lag
screws (M4*20L). Measure carefully to ensure that the bracket
is located at the bottom/center of the array outline and that the
mount is level.
Use M8 interconnecting bolts & corresponding nuts to connect
the second mount and third mount to the first mount. Next,
affix second mount to Wall or Wall Reinforcement frame with
lag screws (M4*20L). Ensure that these mounts are level.
Tips for 2x2 or 3x3 video wall arrays
If your array is a 2x2 array (or 2x1, or 1x2), you may pre-assemble
mounts. For example, this means that you may use the M8
interconnecting bolts to construct a 2x2 frame prior to hanging the
mounts on the wall using The lag screws. This will help save time for
these smaller arrays. The mounts shown to the right are an older model
but the concept still applies to the current version of H-Mounts.
In a 3x3, you may assemble rows on the ground then attach to wall.
*Note: Floor surface must be level/even when connecting mounts.
Must connect mounts using M8 Bolts and nuts at all interconnection
positions (Long side: 14 positions, Short Side: 5 Positions)
1
3
1
2
3
1
2


