


Features & Components
Application Quick Buttons 2 - 11
2
Application Quick Buttons
Note that the application quick button utility is designed to allow use of the hot key
buttons in absence of the optional PC Camera (
the quick button utility will only
appear if no PC Camera is installed
). You will need to install the
Quick Button
Utility
(see page
4 - 6
) to enable the functions.
The quick buttons give instant access to user-defined applications, with one quick
button press. To configure a program to open when the buttons
(see
Table ,
on page 1 - 10
) are pressed, follow the instructions below.
The quick buttons will
function as long as the program is running (the icon
will appear in the taskbar).
If the program is not running you will need to restart the computer.
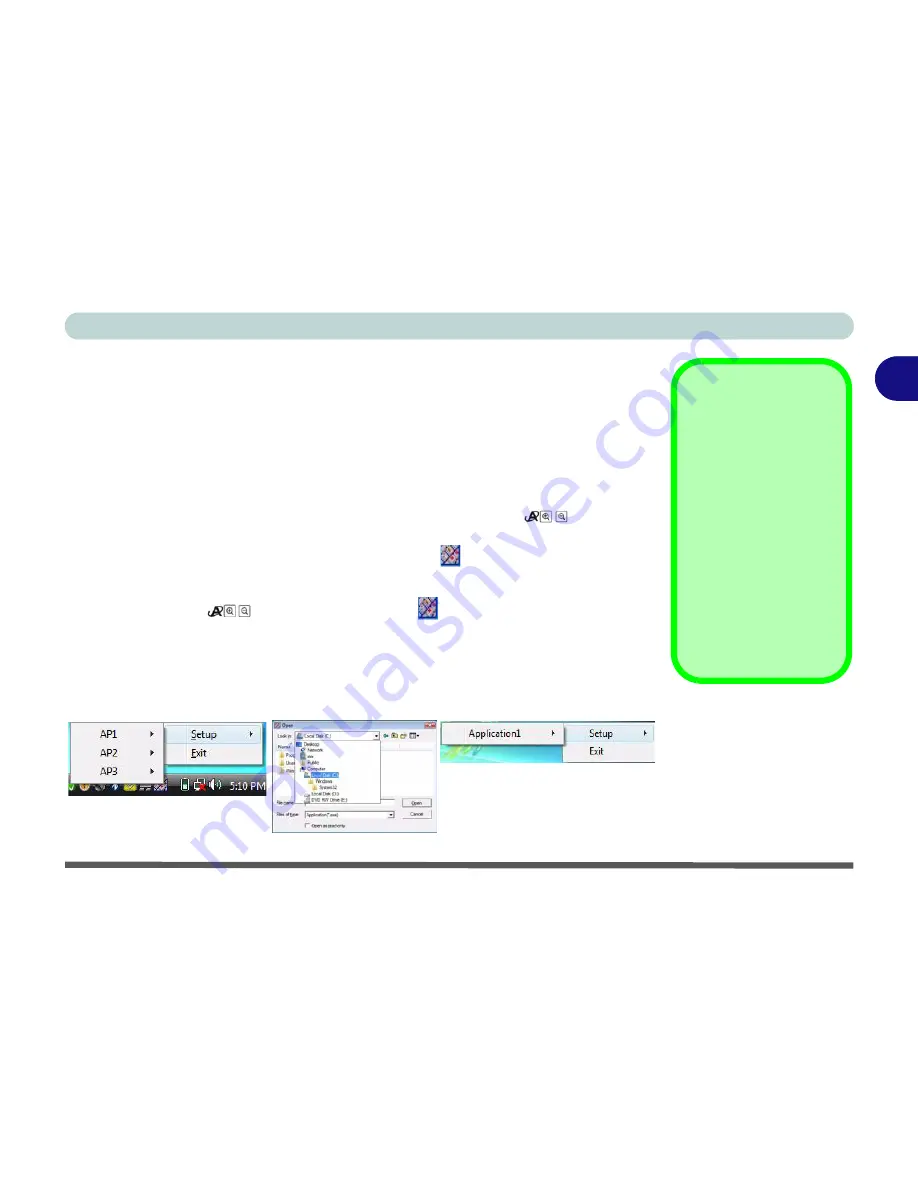
1.
Press a button
or right-click the icon
in the
taskbar
.
2.
Select
Setup
from the menu, scroll to
AP1/2/3
(or just
Application 1
for
Model C
computers) and select
Custom
.
3.
An
Open
dialog box will appear on the screen.
4.
Browse
to the directory where the required application
.exe
(see sidebar) exists.
5.
Double-Click
on the program file or choose
Open
.
Application.exe
You will need to locate
the actual
application
executable (.exe) file
,
not just the
shortcut
. To
find the application right-
click its
shortcut
on the
desktop and click
Prop-
erties
.
Click the
short-
cut
(tab) and see where
the executable file is lo-
cated by clicking the
Open File Location
(button).
Figure 2 - 7
Quick Button
Configuration
Screens
Summary of Contents for SuperSonic Force 17120-M660SU
Page 1: ......
Page 2: ......
Page 39: ...Video Features 1 19 Quick Start Guide 1 Figure 1 10 Display Settings 1 2 3 1 2 3 1 2 3...
Page 56: ...Features Components 2 16 2...
Page 80: ...Drivers Utilities 4 8 Driver Installation 4...
Page 114: ...Modules Options 7 12 PC Camera Module 7 Right click Figure 7 8 Audio Setup for PC Camera...
Page 122: ...Modules Options 7 20 7...
Page 140: ...Interface Ports Jacks A 4 A...
Page 158: ...NVIDIA Video Driver Controls C 10 C...
Page 164: ...Specifications D 6 D...
Page 172: ...Windows XP Information E 8 Recording Audio E Figure E 5 Audio Setup for Recording Windows XP...
Page 214: ...Windows XP Information E 50 PC Camera Module E Figure E 30 Audio Setup Windows XP...


