AKULA 9000B USER MANUAL
/ SECTION 3
REV:EN05130513-03
Copyright 2006-2015 © Geoscanners AB
16
3.2
Global Settings Dialogue Window
The global settings window is the main tool of GAS™
to control the way and feel of the software plus the
required external devices.
To open the global settings dialogue window press
the icon in the main toolbar or press Alt+S on your
keyboard.
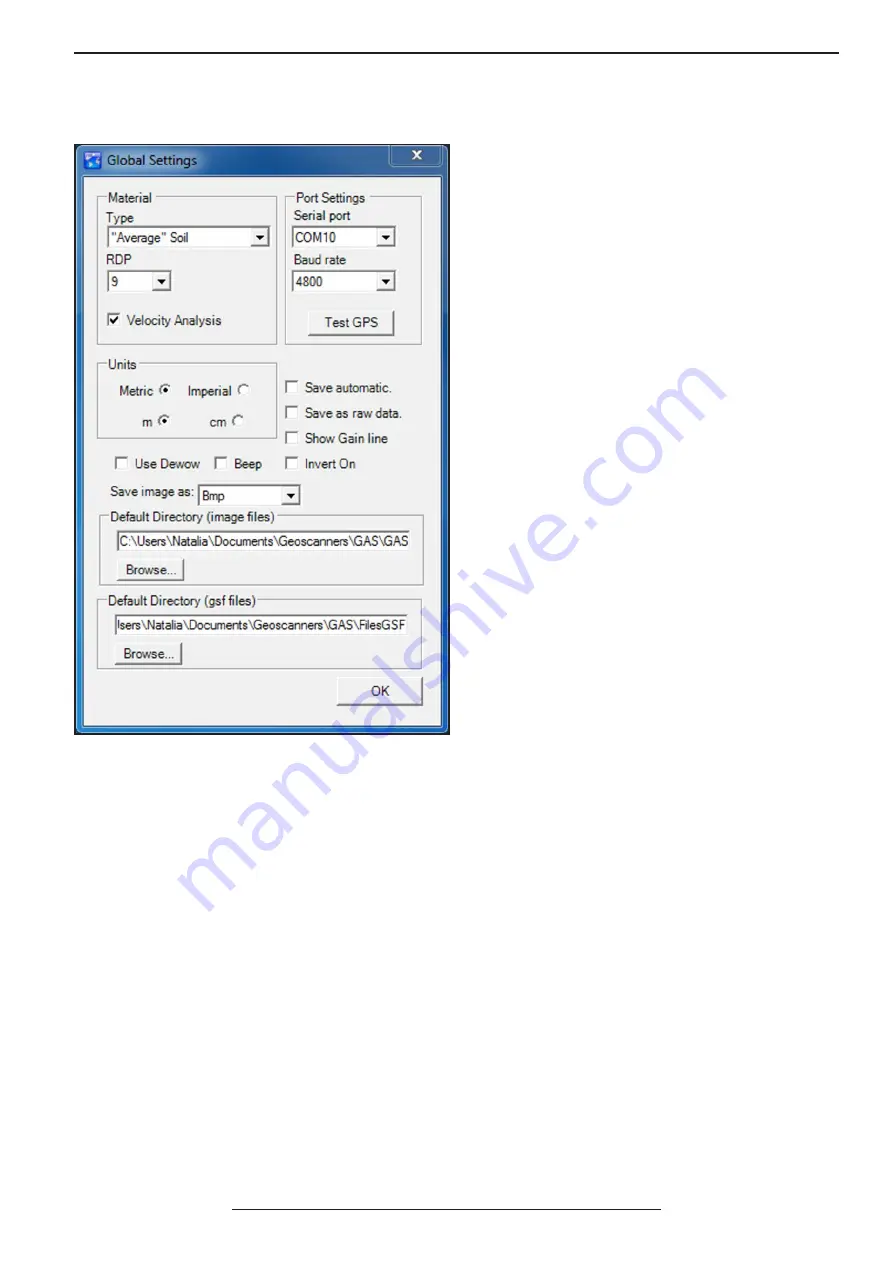
The Global Settings window is divided into six different
logical regions containing related settings.
The material box allows to select different kind of
soils with typical values for the relative dielectric
permittivity.
The selected value can be applied to the velocity
analysis while in distance mode or not depending on
the status of the corresponding check box. Please note
that although these values have been selected from
respected publications errors might occur and that
the relative dielectric permittivity of the soils is rarely
homogeneous.
The port settings box has all the necessary information
to communicate with the GPR receiver if this is
available. The selection of the port and the baud
rate are depending on your GPS receiver unit and its
parameters. A test button is available to check if the
selected settings are the correct ones.
The measurements units box is where one can select
not only the measurement system, but also the type of
units suitable for the kind of survey taking place.
The next area is reserved for the saving options of the data and the screen shots images that GAS™ can produce.
If the save automatically check box is checked then all files are saved and an increasing number is assigned to
each next collected profile. The files are always stored in the default directory for the data files, gsf files. If this
check box is not checked then every time one presses stop during collection mode a dialogue window asking to
save or discard will appear.
GAS™ gives the possibility to save the data with all the processing applied to it or without processing at all. In the
latest case it doesn’t mean you cannot apply processing to the collecting profile and see the results on the screen.
It is just that the file containing the profile will not store the processed data, but the raw one coming from the
radar control unit. This is done because there are users to prefer to see in the field how would the data look like
after wards, but still want to leave the processing to a later time and with more powerful tools.
The next setting is the drop down button that gives different choices of image file formats for the screen shot
images the software produces. Select the format that suits your needs best. The default is “bmp” because it is the
richest format and no compression is applied to the image data.
There are occasions when the antenna attached to the control unit and the selected gain profile produce skewing
of the data to the end of the trace. This is nothing else than an artifact produced by the high gain applied to the
small signals. This artifact can be thought of as a low frequency distortion and can be removed completely by
checking up the “Use Dewow” check box.


