


page | 14
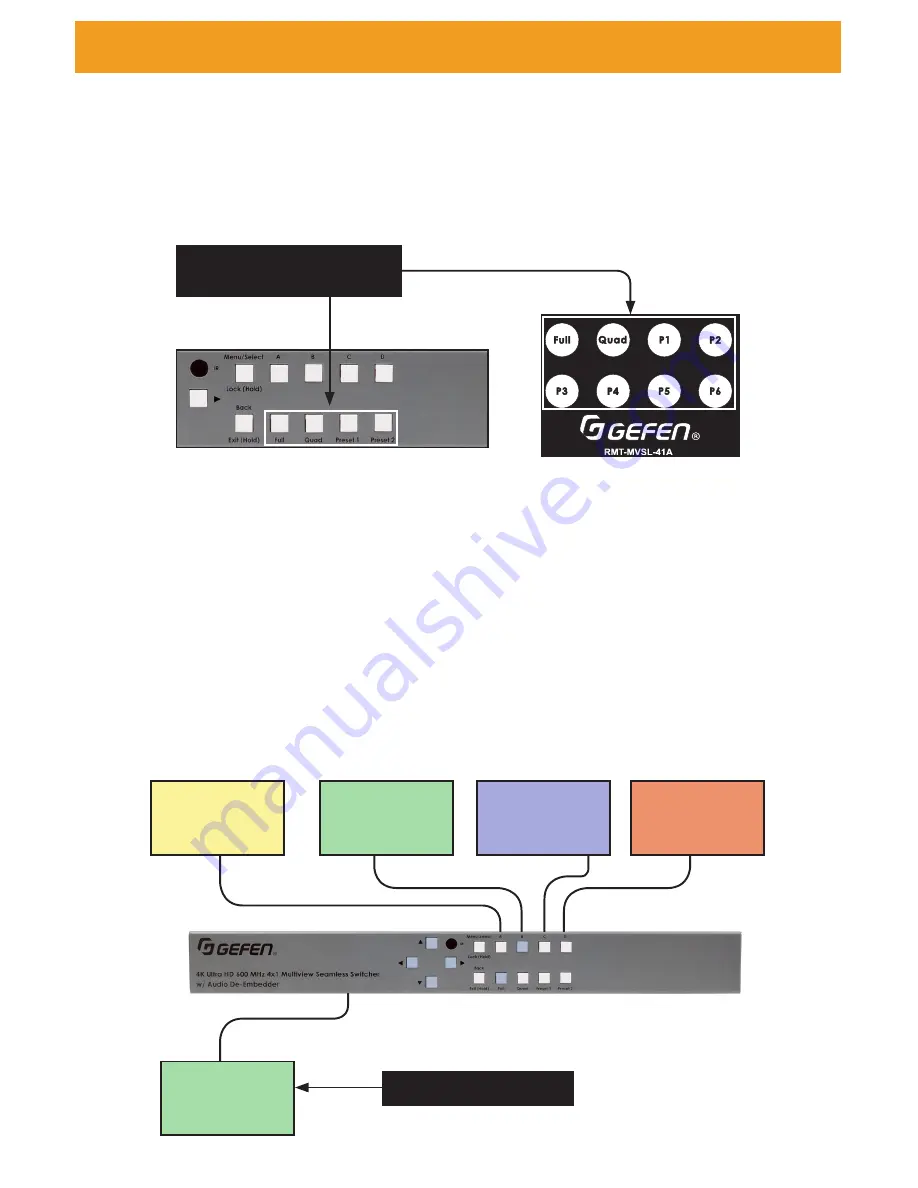
Preset Activation
Four preset buttons are present and are available for quick activation from the front panel.
Two buttons are dedicated to default presets (
Full
and
Quad
), while the remaining two
(
Preset 1
and
2
(front panel) and
P1
-
P6
(remote) are user presets that can be set via the
web interface.
To activate, press the desired preset button.
Full screen mode activation
To enter full screen operation when the unit is in a different preset or configuration:
1. Select the
Full
preset button on the front panel or IR remote. The LED for full screen
will become active and window buttons A – D will flash.
2. While the buttons are flashing, select a window button on the front panel or IR remote.
The buttons will stop flashing and the selected one will remain illuminated, indicating
the window is active. Each window (A - D) will automatically be assigned an input in
numerical order, starting with input 1 for Window A.
The Full screen preset button LED will remain active while full screen mode is in operation.
The image displayed on the output will be dictated by the current routing state of the
switcher. In this example, the source that is connected to Input 2 is displayed.
Window Basics
Single window displayed
Input 1
Input 2
Input 3
Input 4
A
B
B
C
D
Press to load custom / user
window preset
IR remote
Front panel
Summary of Contents for 4x1 Multiview Seamless Switcher
Page 10: ......
Page 11: ...01 Getting Started Multiview Seamless Switcher...
Page 14: ...page 4 IR Remote Control Unit 4 3 2 8 6 10 12 11 7 5 9 1...
Page 20: ......
Page 21: ...Multiview Seamless Switcher 02 Operating the Seamless Switcher...
Page 60: ...This page left intentionally blank...
Page 61: ...Multiview Seamless Switcher 03 Advanced Operation...
Page 86: ...This page left intentionally blank...
Page 87: ...Multiview Seamless Switcher 04 Appendix...


