63
R E LI AG E A R® LV SG
LO W VO LTAG E S W I TC H G E A R
Bus area
Warning:
De-energize equipment completely
before doing maintenance work on any devices,
connections, bus work, breaker or feeder cable
compartments. This includes
de-energizing any connections to outside primary
or secondary sources, such as transformers, tie
lines, etc.
Inspect and check the bus area as follows:
1. Inspect the buses and connections carefully
for evidence of overheating or weakening of the
insulating supports. If bus insulation is present,
remove the molded covers over the main bus
connection to expose joints for inspection.
2. Check all connection bolts in the bus
compartment and all bracing bolts for tightness.
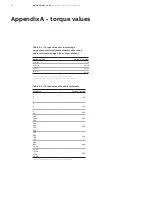
See the Torque Table A.1 in Appendix A.
3. Vacuum and, with a clean rag, wipe the buses
and supports.
4. Visually inspect the insulation on the bars that
run from the breaker studs through the bus
structure to the cable area.
5. After cleaning, megger and record the resistance
to ground and between phases of all insulated
bars and all buses and connections. Disconnect
all control circuits before checking resistance.
Do not use over a 1500-volt megger. Since
definite limits cannot be given for satisfactory
insulation resistance values, a record must be
kept of the readings.
Weakening of the insulation from one maintenance
period to the next can be recognized from the
recorded readings. The readings should be taken
under similar conditions each time, if possible, and
the record should include the ambient temperature
and humidity.
Cable and busway compartment
Inspect and check the cable and busway
compartment as follows:
1. Inspect all power cable connections for signs of
overheatingand tighten all connections. If severe
discoloration or if damage is apparent, remove
the damaged portion of the cable.
Caution:
Be sure the condition which
caused the over-heating has been
corrected before energizing.
2. Check all bolts that hold cable terminals to the
connection bars for tightness.
3. Check the neutral bus and ground bus
connection and mounting bolts for tightness.
4. Check that all secondary control wiring
connections are tight and that all control
cabling is intact.
Overall switchgear
Make the following checks on the complete
switchgear equipment.
• Clean and inspect all painted surfaces and
retouch where necessary.
• Check to see that all anchor bolts and other
structural bolts are tight.
• Check that all breaker and instrument
compartment door latches operate properly.
• If the switchgear is equipped with heaters,
check to see that all heaters are energized
and operating.
• For exterior vent openings in equipment
furnished with air filters, the foam filter elements
should be removed and washed in warm soapy
water, rinsed, and reassembled
at least annually. Elements should be inspected
before re-assembly and replaced if any signs
of deterioration are evident.
Paint refinishing
Indoor switchgear is finished with ANSI-61 gray
acrylic enamel paint (PPG W42713, part number
21525032650). To refinish damaged areas, remove
all loose paint, rust, scale, oil or grease. Sand any
scratches smooth using 220 grit paper or finer.
DANGER
WARNING
CAUTION
NOTICE


