


232002430G(03)
28
NOTE
If you have purchased additional Optional Accessories for the LaserPro FMC280, please
refer to chapter VII for instructions on how to properly setup your optional accessories.
These should be setup prior to working with your LaserPro FMC280.
Tip
Please adjust the LCD Display Screen’s Contrast
before plugging in the electrical cord of
your laser. LCD adjustment wheel is located underneath the control panel
4.1.3 Connecting the Computer
The LaserPro FMC Series can communicate with a computer through a USB Port or LAN Port
connection interface. Regardless of the connection method chosen, you will need to connect the
respective connection cable from the LaserPro FMC Series to your computer.
USB Connectivity:
Connect the included USB Port Cable to the USB Port on the right-hand
side of the LaserPro FMC280.
Ethernet Connectivity
:
Connect the LAN Cable in accessory to the LAN port on the right-
hand side of the laser system. Follow below instruction for ethernet connectivity setup..
4.1.3.1 Networking Connectivity Setup
GCC laser engraver is built-in with LAN port to enable multiple laser engravers to be operated by one
PC and multiple PCs to share a single unit of laser engraver. Below setup instructions use GCC Spirit
GLS laser system as illustration, the procedures are identical, only choose the right machine during
setup if any.
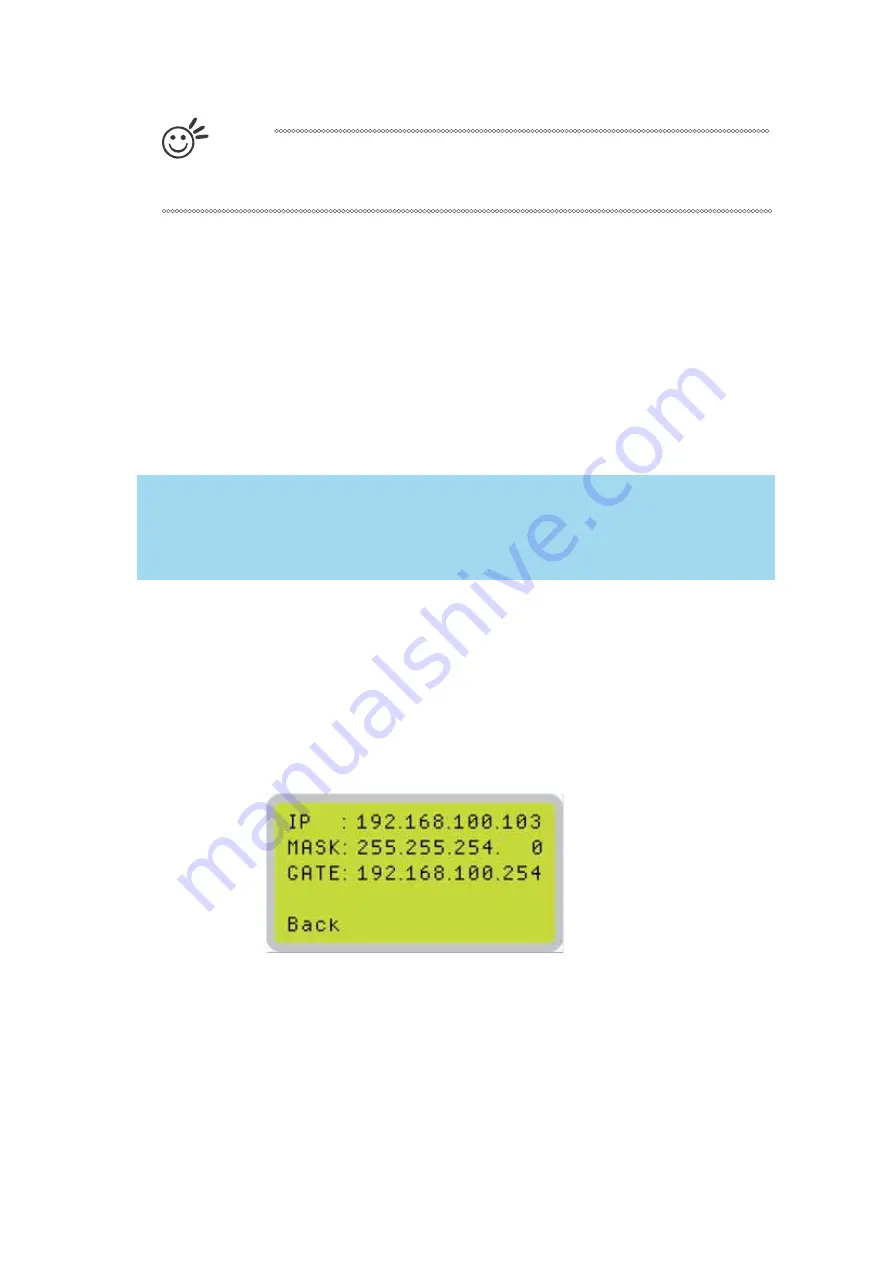
Step 1. Connect LAN cable to the LAN port of GCC laser engravers and turn on machine
Step 2. Navigate the control panel through <F4> Function
Æ
<Machine Setting>
Æ
<LAN Setup
Wizard>
Æ
IP Address.
Step 3. Go to Windows <Control Panel>
Æ
<Hardware and Sound>
Æ
<Printer>, and right click on
Spirit series printer to check printer properties.
Step 4. Go to <Ports> tab of Spirit series printer properties, and select <Add Port>, and follow the
instruction to enter the TCP/IP information received from laser machine control panel in step 2.
Summary of Contents for LaserPro FMC280
Page 1: ...www delinit by...
Page 20: ...16 232002430G 03 Step 3 Loosen the lock Step 4 Remove the top board and each sideboard...
Page 27: ...232002430G 03 23 3 2 Right Profile View Ethernet Port USB Port Power Socket Main Power Swiych...
Page 28: ...232002430G 03 24 3 3 Left Profile View Water Outlet Water Inlet Assist Air Inlet...
Page 29: ...232002430G 03 25 3 4 Rear View...
Page 33: ...232002430G 03 29...
Page 34: ...232002430G 03 30...
Page 38: ...232002430G 03 34...
Page 39: ...232002430G 03 35...
Page 40: ...232002430G 03 36...
Page 44: ...232002430G 03 40 4 Enter your Mac OS X User Name and Password then press OK 5 Press Active...
Page 45: ...232002430G 03 41 6 Press OK when activation is complete 7 Register Parallels Desktop...
Page 101: ...232002430G 03 97 5 3 4 4 LaserPro FMC280 Print Driver Paper Page...
Page 113: ...232002430G 03 109 8 Now you are ready to output the modified image by clicking File Print...
Page 128: ...124 232002430G 03 Chapter 9 Appendix LaserPro FMC280 Specification Sheet www delinit by...


