


115
232002430G(03)
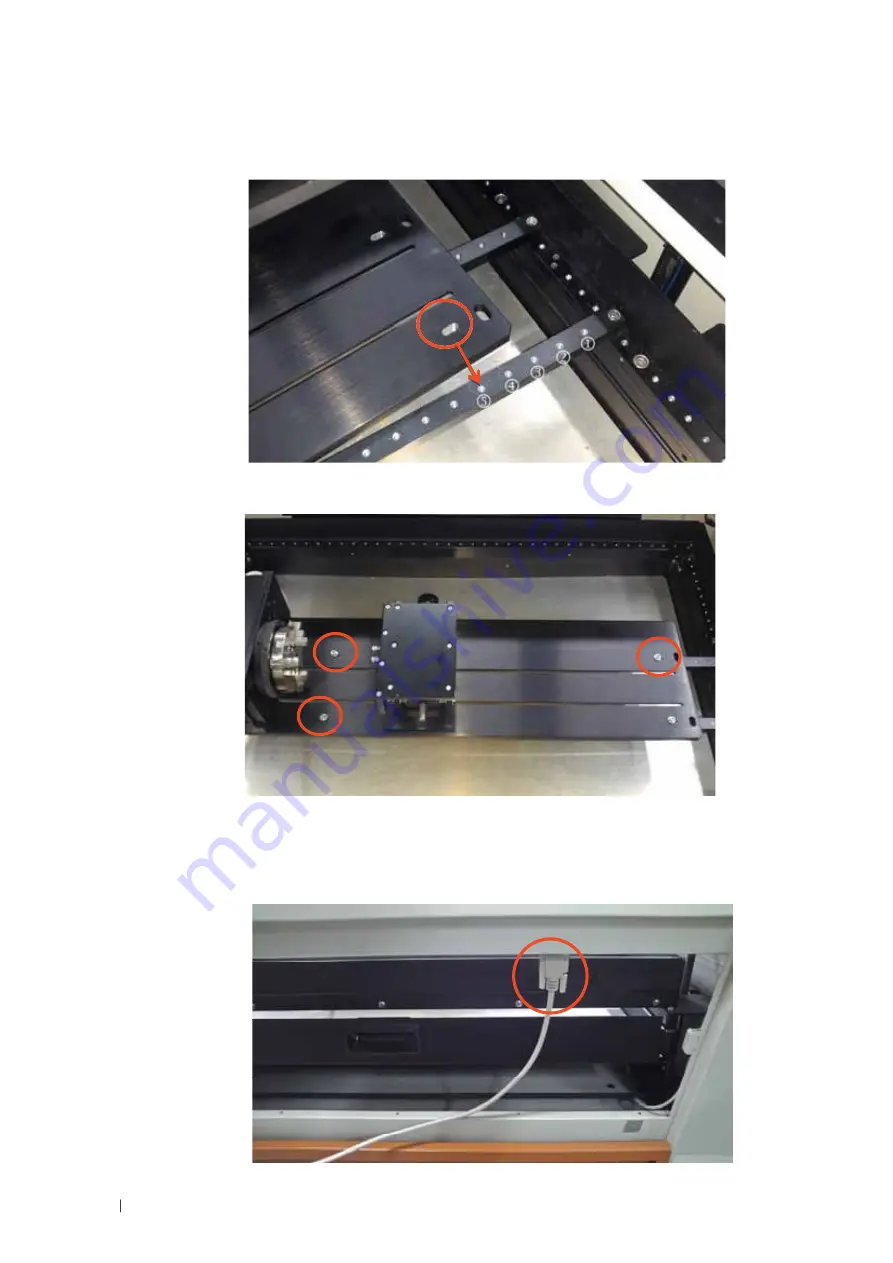
3) Put the Rotary Chuck on top of the two Supporting Bars in step 2. Align and fix the
Rotary Chuck to the No. 5 screw opening on the Supporting Bars.
4) Fix the other three screws accordingly.
5) Open the front door of the FMC280 laser machine and connect the Rotary
Chuck cable to the connection port located on the machine chassis, and
close the front door.
Summary of Contents for LaserPro FMC280
Page 1: ...www delinit by...
Page 20: ...16 232002430G 03 Step 3 Loosen the lock Step 4 Remove the top board and each sideboard...
Page 27: ...232002430G 03 23 3 2 Right Profile View Ethernet Port USB Port Power Socket Main Power Swiych...
Page 28: ...232002430G 03 24 3 3 Left Profile View Water Outlet Water Inlet Assist Air Inlet...
Page 29: ...232002430G 03 25 3 4 Rear View...
Page 33: ...232002430G 03 29...
Page 34: ...232002430G 03 30...
Page 38: ...232002430G 03 34...
Page 39: ...232002430G 03 35...
Page 40: ...232002430G 03 36...
Page 44: ...232002430G 03 40 4 Enter your Mac OS X User Name and Password then press OK 5 Press Active...
Page 45: ...232002430G 03 41 6 Press OK when activation is complete 7 Register Parallels Desktop...
Page 101: ...232002430G 03 97 5 3 4 4 LaserPro FMC280 Print Driver Paper Page...
Page 113: ...232002430G 03 109 8 Now you are ready to output the modified image by clicking File Print...
Page 128: ...124 232002430G 03 Chapter 9 Appendix LaserPro FMC280 Specification Sheet www delinit by...


