67
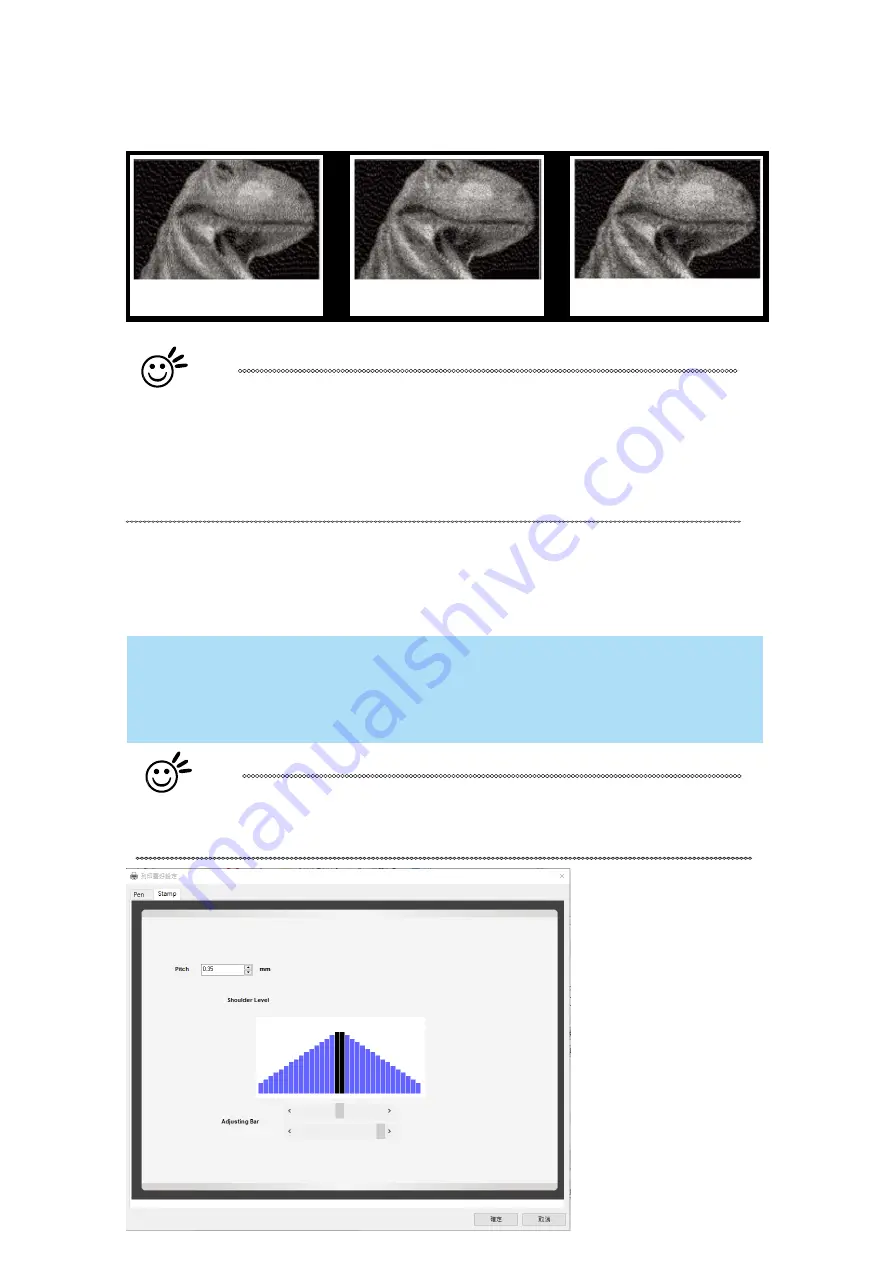
The following diagram is an example of the raster effects when using the different diffusion types.
Floyd
Stucki
Jarvis
Tip
There is no "correct" or "best" setting when using the Raster options. The most
appropriate settings will be based on a variety of factors: your design, the
material you are engraving on, the results you wish to achieve, etc. Please take
some time to experiment with the multitude of raster options to get the one you
feel is the best for your piece. This is where much of the fun in engraving
is….
experimentation!
Stamp Page
Producing stamps require different operational steps than your standard engraving or cutting jobs.
The Stamp page offers dynamic options allowing you to customize your stamp production process.
NOTE
The Stamp page will only appear and be accessible when you have selected the
Stamp Mode from the Options Page.
Tip
Functions located on the other pages that are useful when making a
stamp: Set Shoulder, Pitch, Border, Invert, and Mirror.
Summary of Contents for LaserPro E200 Series
Page 13: ...12 Chapter 2 Unpacking Unloading Unpacking...
Page 19: ...18 3 3 Right Profile View 3 4 Left Profile View...
Page 20: ...19 3 5 Rear View...
Page 21: ...20 3 6 Water Chiller Front View...
Page 22: ...21 3 7 Water Chiller Right View 3 8 Water Chiller Left View 3 9 Water Chiller Rear View...
Page 23: ...22 Chapter 4 Machine Setup Water Chiller Setup E200 Desktop Laser Engraver Setup...
Page 31: ...30 2 Click Next 3 Clip Launch SmartJOB and clip Finish...
Page 36: ...35 5 Choose the WiFi connection 6 WiFi Setting is complete...
Page 70: ...69 7 4 E200 Touch Panel Operation 7 4 1 Navigation Chart of E200 Touch Panel...
Page 81: ...80 Chapter 8 Optional Items Fume Extraction System Air Compressor Rotary Attachment...
Page 99: ...Chapter 10 Appendix GCC LaserPro E200 Specification Sheet...


