65
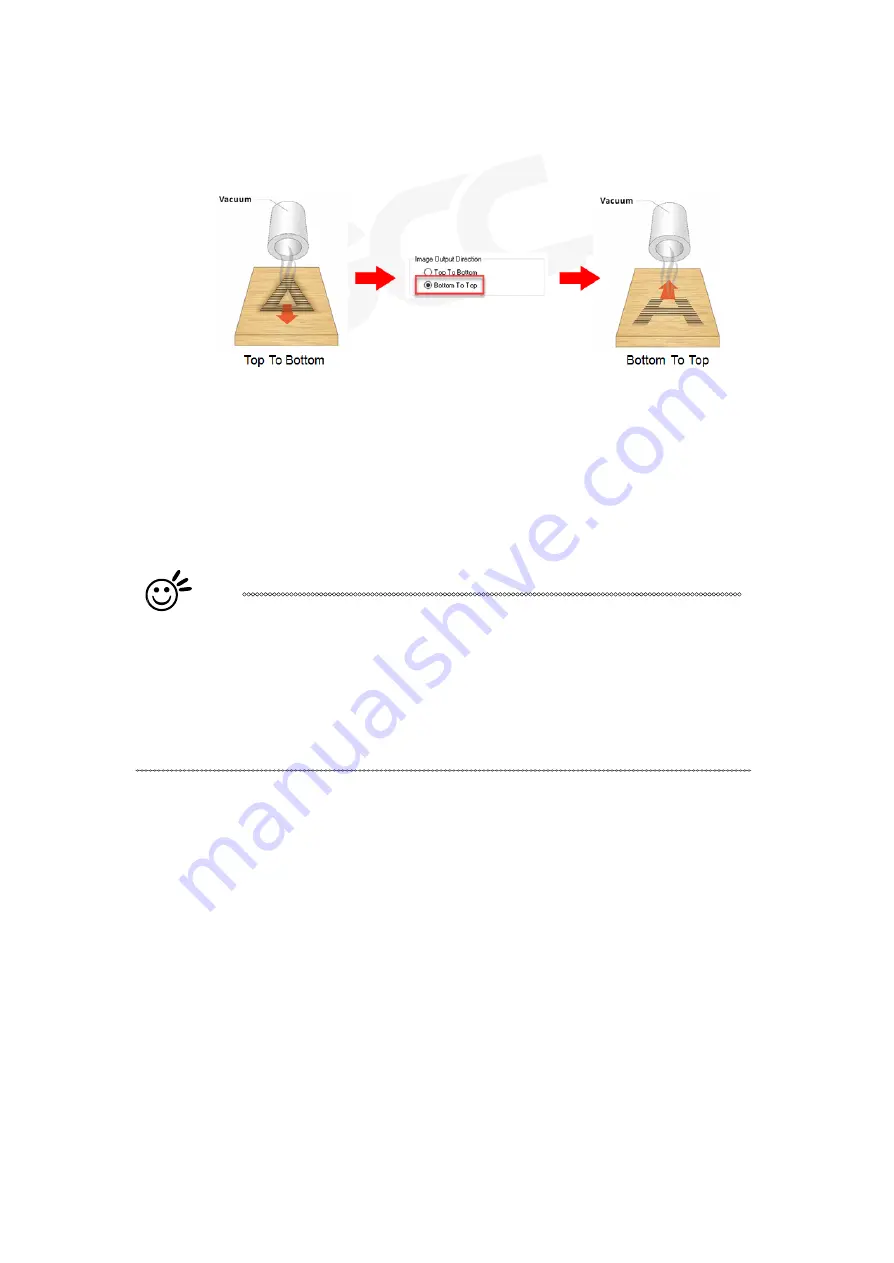
Image Output Direction [DEFAULT SETTING: Top To Bottom]
These selections allow you to control the direction in which the system processes an engraved image.
•
Top To Bottom
: Selecting this will force the system to process the current task by moving the laser
carriage from the top to the bottom of the image (rear end to front end of the work table).
•
Bottom To Top
: Selecting this will force the system to process the current task by moving the laser
carriage from the bottom to the top of the image (front end to rear end of the work table)
(Normally, the LaserPro E200 engraves from left to right, top to bottom. Selecting Bottom Up will
force the machine to start from the bottom and work its way to the rear of the working table.
Tip
In situations where the material you will be working with may produce a lot
of dust byproducts and you are utilizing the optional Fume Extraction
system, it is recommended you select the Bottom To Top image output
direction option. This will minimize the amount of dust byproducts lodged in
the engraved sections as the Fume Extraction system is vented from the
rear of the machine, the same direction as the image is processed.
Summary of Contents for LaserPro E200 Series
Page 13: ...12 Chapter 2 Unpacking Unloading Unpacking...
Page 19: ...18 3 3 Right Profile View 3 4 Left Profile View...
Page 20: ...19 3 5 Rear View...
Page 21: ...20 3 6 Water Chiller Front View...
Page 22: ...21 3 7 Water Chiller Right View 3 8 Water Chiller Left View 3 9 Water Chiller Rear View...
Page 23: ...22 Chapter 4 Machine Setup Water Chiller Setup E200 Desktop Laser Engraver Setup...
Page 31: ...30 2 Click Next 3 Clip Launch SmartJOB and clip Finish...
Page 36: ...35 5 Choose the WiFi connection 6 WiFi Setting is complete...
Page 70: ...69 7 4 E200 Touch Panel Operation 7 4 1 Navigation Chart of E200 Touch Panel...
Page 81: ...80 Chapter 8 Optional Items Fume Extraction System Air Compressor Rotary Attachment...
Page 99: ...Chapter 10 Appendix GCC LaserPro E200 Specification Sheet...


