52
7.2.4
Engraving & Cut by SmartJOB (workflow)
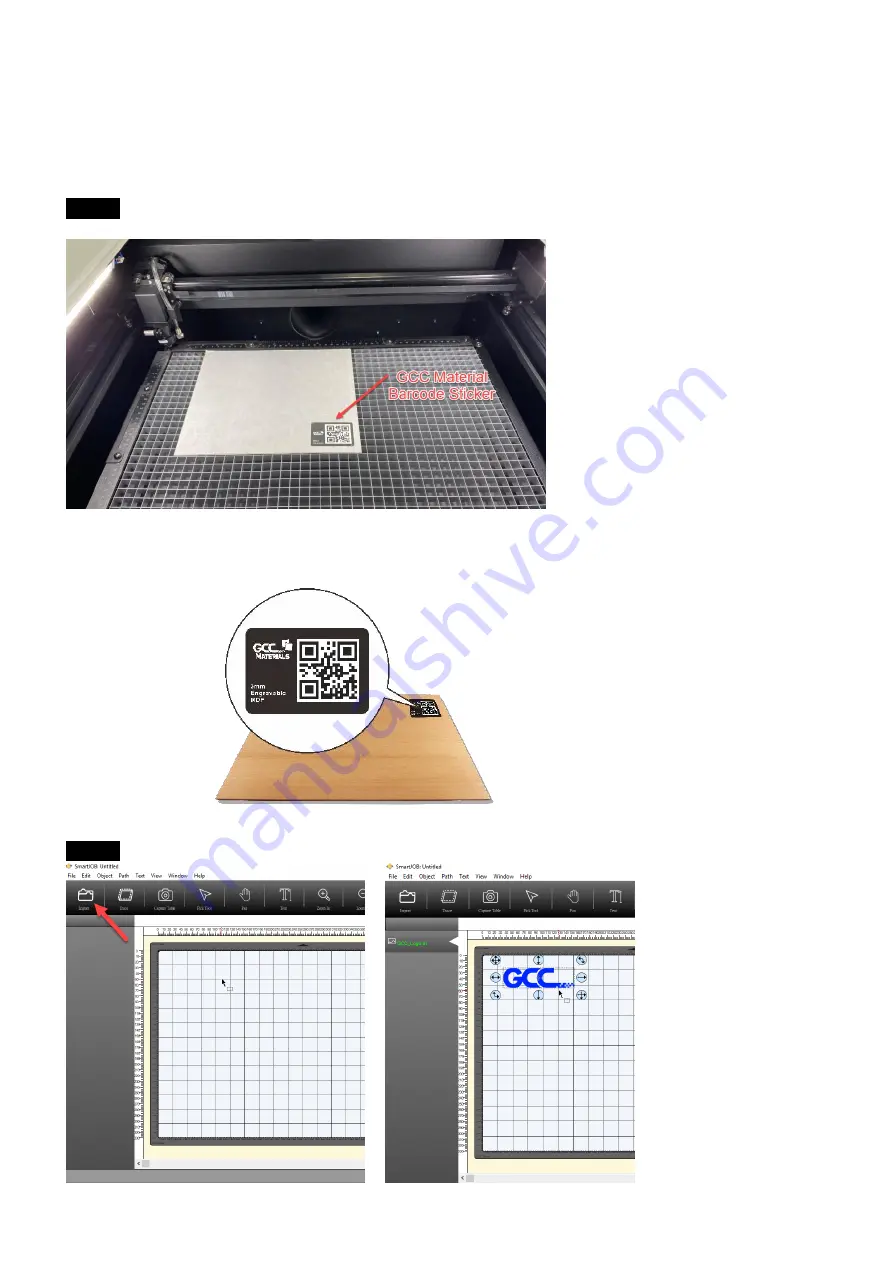
Step 1
Place the GCC Material to E200 machine.
NOTE: Every material piece which comes with E200 has a specific barcode on the
surface of the material. When removing protection foil, please do NOT remove the QR
code sticker.
Step 2
Open the SmartJOB software and import the file which you’d like to process.
Summary of Contents for LaserPro E200 Series
Page 13: ...12 Chapter 2 Unpacking Unloading Unpacking...
Page 19: ...18 3 3 Right Profile View 3 4 Left Profile View...
Page 20: ...19 3 5 Rear View...
Page 21: ...20 3 6 Water Chiller Front View...
Page 22: ...21 3 7 Water Chiller Right View 3 8 Water Chiller Left View 3 9 Water Chiller Rear View...
Page 23: ...22 Chapter 4 Machine Setup Water Chiller Setup E200 Desktop Laser Engraver Setup...
Page 31: ...30 2 Click Next 3 Clip Launch SmartJOB and clip Finish...
Page 36: ...35 5 Choose the WiFi connection 6 WiFi Setting is complete...
Page 70: ...69 7 4 E200 Touch Panel Operation 7 4 1 Navigation Chart of E200 Touch Panel...
Page 81: ...80 Chapter 8 Optional Items Fume Extraction System Air Compressor Rotary Attachment...
Page 99: ...Chapter 10 Appendix GCC LaserPro E200 Specification Sheet...


