50
Input Settings
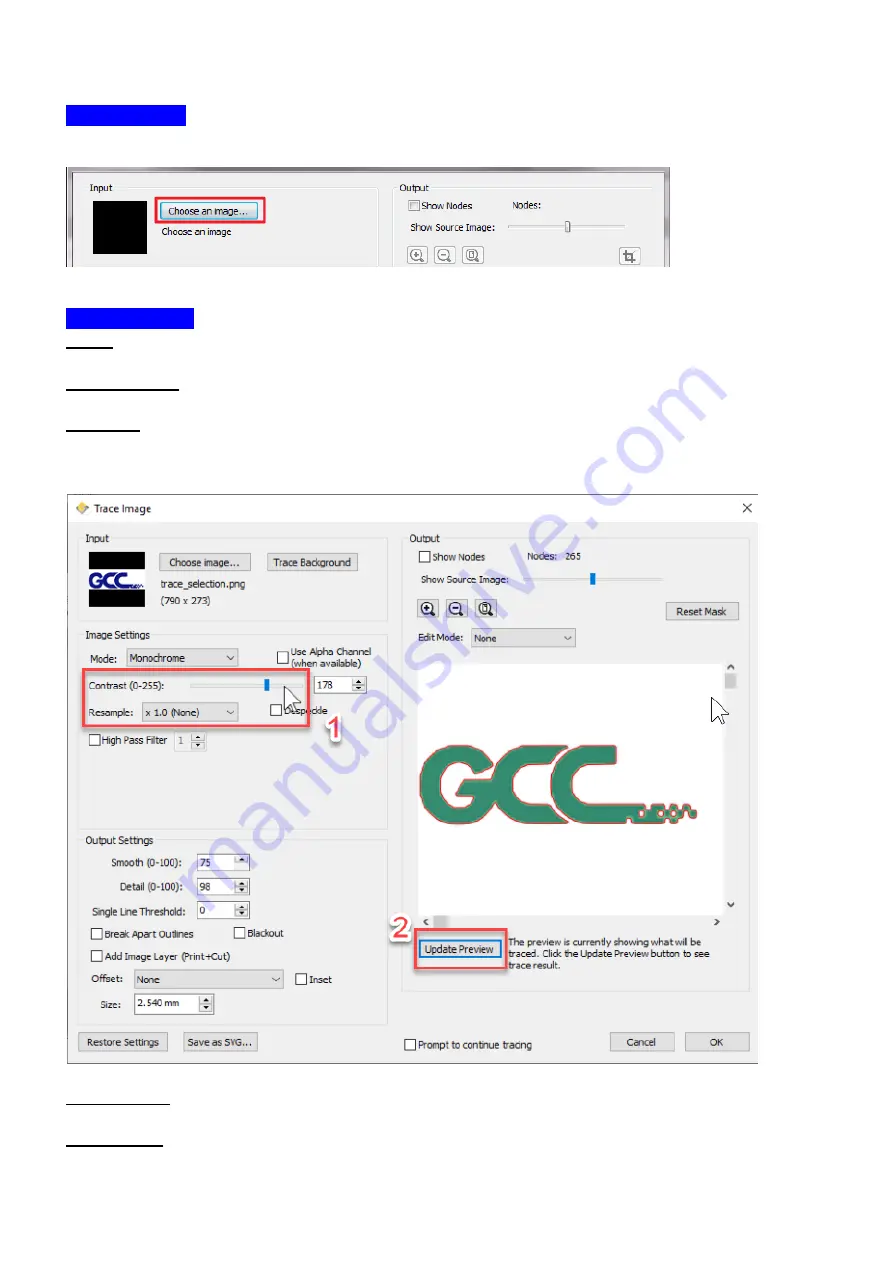
Choose an Image: click “Choose an image…” button. The program can accept most files
(.bmp, .jpg, .gif, .png).
Image Settings
Mode:
choose which tracing mode you would like to do.
Monochrome
- will trace as if the image is a black and white image.
Contrast:
this value will determine the cutoff to whether parts of the image should be traced.
When you adjust the contrast value, the preview will change to a black and white image
showing what parts of the image will be traced. To see trace results, click the “Update
Preview” button.
Color layers
- will segment the image into the specified number of colors.
Max Colors
- the maximum number of colors to segment the image in to. You can turn off
colors by clicking on the color boxes. To see trace results, click the “Update Preview” button.
Summary of Contents for LaserPro E200 Series
Page 13: ...12 Chapter 2 Unpacking Unloading Unpacking...
Page 19: ...18 3 3 Right Profile View 3 4 Left Profile View...
Page 20: ...19 3 5 Rear View...
Page 21: ...20 3 6 Water Chiller Front View...
Page 22: ...21 3 7 Water Chiller Right View 3 8 Water Chiller Left View 3 9 Water Chiller Rear View...
Page 23: ...22 Chapter 4 Machine Setup Water Chiller Setup E200 Desktop Laser Engraver Setup...
Page 31: ...30 2 Click Next 3 Clip Launch SmartJOB and clip Finish...
Page 36: ...35 5 Choose the WiFi connection 6 WiFi Setting is complete...
Page 70: ...69 7 4 E200 Touch Panel Operation 7 4 1 Navigation Chart of E200 Touch Panel...
Page 81: ...80 Chapter 8 Optional Items Fume Extraction System Air Compressor Rotary Attachment...
Page 99: ...Chapter 10 Appendix GCC LaserPro E200 Specification Sheet...


