background image

Page 6 - 8

 © April 2001 General Binding Corporation

Applications

F 60 C Operation and Maintenance  Manual

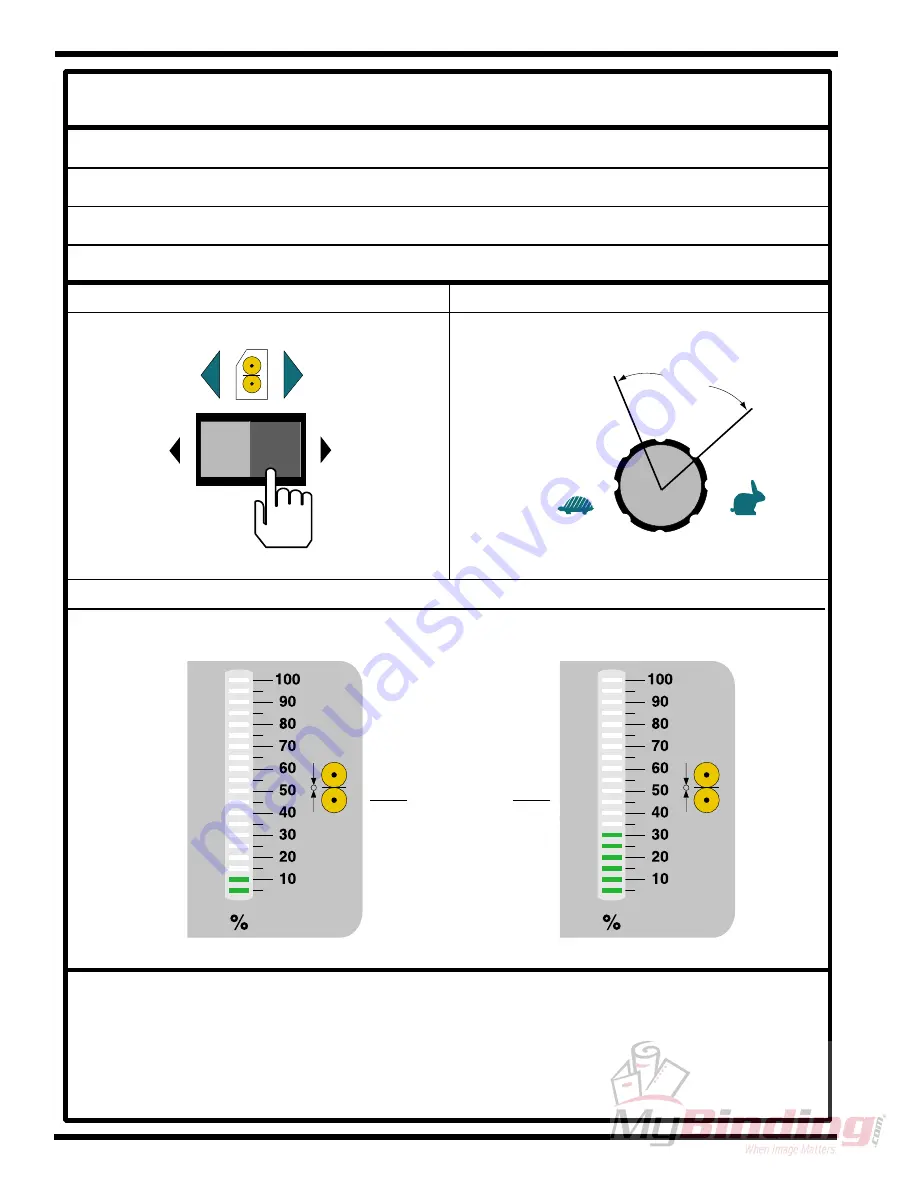
PROCESS CONTROL CHART

Materials - Pre-coating substrates

Top material : Roll of pressure sensitive mount adhesive

Bottom material : N/A

Other material (s) : Substrates, leader board and trailer board

Motor Direction

Motor Speed

1

2

3

4

5

6

7

8

9

10

range

Roller Pressure

RANGE

Notes : The roll of mount adhesive should not exceed the substrate by more than 1 in. 
(2.54 cm). Speed will be determined by what is comfortable for the operator. Pressure is 
dependent on the substrate. Do not crush the substrate. Use a leader board to start the 
run and stop the run when the trailer board is in the nip of the rollers. Stopping on a 
subtsrate will leave an impression on the board. Refer to helpful hints for pressure 
sensitive materials and mounting.

Summary of Contents for FALCON 60 C

Page 1: ...Provided By http www MyBinding com http www MyBindingBlog com GBC F60C Roll Laminator Instruction Manual...

Page 2: ...Tech 4151 Anderson Road DeForest WI 53532 Revision Ph 608 246 8844 Fx 608 246 8645 FALCON 60 C OPERATION MAINTENANCE MANUAL APRIL 2001 GENERAL BINDING CORPORATION ALL RIGHTS RESERVED Do not duplicate...

Page 3: ...inding Corporation assumes no liability arising from infringements of patents or any other rights of third parties This publication is copyrighted 2001 by General Binding Corporation All rights re ser...

Page 4: ...Read me file F 60 C Operation and Maintenance Manual April 2001 General Binding Corporation This page intentionally left blank...

Page 5: ...Corporation Fax Correspondence Fax number 608 246 8645 Date To Technical Coordinator at GBC Protech 4151 Anderson Road DeForest WI 53532 From Company Address Phone number Fax number Re F 60 C Operati...

Page 6: ...Read me file F 60 C Operation and Maintenance Manual April 2001 General Binding Corporation This page intentionally left blank...

Page 7: ...ty 1 1 Symbols 1 1 1 2 Safety precautions 1 2 1 3 Safety features 1 3 1 4 Installation 1 4 1 5 Operations 1 7 1 6 Applications 1 9 1 7 Troubleshooting 1 10 1 8 Maintenance 1 11 1 9 Decal explanation 1...

Page 8: ...Specifications 3 1 General 3 1 3 2 Consumables 3 2 3 3 Function 3 3 3 4 Electrical 3 4 3 5 Dimensions 3 5 Figure 3 5 1 Dimensions 3 6 4 0 Installation 4 1 Pre installation check list 4 1 Figure 4 1 1...

Page 9: ...ontent 4 7 4 7 Installing levelers 4 8 4 8 Leveling 4 8 4 9 Connecting power 4 10 4 10 Safety check 4 12 5 0 Operations 5 1 Power ON OFF 5 2 5 2 Control panel 5 3 Figure 5 2 1 Front control panel 5 4...

Page 10: ...ms 6 3 Blank chart 6 4 Blank diagram 6 5 Blank diagram w roll to roll option 6 7 Chart Pre coating substrates 6 8 Diagram Pre coating substrates 6 9 Chart Mounting an image 6 10 Diagram Mounting an im...

Page 11: ...19 Chart PSA single sided lamination craft paper 6 20 Diagram PSA single sided lamination craft paper 6 21 Diagram PSA single sided lamination craft paper w roll to roll option 6 23 Chart PSA over la...

Page 12: ...eration and Maintenance Manual April 2001 General Binding Corporation 8 0 Maintenance 8 1 Maintenance schedule 8 1 8 2 Cleaning the rollers 8 2 8 3 Clean cabinets and covers 8 3 8 4 Clean the control...

Page 13: ...FORMATION Indicates helpful information that should be considered before during or after an action step or procedure is given CAUTION Indicates a potentially hazardous situation which if not avoided c...

Page 14: ...wn control is located on the rightsideofthemachinewithinthefront Beforeturning thecrankhandletosettheGAPdown ensurethatnothing is in the nip area Installationshouldbeperformedbyaqualified technicianto...

Page 15: ...f all four E STOPS are in the unlatched position To continue operation all E STOPs mustbein the unlatched position To reset twist the E STOP 1 4 turncounterclockwise 1 4 tu r n PressRESETlocatedonthec...

Page 16: ...use a knife or other sharp object to remove the shrink wrap from around the laminator You can cause irreparable damage to the rollers 1 4 Installation Thefollowingsymbolsarepositioned atvarious points...

Page 17: ...nator INFORMATION Do not put packing screws on the floor They can cause problems when trying to roll the laminator into position or you can become injured if stepped on CAUTION A second person must su...

Page 18: ...ing power to the laminator If improperly connected you can be seriously injured or cause damage to the laminator WARNING Do not wear ties loose fit clothing or dangling jewelry while operating or serv...

Page 19: ...out the pressure plate properly placed on the front feed table W ARNING W ARN ING Keep hands and fingers clear of the laminator roller nip when changing GAP You can be CRUSHED W ARNING When the lamina...

Page 20: ...ensure the film widths are identical Exposed adhesive can cause complications CAUTIO N Never use an open blade near the laminating rollers You may cut the rollers or your self CAUTIO N When using two...

Page 21: ...it 1 6 Applications Thefollowingsymbolsarepositioned atvarious points in Section 6 Applications WARNING Do not wear ties loose fit clothing or dangling jewelry while operating or servicing the laminat...

Page 22: ...nator when an image is within the nip of the rollers INFO RM ATIO N Laminates and papers should always be stored in a controlled enviroment INFO RM ATIO N 1 7 Troubleshooting Thefollowingsymbolsarepos...

Page 23: ...ure can destroy the silicone layer by pressing to hard or scrubbing too long in one spot Below is a recommended maintenance schedule Before performing any of the steps listed read through the procedur...

Page 24: ...Laminator are important safety labels Pay careful attention to these labels at all times Figure 1 12 1 illustratesthelocationofeachoftheselabels DANG ER H AZAR DOU S V OLTAGE G EFAHR To be serviced o...

Page 25: ...erator s M anual before handling this machine Observ e instructions and safety rules when operating Read Manual Read and understand the Operations Manualbeforeattemptingtorunthismachine Electrical Sho...

Page 26: ...s Manual before handling this machine Observe instructions and safety rules when operating Inside cabinet WARNING ACHTUNG MISE EN GARDE Moving parts can cruch and cut Inside cabinet DANGER GEFAHR HAZA...

Page 27: ...ecificallydoesnotcoverdamage to the laminating rollers caused by knives razor blades other sharp objects failure caused by adhesives or improper use of the machine Warranty repair or replacement does...

Page 28: ...uld be fully aware of all aspects of safety withregardstolaminationequipment Anycommissioningorserviceengineermustbe ofcompetentnature trainedandqualifiedtoGBCFilms Group standards to fulfill that job...

Page 29: ...cription Features Applications Costefficient wideformatcolorfinisherforthesheet fed ink jet market The Falcon 60 C is a self standing cold mounter and laminator Two unwinds 1 upper 1 center front One...

Page 30: ...ths Paperwidths Mounting thickness Safety Pressuresensitivelaminates Pressuresensitiveadhesives Up to an 8 in roll diameter 20 3 cm 3 in core standard 7 62 cm 2 1 4 in optional must have optional core...

Page 31: ...1 General Binding Corporation 3 3 Function Speed Motor Heating capabilities Controls Roll design 0 16 ft min 0 4 6 m min 2 1 4 horse power drive motor Bi directional D C motor N A Front control panel...

Page 32: ...anual April 2001 General Binding Corporation 3 4 Electrical United States and Canada B T U output Heater wattages Amperagedraw D C voltage used A C voltage used 220 240 VAC 50 60 Hz single phase 10 am...

Page 33: ...g Corporation 3 5 Dimensions Weight Uncrated Crated Dimensions Uncrated Crated Nip Height 1300 lbs 590 kg 11575 lbs 714 kg 80 in L x 38 5 in W x 57 in H 203 cm H x 98 cm W x 145 cm L Refer to Figure 3...

Page 34: ...3 6 Specifications F 60 C Operation and Maintenance Manual April 2001 General Binding Corporation Figure 3 5 1 Dimensions WARNING ACHTU NG M S N AR PRO TECH F 60 C 57 in 145 cm 80 in 203 cm 38 5 in 9...

Page 35: ...can be crushed or seriously injured For instructions on how to connect power proceed to 4 9 Connecting power in this section 4 0 Installation GBC Films Group is committed to a program of ongoing prod...

Page 36: ...re 4 1 1 Suggested Floor Layout 4 ft x 6 ft 1 22 m x 2 m W ork table on w heels Table height 37 3 4 in 95 96 m 4 ft x 6 ft 1 22 m x 2 m W ork table on w heels Table height 37 3 4 in 95 96 m 3 ft 1 m 1...

Page 37: ...l side Right Drive side Left PRO TECH F 60 C Figure 4 2 2 Safety and controls PRO TECH F 60 C Control panel Foot switch Main roller lift Upper unwind brake Lower unwind brake Core grip E stop Core sup...

Page 38: ...he unpacking procedure that pertains to your method of shipment WARNING The unpacking process requires at least two people You can be severely injured crushed or cause damage to the laminator With reg...

Page 39: ...to mishandling and or tipping GBC Films Group bears no responsibility for personal injury or damage due to moving the laminator improperly INFORMATION Tools required 2 Phillips head screwdriver 7 8 op...

Page 40: ...the rollers b Move all packing materials to a safe distance Moving the laminator a Have the laminator rolled off the skid and placed on the floor by licensed riggers The ramps includedwiththelaminato...

Page 41: ...0 One roll of masking tape 475 000 One BHCS 3 8 16 x 5 8 If you are missing any of the items listed above contact your local service technician or sales representative Contacts GBC Parts 800 790 7787...

Page 42: ...o load film walk around and to be servicedifnecessary b Place one leveling pad on each of the four levelingboltsonthelaminator Leveling pads Jam nuts c Use a 3 4 in open end wrench to secure the jamnu...

Page 43: ...Position the level center of the upper tie bar A PRO TECH F 60 C h Levelthelaminatorfromdrivesidetocontrol sidebyturningthelevelingnutclockwiseto raise or counter clockwise to lower b Loosen the nut...

Page 44: ...You will need the control side cabinet cover off to connect the electrical power INFO RM ATIO N 4 9 Connecting power ELECTRICAL SHOCK Only a qualified electrician should connect power to the laminato...

Page 45: ...operly connected you can be seriously injured or cause damage to the laminator d Secure the main power strain relief to the cabinet e Turn the junction box power to the ON position f Verifylinevoltage...

Page 46: ...nterlocksarefunctioningproperly This procedure describes how to check one E STOP and the PHOTO EYE Repeat the steps for the remaining three E STOPS ALL SAFETY FEATURES MUST BE CHECKED WARNING Do not w...

Page 47: ...sout thedisplayonthe temperaturecontrollerunitgoesout i Turn the E STOP 1 4 turn counter clockwise to unlatch 1 4 tu r n j Repeat steps b and e for the remaining three E STOPs PHOTO EYE a Cut a piece...

Page 48: ...ward e Lower the main roller to initial contact one bar onthepressuredisplayisilluminated f Pressthemotorengage disengageto ENGAGE disengage engage CAUTIO N Do not use the footswitch The PHOTO EYE is...

Page 49: ...the roller nip about center of the front feed table finger board l The rollers should stop just before the finger board can enter the roller nip m Slidethefingerboardbackawayfromtherollers nip Press t...

Page 50: ...Manual April 2001 General Binding Corporation q Slide the finger board back away from the rollersnip r If the finger board comes in contact with the rollerswhiletheyareturning contactyour service repr...

Page 51: ...n 5 0 Operations Inthissectionyouwillfindinformationonhowto properly turn your Falcon 60 C Laminator on learn functions of the control panel properly load and unload film useoftheunwindbraketensioning...

Page 52: ...OPsareintheunlatchedposition 1 4 tu r n b Turn the MAIN POWER to the up position On Off POW ER c Press RESET located above the main power on off POW ER Reset d Power indicator on the control panel sho...

Page 53: ...NGAGE When pressed to the right power to the motor is supplied and the rollers will begin to turn When pressed to the left powertothemotorisremovedandtherollersstopturning disengage engage 3 FWD REV W...

Page 54: ...Page 5 4 Operations F 60 C Operation and Maintenance Manual April 2001 General Binding Corporation Figure 5 2 1 Front control panel 1 2 3 4 5 6 7 8 9 10 1 2 3 4 5...

Page 55: ...Figure 5 3 2 Ensure the roll of laminate is loaded properly on the unwind shaft Exposed adhesive should be facing away from the rollers This will prevent hours of roll cleaning CAUTIO N Figure 5 3 1...

Page 56: ...d support saddle c Swingtheunwindshaftoutfarenoughtoslidethe rolloffilmcompletelyon Never leave the unwind shaft out of the unwind support saddle unless loading or unloading film W ARNING d Swingtheun...

Page 57: ...Never use an open blade near the laminating rollers You may cut the rollers or your self CAUTIO N b Liftupontheclevispintotheunwindshaftlocated in the unwind support saddle Clevis pin Unw ind support...

Page 58: ...e b Turn the upper black brake knob shown above or the lower gray brake disc not shown counter clockwise to decrease unwind brake tension 5 5 Rewind brake tension The rewind brake controls the tension...

Page 59: ...and fingers clear of the laminator roller nip when adjusting nip You can be CRUSHED CAUTIO N Excess pressure can damage the laminating rollers Always use the minimum roll pressure necessary to comple...

Page 60: ...oller until it makes contact with the substrate Lower enough to applysufficientpressurewithoutcrushingthe substrate Excessive pressure will cause the substrate to bow or flatten INFO RM ATIO N Suffici...

Page 61: ...onsetting Forward a Press the motor direction to FWD reverse forward b Set your speed dial to a comfortable operating speed 1 2 3 4 5 6 7 8 9 10 W ARNING The footswitch operation over rides the PHOTO...

Page 62: ...Page 5 12 Operations F 60 C Operation and Maintenance Manual April 2001 General Binding Corporation This page intentionally left blank...

Page 63: ...in 2 54 cm If it does you will experience complications with this application INFO RM ATIO N 6 0 Applications The Falcon 60 C can accommodate Poly in or Poly out films Poly out means the adhesive is...

Page 64: ...iables can effect how much pressure is actually needed width thickness density etc Excessive pressure will cause the substrate to bow or flatten INFO RM ATIO N Brake tension Braketensionshouldalwaysbe...

Page 65: ...ontrolchart and diagram for the Falcon 60 C as well as completed charts for the basic operations of the laminator The pro cess control charts should be kept in this manual or in a book close to the la...

Page 66: ...n Applications F 60 C Operation and Maintenance Manual PROCESS CONTROL CHART Materials ___________________________________ Top material Bottom material Other material s Motor Direction Motor Speed 1 2...

Page 67: ...Page 6 5 Applications F 60 C Operation and Maintenance Manual April 2001 General Binding Corporation Diagram Blank...

Page 68: ...Page 6 6 April 2001 General Binding Corporation Applications F 60 C Operation and Maintenance Manual This page intentionally left blank...

Page 69: ...Page 6 7 Applications F 60 C Operation and Maintenance Manual April 2001 General Binding Corporation Diagram Blank w roll to roll options...

Page 70: ...Speed 1 2 3 4 5 6 7 8 9 10 range Roller Pressure RANGE Notes The roll of mount adhesive should not exceed the substrate by more than 1 in 2 54 cm Speed will be determined by what is comfortable for th...

Page 71: ...Page 6 9 Applications F 60 C Operation and Maintenance Manual April 2001 General Binding Corporation Diagram Pre coating substrates Roll of mount adhesive Leader board Substrate...

Page 72: ...8 9 10 range Roller Pressure RANGE Notes The image should not exceed the pre coated board by more than 1 in 2 5 cm If the image is smaller than the pre coated board trim the board or pre trim the rele...

Page 73: ...Page 6 11 Applications F 60 C Operation and Maintenance Manual April 2001 General Binding Corporation Diagram Mounting an image Pre coated board Liner Image Hold image here...

Page 74: ...sensitive mount adhesive Other material s Prints Motor Direction Motor Speed 1 2 3 4 5 6 7 8 9 10 range Roller Pressure RANGE Notes Speed for mounting should be comfortable for the operator Excessive...

Page 75: ...Page 6 13 Applications F 60 C Operation and Maintenance Manual April 2001 General Binding Corporation Diagram PSA decaling Image Decal Roll of PSA film Roll of mount adhesive Release liner...

Page 76: ...Page 6 14 April 2001 General Binding Corporation Applications F 60 C Operation and Maintenance Manual This page intentionally left blank...

Page 77: ...ations F 60 C Operation and Maintenance Manual April 2001 General Binding Corporation Roll of PSA film Roll of mount adhesive Release liner Roll of prints Rewind of decals Diagram PSA decaling w roll...

Page 78: ...rial N A Other material s Decal and substrate Motor Direction Motor Speed 1 2 3 4 5 6 7 8 9 10 range Roller Pressure RANGE Notes Speed for mounting should be comfortable for the operator Use the foots...

Page 79: ...Page 6 17 Applications F 60 C Operation and Maintenance Manual April 2001 General Binding Corporation Diagram Mounting a decal Substrate Liner Decal Hold decal here...

Page 80: ...Speed 1 2 3 4 5 6 7 8 9 10 range Roller Pressure RANGE Notes The leader board and trailer board should be the same width as the pre coated board The laminate should not exceed the pre coated board by...

Page 81: ...9 Applications F 60 C Operation and Maintenance Manual April 2001 General Binding Corporation Pre coated board Roll of PSA film Release liner Leader board Image Diagram PSA single sided lamination sle...

Page 82: ...e Bottom material Roll of craft paper Other material s Prints Motor Direction Motor Speed 1 2 3 4 5 6 7 8 9 10 range Roller Pressure RANGE Notes Top and bottom material should be of the same width Do...

Page 83: ...cations F 60 C Operation and Maintenance Manual April 2001 General Binding Corporation Diagram PSA single sided lamination craft paper method Image Finished product Roll of PSA film Roll of craft pape...

Page 84: ...Page 6 22 April 2001 General Binding Corporation Applications F 60 C Operation and Maintenance Manual This page intentionally left blank...

Page 85: ...ion and Maintenance Manual April 2001 General Binding Corporation Diagram PSA single sided lamination craft paper method w roll to roll option Roll of PSA film Roll of craft paper Release liner Roll o...

Page 86: ...r Speed 1 2 3 4 5 6 7 8 9 10 range Roller Pressure RANGE Notes The laminate should not exceed the pre mounted image by more than 1 in 2 54 cm Speed will be determined by what is comfortable for the op...

Page 87: ...e 6 25 Applications F 60 C Operation and Maintenance Manual April 2001 General Binding Corporation Diagram PSA over lamination of a mounted image Mounted image Roll of PSA film Release liner Leader bo...

Page 88: ...Page 6 26 April 2001 General Binding Corporation Applications F 60 C Operation and Maintenance Manual This page intentionally left blank...

Page 89: ...burned As an operator you can perform some simple troubleshooting in attempt to correct your typical output typeproblems Usetheeasytofollowguideforassistance 7 1 Wave problems Thefollowingisalistofcom...

Page 90: ...nal settings for materials being used Problem Waves on only one side of the output Hints Check the nip setting of main rolls Check for even paper tension Problem Angled waves in the output on both sid...

Page 91: ...ards Be sure image is conformed to the roll Use a speed you are comfortable with Be sure even tension is supplied to the image 7 3 Machine problems OncetheHintsareallchecked andyourproblem still exist...

Page 92: ...r proper chain tension Place a service call 7 4 Glossary Theglossarycanhelpyouinunderstandingsome of the terminology used when referring to the laminator applications ortroubleshootingaspectsofthemach...

Page 93: ...ounting substrate It is made up of foam sandwiched between two layers of paper or paper like media Inkjet A term used to describe a type of printing where an ink is projected topically onto a paper or...

Page 94: ...ubstrate Commonly referenced when discussing front mounted images to a clear substrate with an optically clear mount adhesive Silvering A term used to describe one of two occurrences 1 airbubblestrapp...

Page 95: ...tenance can result in poor output quality ELECTRICAL SHOCK Remove power from the laminator before servicing You can be severely shocked electrocuted or cause a fire 8 1 Maintenance Schedule Below is a...

Page 96: ...ireterminationtightness performed by service technician ELECTRICAL SHOCK Remove power from the laminator before servicing You can be severely shocked electrocuted or cause a fire 8 2 Cleaning the roll...

Page 97: ...nip of the rollers You may be CRUSHED d Use the footswitch to rotate the rollers when finishedcleaningtheexposedarea 8 3 Clean cabinets and covers ELECTRICAL SHOCK Remove power from the laminator bef...

Page 98: ...ed electrocuted or cause a fire Use only a damp cloth for cleaning unless other wise specified 8 5 Chain tensioning A properly tensioned chain should have a 1 2 in 1 3 cm of total play at the longest...

Page 99: ...side cabinet cover by 1 Loosen the three screws along the bottom 2 Remove the seven screws along the top and sides of the cover 2 PRO TECH F 60 C 1 d Check the primary chain outer and the secondary c...

Page 100: ...neral Binding Corporation f Pressfirmlydownonthemotorhousingand tightenthemotormountbolts Press firm ly here g Check the primary chain outer and the secondary chain inner again for proper chain tensio...

Reviews: