background image

5

G

How to bind

 Measure document using colour coded guide (fig.1)

 Select comb which fits your document (fig.2) 

Use the table to choose a suitable comb size. Please note 

that this guide is based on 80gsm paper. The sheet capacity 

of combs will vary depending on the type and thickness of 

the cover sheets you have chosen. If in doubt select the next 

comb up in capacity.

 Load comb onto machine (fig.3) 

Insert the binding comb next to the white positional arrow on 

the machine, behind the metal comb support fingers, with 

the open side of the comb pointing upwards.


Note: If using GBC

®

 ProCombs™ the white arrow on your 

comb should align to the white arrow on the machine.

 Open comb by turning lever towards you (fig.4) 

The coloured arrows adjacent to the opening comb act as a 

guide as to how far to open in order to allow punched sheets 

to be easily inserted.


Note: If using GBC

®

 ProCombs™ the coloured line on your 

comb should align to the coloured arrows on the machine for 

faster binding. 

 Select document size (fig.5) 

Rotate the edge guide to the paper / cover size you wish to 

bind; A4 (297mm x 210mm) or Letter (215mm x 279mm). 

When using oversized covers, rotate the edge guide to the 

oversize position, punch the covers for your document and 

set aside. Then rotate the edge guide to select either A4 or 

Letter and proceed.

 Load pages into slot (fig.6) 

You can punch 2 cover sheets (0.2mm) or up to 15 sheets 

of paper (80gsm) at a time. Select the quantity of sheets 

to punch and tap the edge of the sheet stack against a flat 

surface to ensure that all sheets are aligned. Push the side 

of the stack to be punched into the punching slot as far as 

it will go, and slide left to align with the edge guide. When 

properly aligned, both of the two red flags visible on the top 

cover of the binder will turn green.

 Punch pages (fig.7) 

Press the ON / OFF button  . A blue light will illuminate to 

indicate that the power is on. And the punch button   will 

light up in green. 

   To punch, press the illuminated green punch button  .  
    When finished punching turn the machine OFF by pressing 

the ON / OFF   button.  

   If the punch jams the red jam light   will illuminate to 

indicate that the machine has jammed. The machine will 

automatically reverse the punches to clear the jam and 

the red jam light will remain illuminated. Remove the paper 

and push the punch button to re-set the machine. The red 

jam light will turn off indicating that the machine is ready to 

punch. Reduce some of the sheets and repeat steps 2 to 4 

to avoid jams on additional lifts.


Note: If the red light remains on, unplug the unit and contact 

an authorised GBC  service representative for any required 

repairs.  

   When finished punching turn the machine OFF by pressing 

the ON / OFF   button. 

 Combine pages with comb (fig.8) 

Remove the sheets from the punch slot and insert onto the 

fingers of the binding comb.

 Repeat process as required 

Repeat stages 6-8 until your document is fully loaded on 

the comb.

 Close (fig.9) 

Close comb and remove document.

Service

Contact an authorised GBC

®

 service representative for any 

required repairs.    

Maintenance

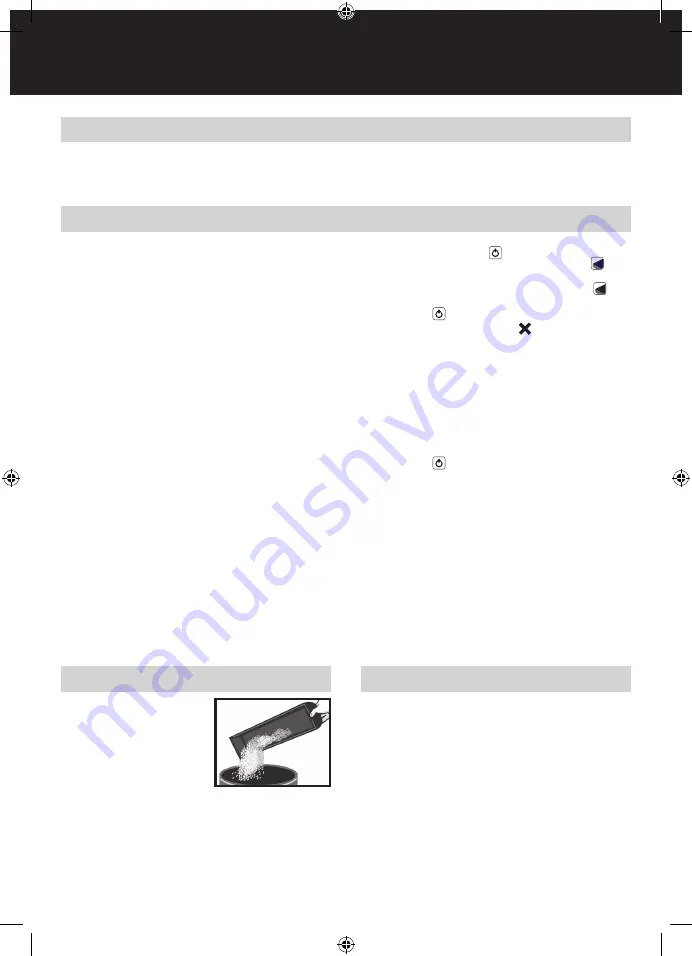
Please ensure that the clippings 

tray is emptied on a regular basis. 

This will prevent blockage and 

ensure that the unit is always 

ready to punch. The clippings tray 

can be accessed from the back of 

the machine.
In order to prevent overloading 

never try and punch more than 

the maximum numbers of sheets recommended (15 sheets of 

80gsm). The unit is maintenance free if handled correctly.

Helpful hints

Place front covers finish side down on the open comb and the back covers finish side up.
For best results always use GBC

®

 brand covers with GBC

®

 colour-coordinated binding combs.

The binding comb can be opened and closed again at any time to replace or add individual sheets (see step 4).

Summary of Contents for CombBind C200E

Page 1: ...sanleitung I Manuale d istruzioni O Gebruiksaanwijzing E Manual de instrucciones P Manual de Instru es T Kullan m K lavuzu K c Brugsvejledning o K ytt opas o Bruksanvisning S Bruksanvisning Q Instrukc...

Page 2: ...English 4 Fran ais 6 Deutsch 8 Italiano 10 Nederlands 12 Espa ol 14 Portugu s 16 T rk e 18 20 Dansk 22 Suomi 24 Norsk 26 Svenska 28 Polski 30 esky 32 Magyar 34 Pycc 36...

Page 3: ...4 4 6 5 7 9 8 1 3 2...

Page 4: ...ith a damaged supply cord or plug after it malfunctions or after it has been damaged in any manner Do not overload electrical outlets beyond their capacity as this can result in fire or electrical sho...

Page 5: ...der will turn green 7 Punch pages fig 7 Press the ON OFF button A blue light will illuminate to indicate that the power is on And the punch button will light up in green To punch press the illuminated...

Page 6: ...cas d inutilisation prolong e N utilisez pas l appareil si la prise ou le cordon d alimentation est endommag apr s un mauvais fonctionnement ou apr s un endommagement quelconque Ne surchargez pas les...

Page 7: ...rapeaux rouges visibles sur la partie sup rieure de l appareil deviennent verts 7 Perforez les feuilles fig 7 Appuyez sur le bouton marche arr t Un voyant bleu s allume pour indiquer que l appareil es...

Page 8: ...inem besch digten Netzkabel oder stecker nach einer Betriebsst rung oder nach einer Besch digung jedweder Art betreiben Steckdosen niemals berlasten es besteht Brand und Stromschlaggefahr Netzstecker...

Page 9: ...fig 6 Pro Stanzvorgang 2 Einbanddeckel 0 2 mm oder bis zu 15 Blatt Papier 80 g m einlegen Die zu stanzende Anzahl Bl tter auf eine flache Oberfl che aufsto en damit alle Bl tter b ndig sind Die Bl tte...

Page 10: ...l prodotto ACCO a propria insindacabile discrezione provveder in conformit alla normativa vigente a i riparare la macchina utilizzando parti nuove o revisionate oppure ii sostituire il prodotto con un...

Page 11: ...ili sulla parte superiore della rilegatrice diventano verdi 7 Perforare i fogli fig 7 Premere il pulsante di accensione spegnimento Una spia blu si illumina per indicare che la rilegatrice accesa e il...

Page 12: ...te retourneren Indien u de machine retourneert zal ACCO naar eigen goeddunken en volgens de geldende wetgeving ofwel i de machine repareren met gebruik van nieuwe of herwerkte onderdelen of ii de mach...

Page 13: ...worden de twee rode indicatoren op het bovenste gedeelte van de bindmachine groen 7 Pons de vellen fig 7 Druk op de aan uit knop Er gaat een blauw lampje branden om aan te geven dat de machine voedin...

Page 14: ...acto con el centro de atenci n al cliente de ACCO correspondiente En funci n del diagn stico y del tipo de modelo enviaremos un ingeniero o le pediremos que devuelva la m quina a ACCO Si devuelve la m...

Page 15: ...de 7 Perfore las hojas fig 7 Pulse el bot n de encendido apagado Se encender una luz azul para indicar que la m quina est encendida y el bot n de perforaci n se encender en color verde Para perforar p...

Page 16: ...ia T cnica da ACCO relevante Dependendo do problema identificado e do modelo da m quina organizaremos a visita de um t cnico ou pedir lhe emos que devolva a sua m quina ACCO Se devolver a m quina a AC...

Page 17: ...uas janelas vermelhas vis veis na parte superior da encadernadora passam a verde 7 Fure as p ginas fig 7 Prima o bot o LIGAR DESLIGAR Acende uma luz azul que indica que a m quina est ligada e o bot o...

Page 18: ...el tipine ba l olarak ya bir m hendisin servis i in sizi ziyaret etmesini sa layaca z ya da sizden makineyi ACCO ya iade etmenizi isteyece iz Makineyi iade etmeniz halinde takdir yetkisi kendine ait o...

Page 19: ...d nda cilt makinesinin st k sm nda g r len iki k rm z bayrak ye ile d necektir 7 Sayfalar delin fig 7 ON OFF d mesine bas n Mavi bir k yanarak g c n a ld n g sterecek ve delme d mesi ye il yanacakt r...

Page 20: ...ter DIN A4 297 mm 15 80 gs m2 2 0 2 mm 5 93 kg 377 x 316 x 125 mm 220 240 VAC x x CombBind C200E COMBBIND C200E m m 2 ACCO Brands Europe ACCO Brands Europe ACCO ACCO ACCO i ii www gbceurope com CombBi...

Page 21: ...fig 3 GBC ProCombs 4 fig 4 GBC ProCombs 5 fig 5 A4 297 mm x 210 mm Letter 215 mm x 279 mm oversize A4 Letter 6 fig 6 2 0 2 mm 15 80 gsm 7 fig 7 ON OFF OFF ON OFF 2 4 GBC OFF ON OFF 8 fig 8 9 6 8 6 8 J...

Page 22: ...og modeltypen enten arrangere et servicebes g fra en tekniker eller bede dig om at returnere maskinen til ACCO Hvis du returnerer maskinen vil ACCO efter eget sk n i henhold til loven enten i reparere...

Page 23: ...Tryk p t nd sluk kontakten En bl lampe lyser som tegn p at maskinen er t ndt og stanseknappen lyser gr nt Tryk p stanseknappen som lyser gr nt for at stanse N r du er f rdig med at stanse skal du slu...

Page 24: ...a esiintyy tekninen vika takuuaikana ota yhteys l himp n ACCO palvelukeskukseen Vian tyypist ja laitemallista riippuen ACCO l hett huoltoteknikon paikan p lle tai pyyt palauttamaan laitteen ACCOlle Jo...

Page 25: ...yl osan punaiset ilmaisimet muuttuvat vihreiksi 7 L vist sivut fig 7 Paina virtapainiketta Sininen valo syttyy merkiksi siit ett virta on kytketty ja l vistyspainike muuttuu vihre ksi L vist painamall...

Page 26: ...garantiperioden tar du kontakt med det relevante ACCO servicesenteret Avhengig av problemtype og modelltype vil vi enten avtale et bes k fra en servicetekniker eller be om at du returnerer maskinen t...

Page 27: ...li gr nne 7 Stans sidene fig 7 Trykk p p av knappen En bl lampe tennes for angi at str mmen er p og stanseknappen tennes og lyser gr nt Du stanser ved trykke p stanseknappen som lyser gr nt N r du er...

Page 28: ...ter diagnosen och modelltypen ordnar vi antingen med ett servicebes k fr n en tekniker eller kommer vi verens med dig om retur av maskinen till ACCO Om du returnerar maskinen kommer ACCO enligt eget g...

Page 29: ...ndningsmaskinen f rg till gr n 7 Stansa sidor fig 7 Tryck p P Av knappen En bl lampa t nds f r att visa att str mf rs rjningen r p och stansknappen lyser gr nt Tryck p den gr na stansknappen som lyser...

Page 30: ...punktem obs ugi klienta ACCO Zale nie od stwierdzonego problemu i modelu urz dzenia zorganizujemy wizyt pracownika serwisu u klienta lub poprosimy klienta o zwrot produktu do firmy ACCO Je eli urz dze...

Page 31: ...ziurkuj kartki fig 7 Naci nij przycisk zasilania Zapali si niebieskie wiate ko wskazuj ce e urz dzenie jest w czone a przycisk dziurkacza zostanie pod wietlony na zielono W celu przedziurkowania karte...

Page 32: ...ko ACCO V z vislosti na zji t n z vad a modelov m typu s v mi domluv me vysl n na eho servisn ho technika nebo v s po d me o vr cen p stroje spole nosti ACCO Vr t te li p stroj spole nost ACCO dle vla...

Page 33: ...a e zm n barvu na zelenou 7 D rov n str nek fig 7 Stiskn te tla tko ON OFF ZAP VYP Modr tla tko se rozsv t a signalizuje tak e je zapnuto nap jen a tla tko d rov n se rozsv t zelen K d rov n stiskn te...

Page 34: ...megk rj k hogy a g pet juttassa vissza az ACCO c ghez A g p visszajuttat sa eset n az ACCO c g saj t bel t sa szerint s a t rv nyekkel sszhangban vagy i j vagy fel j tott alkatr szek felhaszn l s val...

Page 35: ...e v lt 7 Lapok lyukaszt sa fig 7 Nyomja meg a f kapcsol gombot A kigyullad k k f ny jelzi hogy a k sz l k ram alatt van s a lyukaszt ind t gombja z lden vil g t A lyukaszt shoz nyomja meg a lyukaszt z...

Page 36: ...bBind C200E Letter DIN A4 297 15 80 2 2 0 2 5 93 377 x 316 x 125 220 240 VAC x x COMBBIND C200E m m 2 ACCO Brands Europe ACCO Brands Europe ACCO ACCO ACCO i ii www gbceurope com CombBind C200E CombBin...

Page 37: ...o RUS 1 fig 1 2 fig 2 80 2 3 fig 3 GBC ProCombs 4 fig 4 GBC ProCombs 5 fig 5 A4 297 x 210 Letter 215 x 279 A4 Letter 6 fig 6 2 0 2 15 80 7 fig 7 2 4 GBC 8 fig 8 9 6 8 6 8 J fig 9 GBC 15 80 2 GBC GBC...

Page 38: ......

Page 39: ......

Page 40: ...cco com www gbceurope com service NO Poland 00 800 1215218 service pl acco com www gbceurope com service PL ACCO Brands Nordic AB 0200899942 service nordic acco com www gbceurope com service SE ACCO H...

Reviews: