CHAPTER 4: Installing Components
www.gateway.com
34
Important
The hard drive carriers shown in these
illustrations may look different than the
actual hard drive carriers in your server.
5
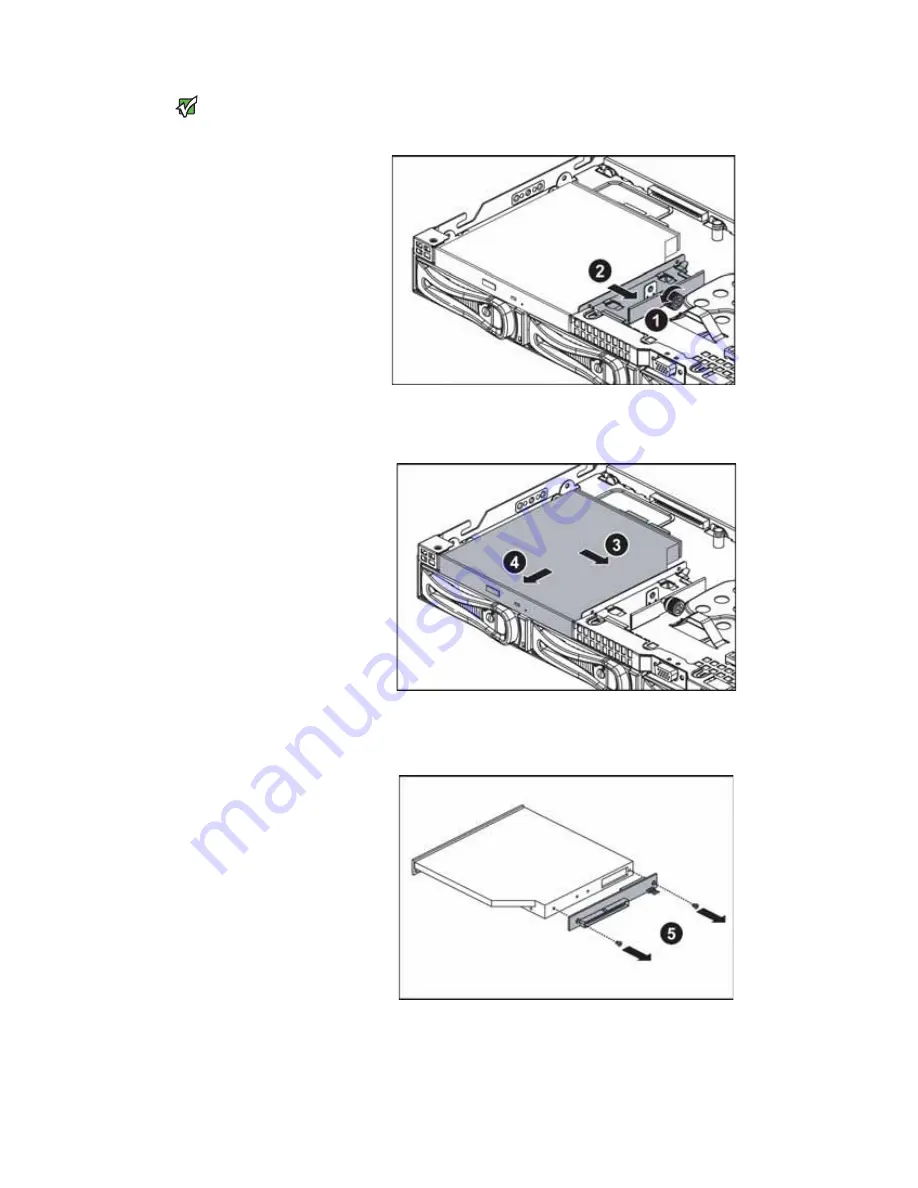
Loosen the thumbscrew (1) holding the retaining clip (2) against the side
of the optical drive, then move the retaining clip away from the drive.
6
Push the optical drive to the right to release the drive from the drive bay,
then pull the drive out of the bay.
7
Unscrew the two screws holding the optical drive interface board on the
back of the optical drive, then remove it.
8
Using the two screws you just removed, attach the optical drive interface
board to the back of the new optical drive.
Summary of Contents for E-9425R
Page 1: ...USER GUIDE Gateway E 9425R Server ...
Page 2: ......
Page 6: ...Contents www gateway com iv ...
Page 16: ...CHAPTER 1 Checking Out Your Gateway Server www gateway com 10 ...
Page 26: ...CHAPTER 2 Setting Up Your Server www gateway com 20 ...
Page 68: ...CHAPTER 4 Installing Components www gateway com 62 ...
Page 105: ...APPENDIX B 99 BIOSSettings ...
Page 116: ...APPENDIX B BIOS Settings www gateway com 110 ...
Page 117: ...APPENDIX C 111 Safety Regulatory and Legal Information ...
Page 127: ......
Page 128: ...A MAN E 9425R USR GDE R0 10 06 ...


