www.gateway.com
127
6
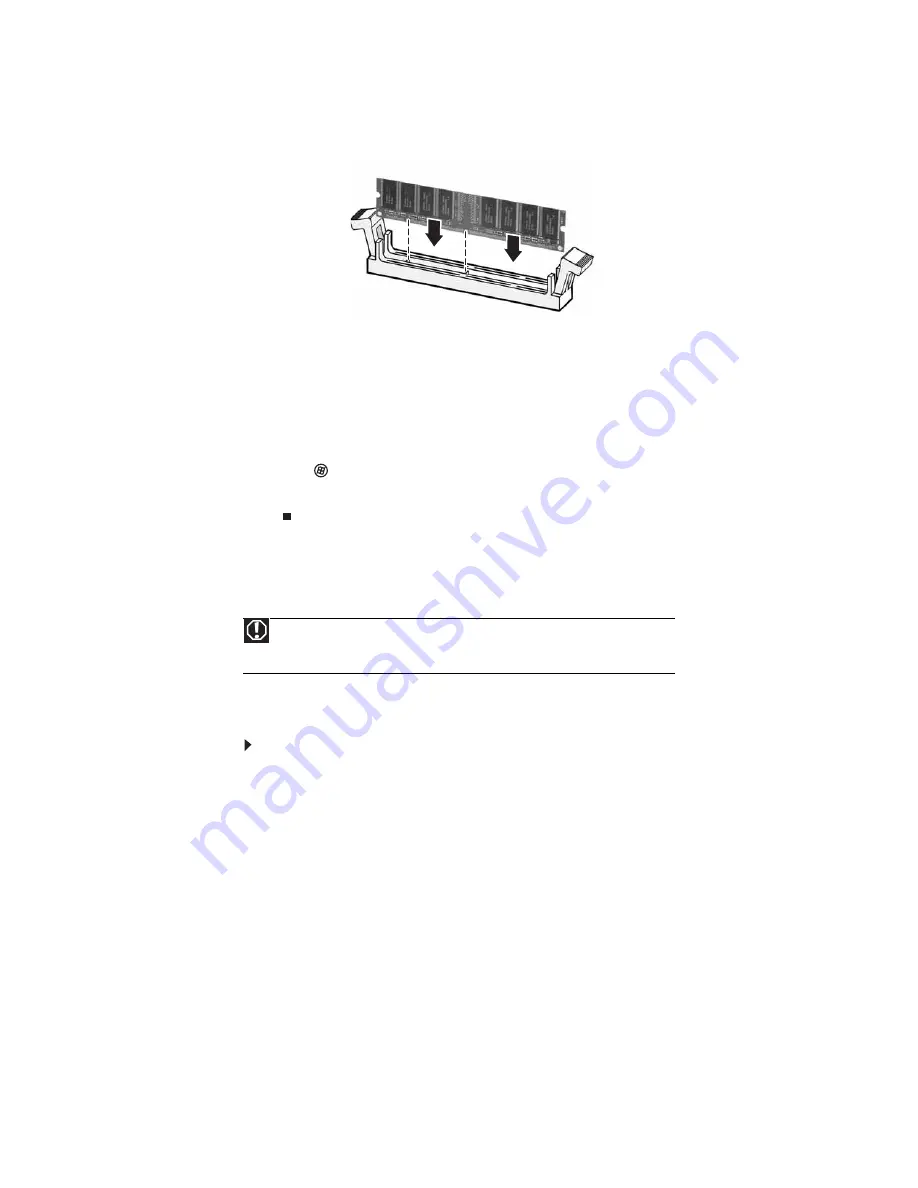
Align the notches on the new DIMM with the notches on the memory module bank and
press the module firmly into the bank. The tabs on the sides of the memory module should
secure the memory module automatically. When the module is secure, you hear a click.
7
Replace the metal reinforcing beam/hard drive assembly, being careful not to pinch the
hard drive cables.
8
Replace the side panel by following the instructions in
.
9
Return your computer to its upright position.
10
Reconnect the cables and the power cord.
11
Turn on your computer. Windows starts and the Windows desktop appears.
12
Click
(
Start
),
Control Panel
, then click
System and Maintenance
. Click
System
. The
amount of memory in your computer is shown at the bottom of the
System Properties
dialog box in the General tab.
Replacing the system battery
If the computer clock does not keep time or the settings in the BIOS Setup utility are not saved
when you turn off your computer, replace the system battery. Use a battery of the same size
and voltage as the original battery that was in your computer.
To replace the battery:
1
Restart your computer.
2
During the restart, press and hold
F1
. The main menu of the BIOS Setup utility opens.
3
Write down all the values in the menus and submenus, then exit from the utility.
4
Shut down your computer.
5
Remove the side panel by following the instructions in
.
6
For more stability, place your computer on its side. To avoid scratching the case, place it
on a towel or other non-abrasive surface.
7
Remove the metal reinforcing beam/hard drive assembly and set it aside (as far as the
hard drive cables will allow).
Warning
Danger of explosion if battery is incorrectly replaced.
Replace only with the same or equivalent type recommended by the manufacturer.
Dispose of used batteries following the manufacturer’s instructions.
Summary of Contents for 3-Bay mBTX Pro
Page 1: ...3 Bay mBTX Pro USERGUIDE...
Page 2: ......
Page 28: ...CHAPTER 2 Setting Up and Getting Started 20...
Page 102: ...CHAPTER 9 Networking Your Computer 96...
Page 103: ...CHAPTER10 97 Protecting your computer Hardware security Data security Security updates...
Page 126: ...CHAPTER 11 Maintaining Your Computer 120...
Page 151: ...CHAPTER13 145 Troubleshooting Safety guidelines First steps Troubleshooting Telephone support...
Page 168: ...CHAPTER 13 Troubleshooting 162...
Page 182: ...Contents 176...
Page 183: ......


