


When you connect an external microphone or line-in audio
source, the device records audio from the external source
instead of the built-in microphone.
1
From the main menu, select >
Microphone
.
2
Select an option:
• To switch automatically between the internal and external
microphones when you connect or disconnect the
microphone, select
Auto
.
TIP:
The device detects most microphones automatically.
The
Auto
option may not detect line-in audio sources and
some microphones when using the VIRB A/V cable
accessory.
• To enable only the external microphone or line-in audio
source, select
External
.
TIP:
You should select this option when using a
microphone that is not detected automatically, or when
using a line-in audio source.
• To enable only the built-in microphone, select
Internal
.
3
Connect the accessory cable to the mini-USB port on the
camera.
4
Connect the microphone or line-in audio source to the
accessory cable.
Photos
Taking a Photo
Your device provides several methods for taking a photo.
• Aim the camera using the viewfinder, and select the camera
key to take a photo.
• While recording a video, select the camera key.
Photos taken while recording a video always use single photo
capture. Photo time-lapse or burst settings are ignored while
recording video. You cannot capture a photo while recording
video at a resolution higher than 1080p.
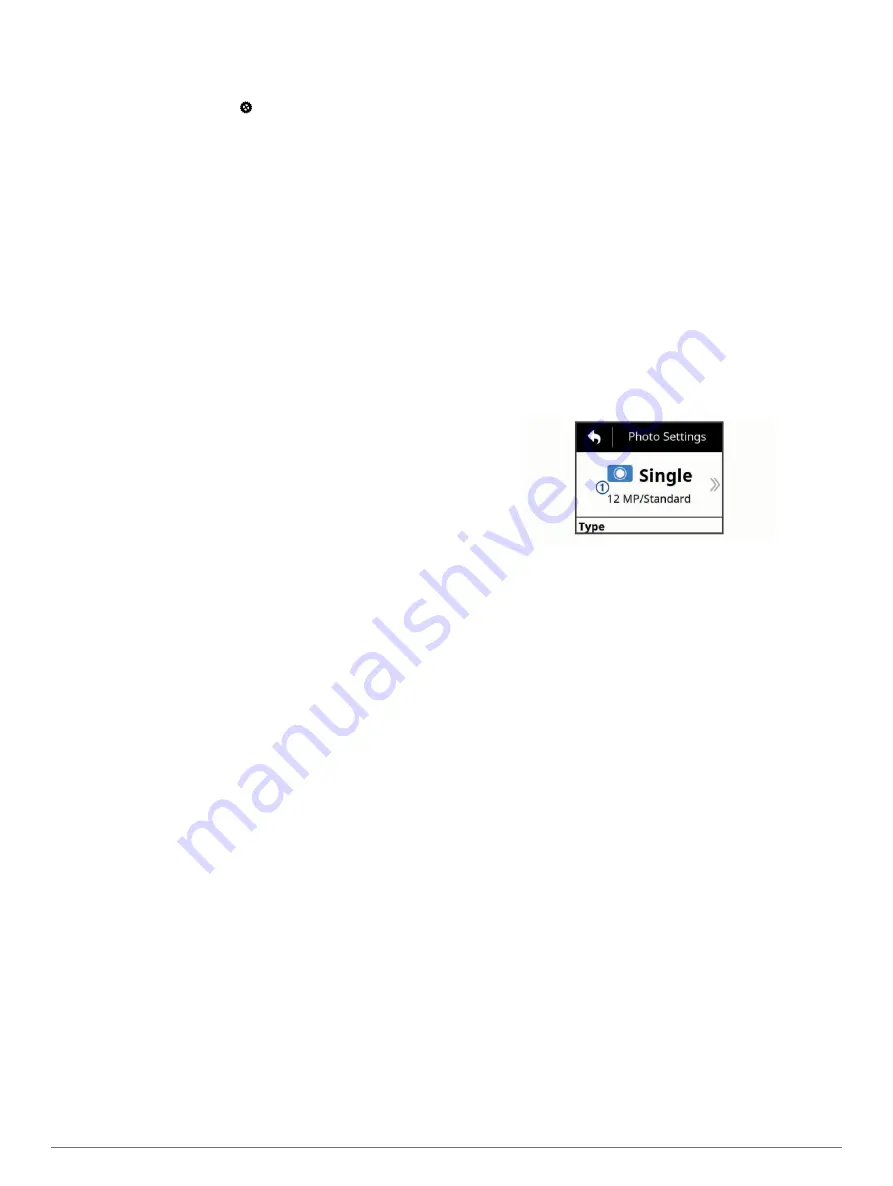
Photo Settings
From the main menu, select
Photo
.
Mode
: The active photo mode appears at the top of the Photo
menu. You can touch it to change the shooting mode for
photos (
).
NOTE:
Additional settings vary based on the selected mode.
Type
: Sets the exposure type for single photos (
), and the exposure and interval types for
time-lapse photos (
).
Exposure Time
: Sets the exposure time when taking photos at
night (
) or time-lapse
photos at night (
Taking Time-Lapse Photos at Night
).
ISO Limit
: Sets the maximum level of sensitivity and image
noise. The camera automatically uses the best ISO level for
the lighting conditions, up to this maximum. Higher ISO
values have more visible noise or grain. Higher ISO values
are best for use in low light environments or indoors. Lower
ISO values are best for use in sunlight. You can use the 6400
option for brighter video in low light, the 1600 option for
moderate brightness in low light, or the 400 option for darker
video in low light.
Bracket EV Step
: Sets the amount of variation above and below
the standard exposure value for bracketed photos. A larger
value creates more variation in the brightness of bracketed
photos.
Photo Count
: Sets the number of frames taken in burst mode.
Interval
: Sets the time interval between photos for time-lapse
mode, or the distance interval between photos in
Travelapse
™
mode. For standard time-lapse mode, you can
select a preset interval or enter a custom interval.
Duration
: Sets the duration for burst and time-lapse modes. For
extended time-lapse mode, you can shoot continuously, or
set a custom duration.
Start Time
: Sets the start time for extended time-lapse mode.
You can start shooting now, or set a custom start time.
Aspect Ratio
: Sets the ratio of the photo width to the photo
height. Standard film uses an aspect ratio similar to 4:3.
Digital displays use an aspect ratio similar to 16:9.
Self Timer
: Sets the timer to delay taking a photo.
Lens Correction
: Corrects wide-angle barrel distortion and
reduces the field of view.
Time Stamp
: Adds a time stamp to your photo.
Pro Settings
: Enables advanced photo settings (
).
Photo Modes
From the main menu, select
Photo
, and select the active photo
mode
À
.
Single
: Enables you to take a single photo using automatic
exposure.
Burst
: Enables you to rapidly take multiple images over a set
number of seconds. This mode is ideal for capturing photos
of people or objects in motion.
Time-lapse
: Enables you to capture a series of photos at set
time or distance intervals.
Photo Exposure Types
You can use several photo exposure types to take single
photos.
Standard
: Takes a single photo at standard exposure. This
option is useful for most daytime photos.
Night
: Takes a single, extended-exposure photo. This option is
useful for capturing photos in low light conditions.
Bracket
: Takes three consecutive photos automatically, using
three different exposure values (exposure bracketing). This
option is useful for composing high dynamic range
(HDR) photos.
Taking a Delayed Photo
You can delay taking a photo using the self timer. This allows
you to join or adjust a shot before the photo is taken.
1
From the main menu, select
Photo
>
Self Timer
.
2
Select a delay time.
3
From the home screen, select the camera key.
The countdown timer displays the remaining time until the
photo is taken, in seconds.
Time-Lapse Photos and Video
You can use several time-lapse modes to take a series of
photos or video frames at a set interval.
Standard
: Standard time-lapse mode takes a series of photos
or video frames at a set time interval. This mode is useful for
Photos
7
Summary of Contents for VIRB Ultra 30
Page 1: ...VIRB ULTRA 30 Owner s Manual August 2016 190 02069 00_0A...
Page 4: ......
Page 21: ......


