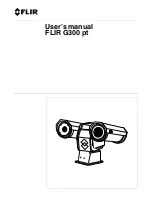
Mode
: The active video mode appears at the top of the Video
menu. You can touch it to change the video mode (
). Additional settings vary based on the
active video mode.
Resolution
: Sets the width and height of the video, in pixels.
Interval
: Sets the time interval for time-lapse mode.
FPS
: Sets the frame rate in frames per second (fps).
Field of View
: Sets the zoom level (
).
Playback Speed
: Sets the speed for slow-motion playback.
Lens Correction
: Corrects wide-angle barrel distortion and
reduces the field of view.
Low Light Boost
: Enables automatic adjustment for low light.
Stabilizer
: Turns on image stabilization to reduce shaky video.
Loop
: Enables loop recording and sets the number of minutes
of video to store when recording a video loop (
).
Auto Pause
: Sets the camera to record video only while it is
moving (
Pausing Video Recording Automatically
).
Pro Settings
: Enables advanced video settings (
).
Video Modes
You can change the video mode to change the resolution,
aspect ratio, frame rate, and speed of recorded video. The
resolution is the width and height of the video, in pixels. The
aspect ratio is the ratio of the video width to the video height.
Standard widescreen televisions use a 16:9 aspect ratio, and
standard full-screen televisions use a 4:3 aspect ratio. The
frame rate is expressed in frames per second (fps). The
playback speed indicates the speed of action in the video
compared to real time.
From the main menu, select Video, and select the active video
mode
À
.
Expansive
: Enables you to capture an expanded viewing area,
similar to the effect of using a wide-angle lens. This is useful
for close-up action shots and when using a chest mount.
Video
: Enables you to capture high-speed action shots. 1080p
works well as a default setting when you need high-resolution
shots. 4K allows you to capture the maximum amount of
detail.
Slow-Mo
: Enables you to capture slow-motion playback with up
to 300 frames per second in standard definition or 120
frames per second in 1080p resolution.
Time-lapse
: This high-resolution mode enables you to capture
slow-moving or long-term action that is ready for playback or
sharing immediately (
).
Expansive Mode
In expansive mode, the camera captures an expanded viewing
area, similar to the effect of using a wide-angle lens. Compared
to standard video mode, a video shot in expansive mode
appears to be zoomed out further. The effect of lens distortion
may be more noticeable in expansive mode, especially at the
edges of the video frame.
You can capture two types of viewing areas using expansive
mode.
From the main menu, select
Video
>
Mode
>
Expansive
>
Type
.
Tall
: In tall expansive mode, the camera uses the full camera
sensor to capture additional vertical area in a 4:3 aspect
ratio. For example, a 2.7K video in tall expansive mode
records 2028 pixels vertically instead of the standard 1524
pixels. This mode is useful when wearing a chest mount or
recording activities where it is essential to capture vertical
movement, such as snowboarding, skateboarding, or
climbing.
Wide
: In wide expansive mode, the camera captures the same
expanded vertical area as tall expansive mode and a slightly
expanded horizontal area. The camera dynamically stretches
the video image fill a 16:9 aspect ratio. The image is
stretched only at the edges, and the center of the image is
not modified. This mode can be useful for capturing close-up
action shots or sweeping panoramic shots.
Field of View Settings
You can change the field of view to capture more or less of your
surroundings. This feature is not available for all video modes.
From the main menu, select
Video
>
Field of View
.
Wide
: Captures a wide view of your surroundings. Use this
option for open areas, close-range video, and to capture as
much of your viewing area as possible.
TIP:
To capture an extra-wide field of view, you can use the
expansive video mode.
Zoom (1.5x)
: Captures a tighter view. Use this option for
medium-range video.
Ultra-Zoom (2x)
: Captures a very focused view. Use this option
for long-range video and closed or covered surroundings.
Setting the Video Format
You can set the video standard for your region. The video
standard affects the available video frame rate options (FPS).
1
From the main menu, select >
System
>
Language and
Region
>
Format
.
2
Select
NTSC
or
PAL
.
Pro Settings
From the video or photo settings, select
Pro Settings
, and
select the toggle switch to enable pro settings.
TIP:
While pro settings are enabled, you can swipe left from the
viewfinder to quickly view or change the current pro settings.
Exposure Bias
: Sets the exposure bias. Exposure bias
affects the level of brightness.
ISO Limit
: Sets the maximum level of sensitivity and image
noise. The camera automatically uses the best ISO level for
the lighting conditions, up to this maximum. Higher ISO
values have more visible noise or grain. Higher ISO values
are best for use in low light environments or indoors. Lower
ISO values are best for use in sunlight. You can use the 6400
option for brighter video in low light, the 1600 option for
moderate brightness in low light, or the 400 option for darker
video in low light.
Color Palette
: Sets the color palette. You can use the Vivid
option for a more vibrant color palette, or the Flat option for a
more neutral color palette.
Sharpness
: Sets the level of sharpness. You can use the
High option for a sharper look, the Medium option for
moderate sharpness, or the Low option for a softer look.
High Bitrate
: Records video at a higher bitrate for some
video modes. This feature may improve the quality and
smoothness of the video, especially when recording fast
motion or high contrast scenes. Enabling high bitrate mode
may decrease the amount of recording time available on your
memory card.
Video
5
Summary of Contents for VIRB Ultra 30
Page 1: ...VIRB ULTRA 30 Owner s Manual August 2016 190 02069 00_0A...
Page 4: ......
Page 21: ......