Commander 1114 VoIP
9
ALL POSSIBLE MEASURES MUST BE TAKEN TO ENSURE
WATER, FLUID OR DUST DOES NOT CONTAMINATE THE
INTERNAL COMPONENTS OF THE TELEPHONE WHILST
UNPACKING, PREPARING AND INSTALLING IT IN INCLEMENT
WEATHER CONDITIONS OR BY NEGLIGENCE.
FAILURE TO TAKE THIS PRECAUTION WILL INVALIDATE YOUR
WARRANTY
The telephone body must
NOT
be opened, nor glands removed or
cables disconnected unless all supplies to the telephone, including
network cables, power cables and external devices have been first
isolated elsewhere.
If only one gland entry is used, the sealing plug fitted to the second
gland position should be left in place.
1. Place the telephone on its base on a firm horizontal surface.
2. Using a 5mm Allen key, release the Front Casing from the Rear
Casing. The screws are captive in the Front Casing.
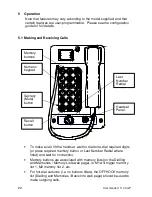
3. Noting the positions, disconnect the keypad cable at the keypad.
See diagram in section 4.8
4. Disconnect the ringer cable from header HD1 in the rear section, see
diagram in section 4.8
5. Take care when removing the Front Casing from the Rear Casing
and storing the Front Casing not to damage the internal electronics,
specifically the headset switch terminals or connector PCB if fitted.
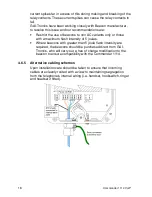
6. Remove the RED blanking plug from the cable entry hole leaving the
BLACK blanking plug in situ.
7. Select the appropriate size gland for the cable used.
8. Take care when inserting the selected gland into the threaded cable
entry hole. Follow the gland manufacturer's instructions particularly
with respect to sealing, installation and earthing.
9. After the glands have been fitted select the required mounting
method and follow the appropriate instructions below.
Summary of Contents for 1114
Page 18: ...Commander 1114 VoIP 17...
Page 31: ...Commander 1114 VoIP 30...


