background image


A26391-K279-Z220-1-7619, edition 1 

17 

Using the Tablet PC 

This chapter describes the basics for operating your Tablet PC. 


!


Please refer to the notes in "Important notes". 

System modes 

Before you begin using the Tablet PC, review the different system modes that the system provides.  
Your system may be configured to enter some of these modes automatically after a period of 
inactivity to conserve battery power. 

ON mode 

The system is running. However, the user has not performed any action. The system waits. 

Suspend mode 

Suspend-to-RAM mode 

All system functions are turned off to conserve power. Power to memory is on, maintaining data in 
programs that were running before system operation was suspended.  
The system does not respond to the pen or other input when in Suspend-to-RAM mode.  

!


If you unplug the mains adapter or remove the battery, you may lose any unsaved data. 

Hibernate mode 

All system functions are turned off to conserve power. Active data in programs that were running 
before suspending system operation is stored on the hard disk drive. 
The system does not respond to the pen or other input.  

Summary of Contents for FPCM35351

Page 1: ...STYLISTIC ST Series EasyGuide ...

Page 2: ...d like to be clarified Please contact our Hotline Help Desk see Help Desk List or the Internet http ts fujitsu com helpdesk your sales partner your sales office The latest information on our products tips updates etc can be found on the Internet at http ts fujitsu com ...

Page 3: ......

Page 4: ...Published by Fujitsu Technology Solutions GmbH A26391 K279 Z220 1 7619 Edition 1 2009 04 Produced by XEROX Global Services ...

Page 5: ...uction Manufacturer s notes Important notes Index Equipment overview Preparing the Tablet PC for use Using the Tablet PC Memory expansion Security functions Troubleshooting and tips Technical data Tablet Dock optional April 2009 edition ...

Page 6: ...gital The Bluetooth trademarks are the property of Bluetooth SIG Inc U S A licensed for Fujitsu Technology Solutions GmbH All other trademarks referenced are trademarks or registered trademarks of their respective owners whose protected rights are acknowledged Copyright Fujitsu Technology Solutions GmbH 2009 All rights including rights of translation reproduction by printing copying or similar met...

Page 7: ...up the Tablet PC 15 Unpacking and checking the delivery 15 Connecting the mains adapter 15 Switching on the Tablet PC for the first time 16 Using the Tablet PC 17 System modes 17 ON mode 17 Suspend mode 17 OFF mode 18 Powering up the Tablet PC 18 Switching off the Tablet PC 18 Activating suspend mode 18 Resuming operation 20 Setting the display brightness 20 Status indicator panel 22 Buttons 24 Ap...

Page 8: ... optional 54 Using the SmartCard reader 55 Inserting a SmartCard 56 Using Trusted Platform Module optional 56 Troubleshooting and tips 59 Help if problems occur 59 Troubleshooting 59 User and or supervisor password forgotten 59 SmartCard reader is not recognised 60 SmartCard PIN forgotten 60 SmartCard lost 60 System will not resume operation 60 Display screen is blank or difficult to read 61 The c...

Page 9: ...ons are used in this manual Indicates information which is important for your health the operability of your notebook or the safety of your data Faults on the notebook caused by your failure to follow the instructions will invalidate your warranty i Indicates important information which is required to use the system properly Text which follows this symbol describes activities that must be performe...

Page 10: ...Innovative technology 2 A26391 K279 Z220 1 7619 edition 1 ...

Page 11: ...ot going to be required for a while The Tablet Dock is available separately Never leave the Tablet PC screen down because this may damage the screen Enter data using the pen supplied only Touching the screen with other tools may cause considerable damage to the screen The casing of your Tablet PC can become very warm during prolonged operation with the power supply unit Therefore touch the device ...

Page 12: ...ible for radio or television faults arising from unauthorised modifications made to this device Fujitsu Technology Solutions GmbH is furthermore not responsible for replacing and or exchanging connector cables and devices which have not been specified by Fujitsu Technology Solutions GmbH The user bears sole responsibility for repairing faults arising from such unauthorised modifications made to a ...

Page 13: ...creen To prevent scratching the screen ensure that a screen protector is installed before using your Tablet PC The warranty does not cover a scratched screen To install a new screen protector on your Tablet PC If a screen protector is already fitted to the screen remove it before installing the new screen protector The screen protector is held onto the screen surface by a thin strip of adhesive ar...

Page 14: ...t on the screen surface with the adhesive side downwards see illustration Apply pressure to the screen protector with your finger When doing so perform wiping movements outwards towards the edges to prevent air bubbles and then firmly press down the edges To ensure a good seal between the screen protector and the display do not lift the screen protector from the display once it has been applied ...

Page 15: ...ly lift off the protective plastic coating at the angled corner Now you can carefully pull off the protective coating see illustration The screen protector is now transparent Wipe the screen protector with a soft dry cloth to remove any low tack adhesive This will help prevent the pen tip from squeaking The screen protector is now installed i The adhesive sets completely within 48 hours ...

Page 16: ...nnection adapter for electrical devices to connect the Tablet PC Do not use a connection adapter for electrical devices to connect the notebook Enquire with the corresponding government office in the country you will be travelling in as to whether you may operate the radio components integrated into your Tablet PC there also see CE marking If you use a modem incompatibilities with the local teleco...

Page 17: ...oard and the Tablet PC the paintwork or the Tablet PC itself Please ensure that no liquid enters the Tablet PC Wipe the casing with a dry cloth If particularly dirty use a cloth which has been moistened in mild domestic detergent and then carefully wrung out Avoiding overheating The Tablet PC monitors its internal temperature As the internal temperature approaches the tolerable limits for heat sen...

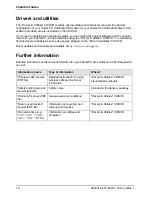
Page 18: ...lities CD DVD Driver updates and manuals are available at http ts fujitsu com support Further information Detailed instructions and technical information for your Tablet PC are contained in this EasyGuide manual Information source Type of information Where Wireless LAN manual PDF file Detailed instructions for using wireless LAN and technical information Drivers Utilities CD DVD pre installed opti...

Page 19: ...279 Z220 1 7619 edition 1 11 Overview of your Tablet PC Top side view 1 2 3 3 4 4 5 6 1 Status indicators 2 ON OFF switch 3 Application buttons 4 Microphone 5 Infrared receiver for keyboard 6 Fingerprint sensor ...

Page 20: ...your Tablet PC 12 A26391 K279 Z220 1 7619 edition 1 Underside 4 5 1 6 2 5 3 1 Hard disk service compartment 2 Port for Tablet Dock 3 WebCam optional 4 Memory service compartment 5 Battery release latches 6 Battery ...

Page 21: ... format card reader 8 Ventilation slots 9 Release for UMTS antenna Left panel 9 4 5 6 8 7 3 10 2 1 1 Headphone port 2 Microphone jack 3 USB port 4 USB port 5 Screen port with port cover 6 Tablet Dock latch point 7 LAN port 8 Kensington lock device 9 Port for mains adapter 10 Battery Right hand side 1 2 3 4 1 ON OFF switch for wireless components 2 Infrared receiver for keyboard 3 Tablet Dock latch...

Page 22: ...Overview of your Tablet PC 14 A26391 K279 Z220 1 7619 edition 1 ...

Page 23: ...nsportation Check whether the delivery conforms to the details in the delivery note i Should you discover that the delivery does not correspond to the delivery note notify your local sales outlet immediately Do not discard the original packing material of the devices You may need the packaging in the future if you need to transport your device Connecting the mains adapter Follow the instructions i...

Page 24: ... the supplied software is installed and configured Due to the fact that this installation must not be interrupted you should set aside enough time for it to be completed and connect the Tablet PC to the mains outlet using the mains adapter During installation the Tablet PC may only be rebooted when you are prompted to do so Press the ON OFF switch The power on indicator lights up During installati...

Page 25: ... user has not performed any action The system waits Suspend mode Suspend to RAM mode All system functions are turned off to conserve power Power to memory is on maintaining data in programs that were running before system operation was suspended The system does not respond to the pen or other input when in Suspend to RAM mode If you unplug the mains adapter or remove the battery you may lose any u...

Page 26: ...mode The Tablet PC allows you to suspend system operation without closing programs or exiting the operating system i Windows XP If you selected Shut down the computerin Start Control Panel Power Options the following procedure will not be possible since pressing the button will cause the system to shut down rather than activating the suspend mode Windows Vista If you selected Shut down the compute...

Page 27: ...eration Your system may be configured to suspend operation automatically after a period of inactivity If the battery charge drops to a critically low level while the system is running the system is forced into a pre selected mode Suspend to RAM or Hibernate If this happens you must either install a charged battery or connect an appropriate external power source such as the mains adapter before you...

Page 28: ...ing your system from the battery or mains adapter the default screen brightness settings will be different The default screen brightness for running on the battery is lower than that for the mains adapter in order to optimise battery life If you do not use the Tablet PC for a short time you can minimise or switch off the screen lighting to save energy There are two ways to adjust the brightness of...

Page 29: ...the message Mobile PC Windows Mobility Center appears Select Properties from the context menu The Mobile PC Windows Mobility Center window appears Select the Display tab and move the screen brightness slider to change the brightness or Click Start Control Panel Mobile PC Windows Mobility Center Select the Display tab and move the screen brightness slider to change the brightness ...

Page 30: ...e Symbol Mode Indicator state Remarks ON mode Lights green System is blocked Security password is assigned by the security application Suspend to RAM mode Off OFF mode Hibernate Off ON mode Lights or flashes green Hard disk drive is being accessed Lights green Battery charge is between 50 and 100 Lights orange Battery charge is between 13 and 49 Lights red Battery charge is between 0 and 12 ON mod...

Page 31: ... orange Power adapter and battery are available battery is charging Lights green Power adapter and battery are available battery is not charging battery is fully charged AC adapter is available but battery is not installed Flashes orange Power adapter and battery are available and waiting to charge battery is out of thermal range Power supply Off Power adapter is not available ON mode Lights green...

Page 32: ...on The application buttons also have separate additional functions that can be used while the system is booting up For more information refer to the Additional functions of application and navigation buttons section in this chapter i The Alt button is the only application button that can be used while the system is logging on or when the system is locked i e when you have the corresponding Windows...

Page 33: ...et button Pressing the E mail button launches you e mail program e g Microsoft Outlook Express Pressing the Fn E mail buttons at the same time automatically launches the Web browser Before the buttons function as described the Internet connection must be set up and e mail retrieval from the server must be configured Orientation button Display mode button When you press the Orientation button the o...

Page 34: ...ton has the same function as the Enter key on a keyboard Windows XP Pressing the Fn ENT buttons at the same time calls up a pre determined application or shortcut as assigned in the Tablet Button Settings utility You can change the settings in Control Panel Tablet Button Settings Windows Vista Pressing the Fn Esc buttons at the same time calls up a pre determined application or shortcut as assigne...

Page 35: ...pter Symbol Function button pressed alone Additional function button pressed together with the button Fn When the Up portion is pressed you will scroll up one page When the Down portion is pressed you will scroll down one page When pressed with the Fn button the Up portion of this button allows you to tab right When pressed with the Fn button the Down portion of this button allows you to tab left ...

Page 36: ...s Purpose when pressed while the system is booting up Alt button Alt Pressing the Alt button while the system is booting up takes you into the BIOS Setup The Alt button has the same function as the F2 key on a keyboard during booting In normal operation the Alt button has the same function as the Ctrl Alt and Del shortcut on a keyboard warm boot E mail button Pressing the E Mail button while the s...

Page 37: ... feature is also available in the operating system Boot Menu Pressing the bottom half of button while the BIOS Setup is open causes the cursor in the BIOS Setup screen to move down The same effect is achieved as with the corresponding arrow key on a keyboard This feature is also available in the operating system Boot Menu Pressing the top half of the button while the BIOS Setup is open causes the ...

Page 38: ...use the pen as a pointer Never use the pen on any other surface than the screen of your notebook Do not try to turn the thumb grip on the pen The thumb grip is used to place the pen in its slot and to take it out of the slot Never store the pen with the tip bearing the weight of the pen e g with the tip down in a pen holder If the pen is stored with the tip pointing down this may have an adverse e...

Page 39: ...rocker button Calibrating the pen Before using the pen for the first time you should calibrate it so that the cursor follows the movements of the pen as accurately as possible You should also always repeat the calibration if the co ordination between the pen and cursor movement deteriorates Windows XP To calibrate run the Tablet and Pen Settings function in the Control Panel You need to calibrate ...

Page 40: ... the barrel Replace the pen tip with one of the spare tips supplied Insert the flat end of the tip into the barrel and push it in firmly until it is in place i If the tip is worn or damaged discard it Installing a pen cord You can attach the pen with a pen cord to prevent accidentally dropping it or losing it Attach the end of the pen cord with the smaller loop to your pen Attach the end of the pe...

Page 41: ...es in line with the local regulations for special waste Charging the battery You can charge the battery by connecting the Tablet PC to the mains adapter The time taken to charge the battery depends on its usage The battery can only be charged when the ambient temperature is between 5 C and 40 C i Windows XP You can set the power management features for your Tablet PC under Start Settings Control P...

Page 42: ...from the Tablet PC and replaced with a charged battery Only use batteries approved by Fujitsu Technology Solutions for your Tablet PC Never use force when inserting or removing a battery Make sure that no foreign bodies get into the battery connections Select one of the following options to prepare for removing the battery If a charged battery is available you can suspend system operation A built ...

Page 43: ... battery out of the Tablet PC in the direction of the arrow 2 Installing the battery Align the battery with the guides in the empty battery compartment Slide the battery into the tray and press it firmly until it is seated When the battery is properly positioned the battery release latch should return to its initial position and lock the battery ...

Page 44: ... energy Buffer battery The buffer battery allows the battery to be replaced during standby mode without the loss of data It allows you a period of one minute The device cannot be used normally without a battery power supply i e only with the buffer battery i The buffer battery function is disabled if Wake On LAN is enabled in the BIOS Setup The buffer battery is not charged when the system is deli...

Page 45: ...he Tablet PC allows you to install a Type I or Type II PC card Inserting a PC card Insert the PC card contacts first into the slot guide The labelled side of the PC card should be facing upwards Slide the PC card carefully into the PC card slot Press it firmly until you feel it click into place ...

Page 46: ... to be removed and click on Shut down Press the eject button 1 The PC card will project further out of the Tablet PC s case If the eject button is retracted you must first release the eject button from the Tablet PC casing Press the eject button until it snaps out Slide the PC card out of the Tablet PC 2 Never press the eject button with the sensitive pen tip The pen tip could be damaged in the pr...

Page 47: ...279 Z220 1 7619 edition 1 39 Memory cards The slot is suitable for storage cards of the Secure Digital I O and Memory Stick type Inserting a memory card Gently push the memory card into the slot until you feel it click into place ...

Page 48: ...ss LAN and indicating the status of the network card For Bluetooth configuration a configuration programme is available on the Bluetooth CD The UMTS module can be switched on and off with the switch for the wireless components You can also use the UMTS Watchersoftware to define profiles and switch individual wireless components on or off Details on how to use wireless LAN and the associated config...

Page 49: ...9 Z220 1 7619 edition 1 41 Switching radio components on and off ON OFF ON OFF Slide the ON OFF switch to the ON position to activate the radio component Slide the ON OFF switch to the OFF position to deactivate the radio component ...

Page 50: ...Using the Tablet PC 42 A26391 K279 Z220 1 7619 edition 1 ...

Page 51: ...dules Please note the information provided in Notes on installing and removing boards and components section in Important notes The notebook must be switched off when installing removing memory modules and must not be in Suspend mode Only use the manufacturer s memory expansions that have been approved for your device Never use force when installing or removing memory modules Make sure that foreig...

Page 52: ... 2 2 Remove the screws 1 Slide the cover off the Tablet PC in the direction of the arrow 2 3 3 2 1 1 Carefully push the two mounting clips outwards 1 The memory module will snap upwards 2 Pull the memory module out of its slot in the direction of the arrow 3 ...

Page 53: ...boot the system Switching off the Tablet PC Do not attempt to remove or install a memory module when the system is in Suspend mode or running Pull the power plug out of the mains outlet Remove the battery see Removing and installing the battery 1 1 2 2 Remove the screws 1 Slide the cover off the Tablet PC in the direction of the arrow 2 ...

Page 54: ... into the slot 1 contacts first Carefully push the memory module downwards until you feel it click into place 2 The memory module is coded to prevent it from being inserted backwards 2 2 1 1 Place the cover on its slot in the direction of the arrow 1 Secure the cover with the screws 2 ...

Page 55: ...47 Confirm that the memory module is recognised by the system To do so restart the Tablet PC The size of the memory module should be displayed in the Info menu in BIOS Setup The memory module is now installed on your Tablet PC You can now use the system ...

Page 56: ...Memory expansion 48 A26391 K279 Z220 1 7619 edition 1 ...

Page 57: ... and the admin passwords you will need to contact the help desk The telephone numbers are contained in the Help Desk supplement Passwords are not covered by your warranty and a charge will be made for assistance Brief overview of security functions Security functions Type of protection Preparation Kensington Lock Mechanical Fit and lock Kensington MicroSaver accessory BIOS password protection Pass...

Page 58: ...aracters Password protection for BIOS Setup supervisor and user password We recommend that you print out the following instructions as these cannot be displayed while setting the password You prevent unauthorised opening of the BIOS Setup with both the supervisor and the user password The supervisor password gives you access to all functions of the BIOS Setup while the user password only provides ...

Page 59: ...or user password Call BIOS Setup up again and select the Security menu When changing the password proceed exactly as for password assignment You can only change the supervisor password when you have logged into the BIOS Setup with the supervisor password Cancelling passwords To cancel a password without setting a new password perform the following steps Call up BIOS Setup and select the Security m...

Page 60: ...assword Highlight the Password on Boot field and press the Enter key Select the Every Boot option and press the Enter key If you do not want to make any other settings you can exit BIOS Setup Select the Exit Saving Changes option in the Exit menu The Tablet PC reboots and you are asked to enter your password the supervisor or user password Deactivating system protection Call up BIOS Setup and sele...

Page 61: ...w if you wish see Setting the supervisor and user password Highlight the Hard Disk Security field and select the Enabled option If you do not want to make any other settings you can exit BIOS Setup Select the Exit Saving Changes option in the Exit menu The Tablet PC reboots and your hard disk is now protected with a password Deactivating hard disk protection Call up BIOS Setup and select the Secur...

Page 62: ...ted with additional software and can be used in place of a password The software for the fingerprint sensor is saved on the hard disk in the C AddOn Windows XP or C Fujitsu Windows Vista directory and must be installed 1 1 Fingerprint sensor The fingerprint software can be found at C AddOn Windows XP or C Fujitsu Windows Vista or on the supplied CD You must install the fingerprint software in orde...

Page 63: ...16 1 2 3 and 4 We recommend that you always use two SmartCards Always keep one of the SmartCards in a safe place if you are carrying the other SmartCard with you i The SmartCard can only be used with a PIN so protection is maintained even when the SmartCard is lost In order to maximise your security the SmartCard which is available as an accessory is disabled if three incorrect attempts are made t...

Page 64: ...ins a unique code As a result the TPM is used to uniquely identify and authenticate the device Requirement The supervisor password is set To use the TPM you must activate the TPM in the BIOS Setup The TPM is activated by selecting the Enabled option for Security Chip in the Security menu in the Security Chip Setting sub menu If you have activated the TPM the Clear Security Chip option appears You ...

Page 65: ...he supplied TPM software CD DVD Information on using the TPM and the related software is also provided on the TPM software CD DVD i If you are using TPM and the software on the TPM software CD DVD we strongly recommend that you use the emergency restore function and create a medium e g floppy disk network drive for restoring the system in emergencies The emergency restore medium is the only way to...

Page 66: ...Security functions 58 A26391 K279 Z220 1 7619 edition 1 ...

Page 67: ...ode e g DIFS code YXXX123456789123 Take a note of this DIFS code and the ID number of your device The ID number can be found on the type rating plate on the back of the casing If you still need assistance resolving the problem contact the relevant Help Desk for your country see the Help Desk List or go to http ts fujitsu com support Have the ID serial No of your system and the DIFS code ready Trou...

Page 68: ...etwork contact your system administrator who can unlock your notebook with a Supervisor PIN SmartCard lost Cause Troubleshooting SmartCard lost If you are working in a network contact your system administrator who can boot your notebook with a Supervisor SmartCard System will not resume operation Cause Troubleshooting The battery is faulty Switch the notebook off Install a charged battery The batt...

Page 69: ...ista Calibrate the pen under Mobile PC Tablet PC Settingsin the Control Panel see Calibrating the pen Check whether the battery is installed correctly in its compartment Switch the notebook on Infrared data transfer is not working Cause Troubleshooting No visual contact between Tablet PC and infrared receiver Ensure visual contact between Tablet PC and infrared receiver Distance between Tablet PC ...

Page 70: ...low Cause Troubleshooting Volume set incorrectly Windows XP Make sure that the sound driver is correctly installed under Control Panel System Device Manager Windows Vista Make sure that the sound driver is correctly installed under Control Panel System and Maintenance Device Manager Use the shortcut Fn F3 to check if the loudspeakers are switched off Double click on the volume indicator in the tas...

Page 71: ...tem maximum of 4 GB Monitor Display model 12 1 inch wide XGA transmissive optimised for indoor use Graphics controller integrated in the Intel GS45 Chipset Battery Main battery Removable Lithium ion Replaceable in Suspend mode 6 cells or 9 cells optional 10 8 V 5200 mAh 6 cells 10 8 V 7800 mAh 9 cells Charge time Suspend Off 6 cells approx 3 7 hours 90 and approx 4 5 hours 100 9 cells approx 4 7 h...

Page 72: ...g 100 V 240 V 50 Hz 60 Hz primary 16 V 3 75 A secondary power draw 60 W Environmental conditions Temperature Operation 5 C 35 C Not in operation 15 C 60 C Humidity Operation 20 85 non condensing Storage 8 85 non condensing Official approval specifications Emissions EN55022 CISPR22 Class B ETSI EN 300 328 for models with WLAN only ICES 003 Immunity EN55024 1998 ETSI EN 301 489 17 V 1 1 1 2000 9 for...

Page 73: ...he Tablet Dock is available as optional accessory Below is a brief description of the Tablet Dock 2 1 1 USB ports 2 DC input connector DC IN 2 3 4 5 1 1 Release button 2 Locking slide 3 Kensington lock device 4 CD DVD drive 5 System interface for the Tablet PC ...

Page 74: ...blet PC STYLISTIC ST with two different battery dimensions in the Tablet Dock With the larger battery you must adapt the Tablet Dock accordingly Enlarging mounting surface on Tablet Dock 1 2 3 Grip the protruding edge and pull it in the direction of the arrow 1 until the strip is released Pull the strip downwards as far as possible 2 and lock it again 3 ...

Page 75: ... locking slide is in the upper position Slide the locking slide downwards Now that it has been locked you can turn the Tablet PC in the Tablet Dock You can operate the Tablet PC in a horizontal or vertical position Removing the Tablet PC Press the release button on the Tablet PC while pushing the locking slide upwards The lock is released Lift the Tablet PC out of the Tablet Dock ...

Page 76: ...Tablet Dock optional 68 A26391 K279 Z220 1 7619 edition 1 ...

Page 77: ...th radio component This equipment complies with the requirements of Directive 1999 5 EC of the European Parliament and Commission from 9 March 1999 governing Radio and Telecommunications Equipment and mutual recognition of conformity This equipment can be used in the following countries Belgium Denmark Germany Estonia Finland France Greece UK Ireland Iceland Italy Latvia Liechtenstein Lithuania Lu...

Page 78: ...bidden to travel the US trading area carrying this device but to avoid trouble at customs clearance Fujitsu Technology Solutions GmbH recommends not to bring this device into the US trading area Regulatory information for Tablet PCs without radio device NOTICE Changes or modifications not expressly approved by Fujitsu Technology Solutions could void this user s authority to operate the equipment N...

Page 79: ... an incoming call In most but not all areas the sum of the RENs of all of the devices should not exceed five 5 To be certain of the number of devices you may connect to your line as determined by the RENs contact your local telephone company If this equipment causes harm to the telephone network your telephone company may discontinue your service temporarily If possible they will notify you in adv...

Page 80: ...ision This Class B digital apparatus meets all requirements of Canadian Interference Causing Equipment Regulations CET appareil numérique de la class B respecte toutes les exigence du Réglement sur le matérial brouilleur du Canada Notice to Users of the Canadian Telephone Network NOTICE This equipment meets the applicable Industry Canada Terminal Equipment Technical Specifications This is confirme...

Page 81: ...riel Avant de connecter cet équipement à une ligne téléphonique l utilisateur doit vérifier s il est permis de connecter cet équipement aux installations de télécommunications locales L utilisateur est averti que même la conformité aux normes de certification ne peut dans certains cas empêcher la dégradation du service Les réparations de l équipement de télécommunications doivent être evectuées pa...

Page 82: ...struction FCC Regulatory information for Tablet PCs with radio device Federal Communications Commission statement This device complies with Part 15 of FCC Rules Operation is subject to the following two conditions 1 this device may not cause interference and 2 this device must accept any interference including interference that may cause undesired operation of this device FCC Interference Statemen...

Page 83: ...tact during normal operation is minimized When using this device a certain separation distance between antenna and nearby persons must be maintained to ensure RF exposure compliance In order to comply with RF exposure limits established in the ANSI C95 1 standards the distance between the antennas and the user should not be less than 20 cm 8 inches Regulatory Notes and Statements Radio device heal...

Page 84: ...ny interference caused by such unauthorized modification substitution or attachment The manufacturer and its authorized resellers or distributors will assume no liability for any damage or violation of government regulations arising from failure to comply with these guidelines Export restrictions This product or software contains encryption code which may not be exported or transferred from the US...

Page 85: ...ry 35 Controls 11 Ctrl Alt Del 25 D Device is not responding to the pen 67 Dimensions 69 DIMM memory module installing 47 removing 45 Display Power supply 23 Display Mode button 25 Display screen blank or difficult to read 65 DOC INDUSTRY CANADA NOTICES 80 E E Mail button 25 Energy saving battery 38 Environmental conditions 69 ESD 4 F Features 11 left side 13 Rear 13 right hand side 14 Top side vi...

Page 86: ... items 32 Starting programs 32 using 30 Pen garage 13 14 Pen retention cord anchorage 13 Pen tip removing tool 33 Power draw system modes 17 Power indicator 22 23 Power supply indicator 23 Powering up the Tablet PC 18 Preparing for operation 15 Processor 69 Protecting the screen 5 R Radio component safety notes 4 Rechargeable battery see also Battery Regulatory information 77 Tablet PCs with radio...

Page 87: ...e operation 64 Technical data Tablet PC 69 Tips 63 TPM 58 Transport 8 Travel preparations 8 Troubleshooting 63 Trusted Platform Module 58 U USB port 13 Using the SmartCard reader 57 V Ventilation slots 13 Volume too low 67 W Weight 69 Windows Advanced Options Menu 29 Wireless LAN safety notes 4 switching off module 43 switching on module 43 ...

Reviews: