Chapter 5 Servicing the Tape Library
5.3 Removing and Replacing a Tape Drive
FUJITSU Storage ETERNUS LT40 S2/LT60 S2 LTO Library Installing, Starting Up and Maintaining
Copyright 2018 FUJITSU LIMITED
P3AM-5392-07ENZ0
87
2
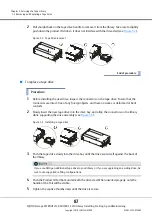
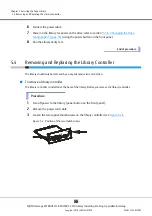
Pull straight back on the tape drive handle to remove it from the library. Take care to slightly
push down the product ID slide so it does not interfere with the drive sled (see
).
Figure 5.2 Tape drive removal
End of procedure
■
To replace a tape drive
Procedure
1
Before installing the new drive, inspect the connectors on the tape drive. Ensure that the
connectors are intact, free of any foreign objects, and have no cracks or deformed or bent
contacts.
2
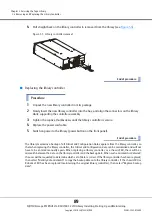
Slowly insert the new tape drive into the drive bay, and align the connectors on the library
while supporting the drive assembly (see
Figure 5.3 Installing a tape drive
3
Push the tape drive slowly into the drive bay until the drive seats itself against the back of
the library.
4
Push the Product ID Foil back underneath the drive sled. When inserted properly, only the
handle of the Foil will be visible.
5
Tighten the captive thumbscrews until the drive is secure.
If you are adding an additional tape drive to your library, or if you are upgrading an existing drive, be
sure to use supported cabling configurations.
Summary of Contents for ETERNUS LT40 S2
Page 2: ...This page is intentionally left blank ...
Page 110: ......

