Section 5 Component Teardown
5-3
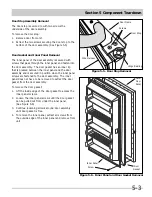
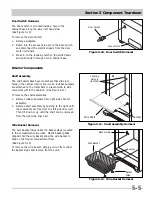
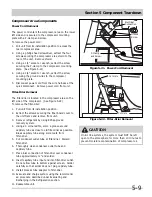
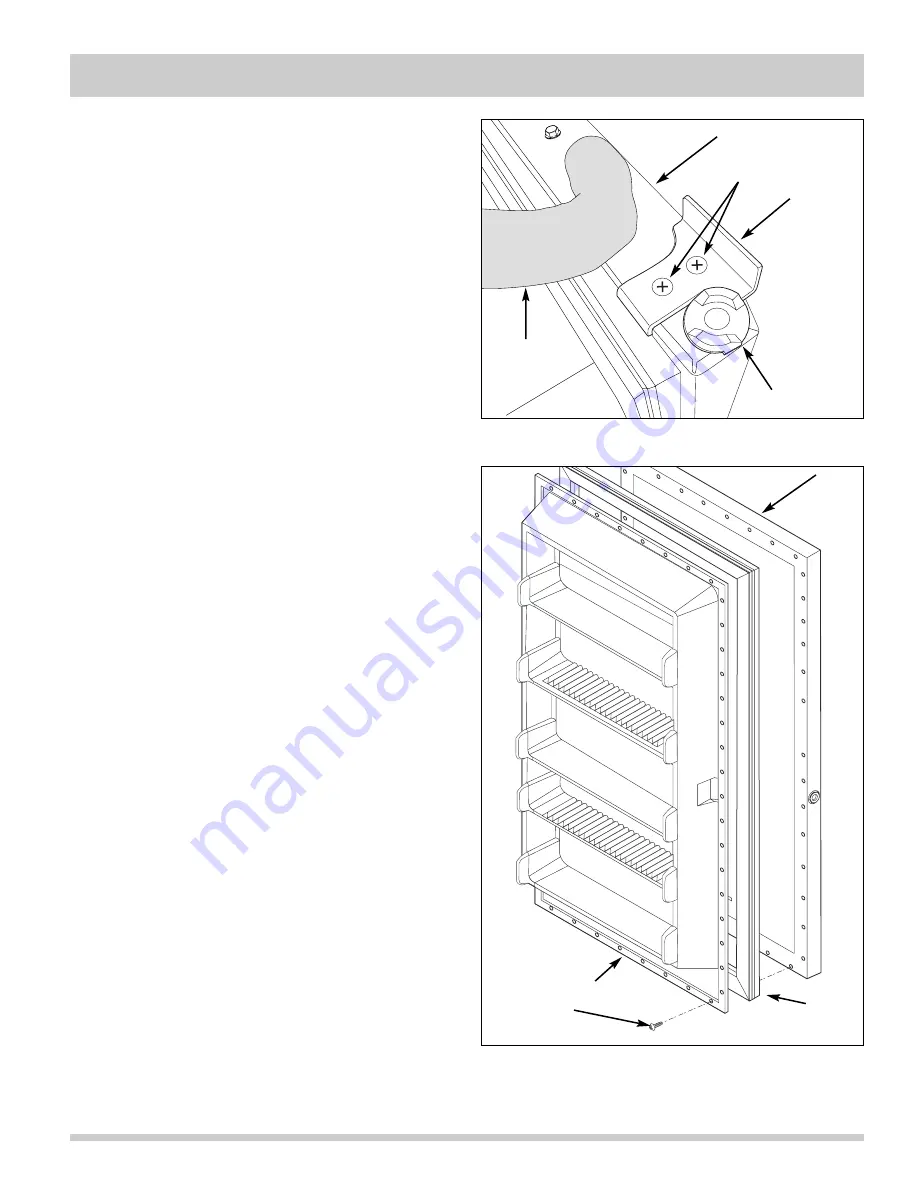
Figure 5-6. Inner Panel and Door Gasket Removal
Door Stop Assembly Removal
The door stop is secured to with two screws the
underside of the door assembly.
To remove the door stop:
1. Remove door from unit.
2. Extract the two screws securing the door stop to the
bottom of the door assembly. (See Figure 5-5)
Door Gasket and Inner Panel Removal
The inner panel of the door assembly is secured with
screws that pass through the inner panel and fasten into
the door assembly. The door gasket has an inner lip
that is pressed between the inner panel and the door
assembly and is secured in position when the inner panel
screws are fastened to the door assembly. The inner
panel does not have to be removed to extract the door
gasket from the door assembly.
To remove the door gasket:
1. Lift the inside edge of the door gasket to access the
inner panel screws.
2. Loosen the inner panel screws until the door gasket
can be pulled out from under the inner panel.
(See Figure 5-6)
3. Continue loosening screws around door assembly
until door gasket is free.
4. To remove the inner panel, extract all screws from
the outside edge of the inner panel and remove from
unit.
Screw
Inner Panel
Door
Gasket
Outer
Door
Panel
Figure 5-5. Door Stop Removal
Door Frame
Door Stop
Hinge Bearing
Wire Harness
Screws
Summary of Contents for FFH17F8HW0
Page 2: ......
Page 14: ...Section 2 Installation Information 2 6 Notes ...
Page 18: ...Section 3 Electronic Control 3 4 Notes ...
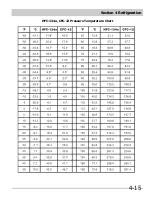
Page 33: ...Section 4 Refrigeration 4 15 HFC 134a CFC 12 Pressure Temperature Chart ...
Page 36: ...Section 4 Refrigeration 4 18 Notes ...
Page 48: ...Section 5 Component Teardown 5 12 Notes ...
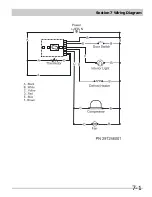
Page 53: ...Section 7 Wiring Diagram 7 1 ...

