10
ViewMAX – High Performance Down Converter
Manual # 26-6090901-00 / Revision D
Operation
After connecting the ViewMAX to the graphics workstation and the desired video output device as described in the
prior sections, plug the unit into the designated AC power source. We recommend that all connections be established
between external equipment and the ViewMAX rear panel prior to powering on the ViewMAX. Locate the power
switch on the rear panel near the power connector and turn the unit on. The power supply will switch on within three
seconds. The two cooling fans located in the left and right corners of the rear panel will start and all of the front panel
button lights will illuminate for a few seconds. The input video source should be powered on and operating at this
time. Please note that all but the most basic ViewMAX setup and control functions require that an active video input
source be present.
Power Up Initialization
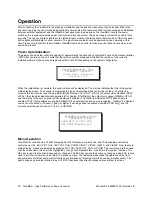
The display shown below will briefly appear for approximately ten seconds on ViewMAX’s vacuum fluorescent display
(VFD) after you turn on the unit. Note that the revision number displayed will reflect the revision of the currently
installed software.
Options
may be replaced with DVI or PRO depending on the system configuration.
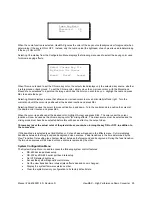
When the initialization is complete, the system status will be displayed. The first line indicates that this is the system
status display screen. The second line indicates the type of input video signal or (No Input Video). The third line
contains the input source type (Analog-RGB (IRGB), Analog-YUV (IYUV), or DVI), the output video standard (NTSC
or PAL), the video blanking standard selected (A for Analog, D for Digital), the output color space (ORGB or OYUV),
and the status of the sync on green (SOG displayed if enabled). The fourth line indicates FRZ if freeze frame is
enabled, TPAT if test patterns are enabled, GENLCK if an external Genlock source is enabled, FreeRun if a Genlock
source is not enabled, or Window, FgKeg, or BgKey if a mixing option is enabled (ViewMAX-PRO only), and the
currently selected aspect ratio (4:3,16:9, or CUSTOM).
Menu Operation
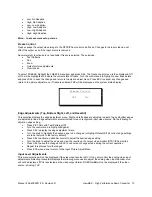
ViewMAX is controlled via a 128x32 pixel graphical VFD display, a control knob, and 10 illuminated push-button
control keys:
SEL
,
ESC
,
PICT ADJ
,
TEST PAT
,
PAN
,
ZOOM
,
VIEW 1
,
VIEW 2
,
VIEW 3
, and
VIEW 4
. From the main
status display, menus are selected by pressing
PICT ADJ
, TEST PAT,
PAN
, or
ZOOM
. The control knob is then used
to select menu items (which will be highlighted), change control parameters, or perform other system functions. The
SEL
key is used to accept and save system changes. The ESC key is used to cancel any changes made.
ESC
is also
used to exit the current menu and return to a previous menu. The table below describes the operation of the front
panel controls. Note that some control functions are composed of pressing more than one key simultaneously. The
push-button keys are also referred to as
HOT KEYS
because they directly access various system functions.
Folsom Research, Inc.
ViewMAX - options
Video Down Converter
Version 2.05
ViewMAX System Status
1600x1200 @75Hz
IRGB NTSC A OYUV SOG
FRZ TPAT FreeRun 4:3


